RSI is typically defined as an overuse disorder- a gradual build-up of overload to nerves, tendons, and muscles arising from repetitive movements or activities. Repetitive use of the same motions leads to inflammation and damage to these soft tissues. This disorder mostly affects the upper limb- particularly the elbows, hands and wrists.
Causes
Possible causes of RSI include but are not limited to:
Undertaking the same and repetitive movements and stressing the same muscle groups
Working in cold environments
Assuming a sustained and/or awkward posture for prolonged periods of time
Undertaking a particular activity for prolonged periods of time with no rest-breaks
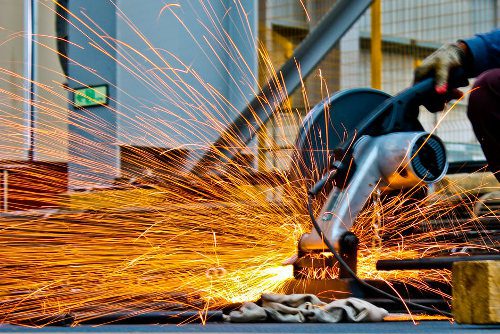
Frequent and prolonged use of vibrating equipment
Adopting poor postures from working at inappropriately designed workstations
Undertaking a motion which involves carrying and/or lifting heavy items
Symptoms
RSI leads to a gradual development of a broad variety of symptoms, which range from mild to severe in severity. RSI particularly affects the muscles and joints of your wrists, hands, elbows, forearms, shoulders, neck. Having said this, RSI can affect other areas of the body as well.
Common symptoms may include:
Pain
Tingling
Cramping
Increased sensitivity to heat and cold
Tenderness
Fatigue
Loss of strength
Throbbing
Soreness
Achiness
Stiffness
Struggling with typical activities of daily living, such as gripping and twisting motions, carrying light weights, writing, kitchen prepping, dressing, personal cares etc
You may develop these symptoms when you undertake a task repetitively for a period of time, and can settle when you stop. Symptoms may settle over a few hours or over the course of a few days. However, if left untreated or is poorly managed, a minor RSI may gradually progress to a nasty chronic injury.
Diagnosis
If you experience mild discomfort whilst completing particular activities at home or at your job, it is a good idea to see your GP or physiotherapist to talk about RSI. But an RSI is not always simple to diagnose as there is no particular clinical test for it. Your GP will enquire about your medical history, occupation and work environment, and other activities to attempt to identify any repetitive motions you undertake that may be the cause of your symptoms. A physical examination will be undertaken, where they will assess your movement, check for pain, inflammation, sensation, tenderness, strength and reflexes in the impacted body part. RSI may be triggered by specific health disorders like bursitis, carpal tunnel, tigger finger, ganglion cyst, or tendonitis (inflammation in your tendons). Your GP can refer you on further diagnostic tests such as X-rays, Ultrasounds, blood tests, MRIs, nerve conduction tests etc, to determine if these underlying disorders may be the cause of your symptoms. You may be also be referred onto a physiotherapist and acupuncturist for conservative treatment and management for mild-moderate issues. If symptoms persist, you will then be referred onto a specialist.
Management
Initial treatment options for the management of RSI symptoms is conservative. This includes:
Rest, Ice, Compression, and Elevation (RICE principles)
Taking regular breaks between tasks and looking after your posture
Undertaking your activities and movements with appropriate form and posture
Intake of Nonsteroidal anti-inflammatory drugs (NSAIDs), both oral and topical as prescribed by the GP
Use of cold and heat to the impacted area
Administration of steroid injections into inflamed joints and tendons
Tailored exercise prescription from physiotherapists to correct posture and strengthen and stretch affected muscles
Acupuncture
Stress reduction and relaxation training
Use of splints and braces to help protect and rest the affected muscles and tendons
Ergonomically appropriate adjustments to your workstation and work environment may be recommended by your physio and GP- for example resetting your desk and chair if you’re working at computer, and alterations to your equipment and activities/motions to lessen the strain and stress on your muscles and joints. Surgery may be necessary in some cases.
Prevention
Minimizing repetitive actions particularly if they involve the use of heavy machinery or vibration. Improving your working posture and work-environment as well a taking regular breaks. Employers often undertake risk-assessments when you join a company to determine that the work area is ergonomically fit, comfortable and appropriate for you. You may be able to request for an assessment if you have not had one or are having issues with your work environment
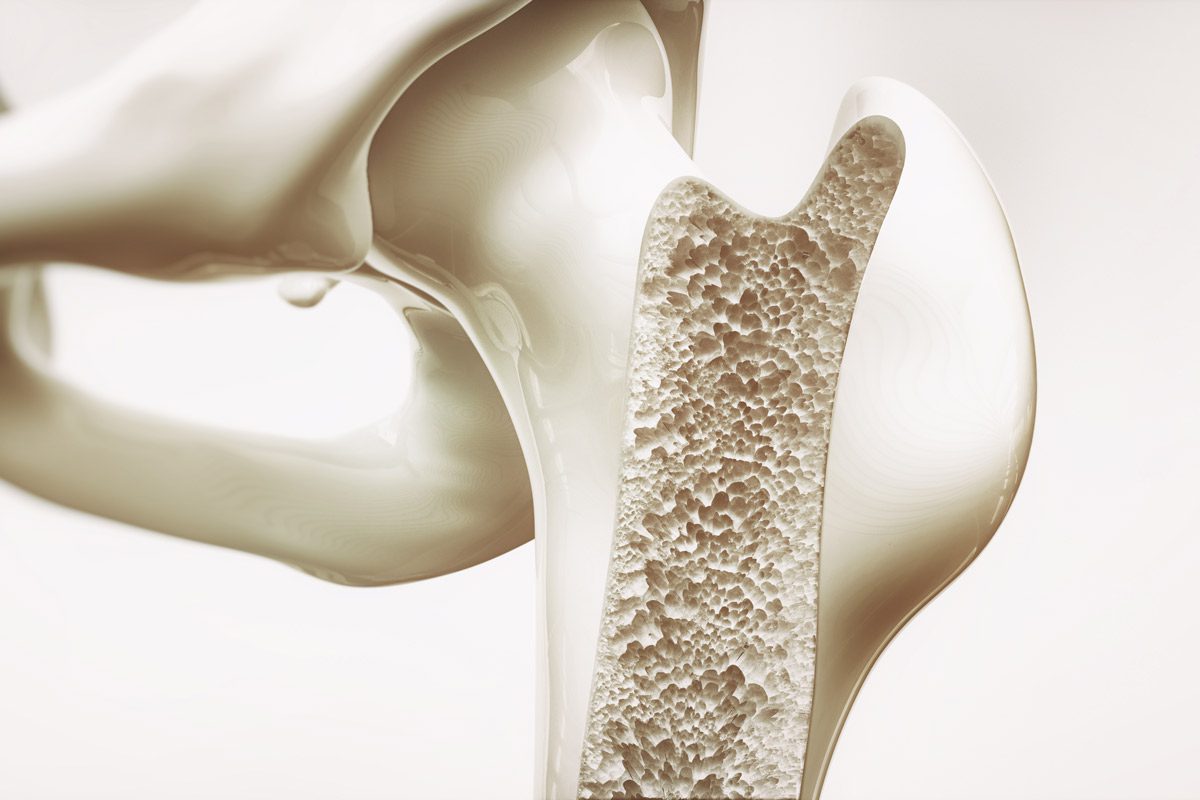
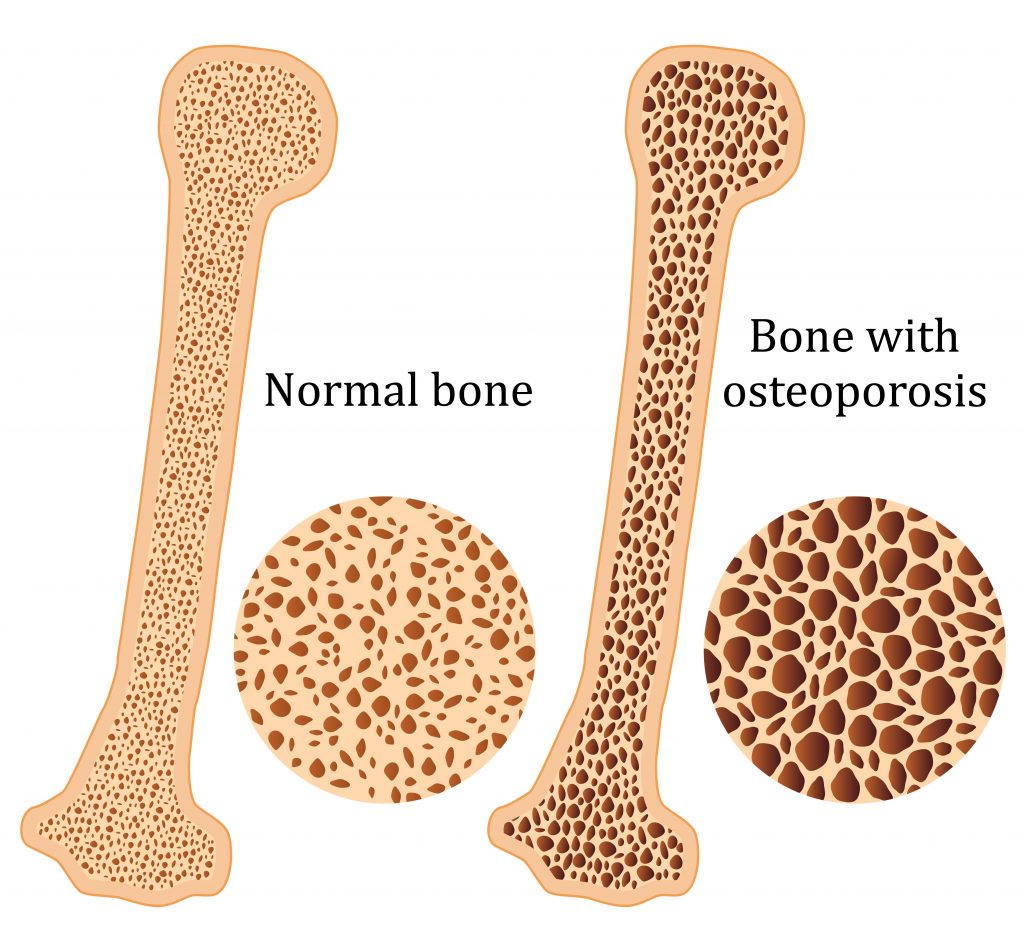
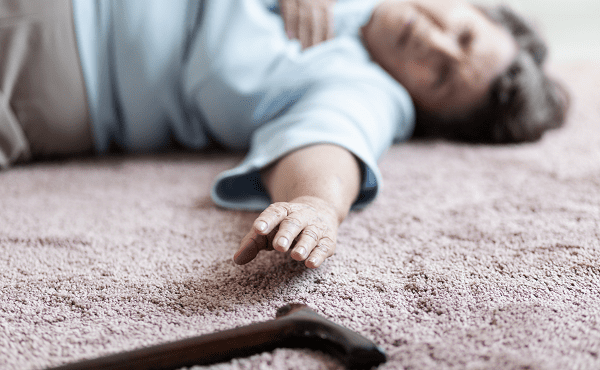
Osteoporosis is a condition which results in weak and brittle bones- to such degree that a fall or even mild stresses like coughing or bending over may result in a fracture. Bones are living tissues which are continually being broken down and replaced. However, your bones become osteoporotic when the formation of new bone does not keep up with the loss of old bone. This condition typically develops over time without any pain or other major symptoms, and is generally not diagnosed until you have sustained a fracture. The hip, pelvis, upper arm, spine and wrists are the most common structures affected by osteoporosis- related fractures.
How do you know if you have Osteoporosis?
Because there are no obvious early warning signs and symptoms, it is difficult to pre-diagnose osteoporosis. You may be unaware that you have this condition perhaps till you have one of the following:
Sustained a fracture from an incident more easily than you should have- like a simple fall or a bump
A decrease in the height of your spinal vertebrae over time
Change in posture – stooping or bending forwards
Back pain, due to a fractured or collapsed vertebra
Please see your doctor if you experience the following:
If you are over the age of 50 and have sustained a fracture
Sustained a spine, wrist, or hip for the first time
Sustained a fracture more easily than you should have (a simple fall or after a slight bump)
Risk factors
Key factors which may increase your risk of developing osteoporosis include:
Females- particularly post-menopausal Caucasian and Asian women
Over the age of 50
Excessive consumption of caffeine or alcohol
Smoking
Having a smaller or petite body frame
Poor physical activity levels and leading a very sedentary lifestyle
Family history of osteoporosis
Having low levels of vitamin D and poor dietary calcium intake
Decreasing levels of testosterone with ageing in men
Estrogen deficiency in women (irregular periods, early (before turning 40) or post-menopausal, surgical removal of the ovaries)
Use of long-term medication such as thyroid and epilepsy medications, corticosteroids
Having medical conditions such as gastrointestinal diseases; endocrine diseases; rheumatoid arthritis; cancer; and blood disorders
How will you be diagnosed?
Your doctor will review your signs and symptoms, family and medical history. You may be referred on for a specialized X-ray or CT scan to evaluate the bone density to help diagnose osteoporosis. Your bone density will be classified by comparing it to the typical bone density for a person of equivalent gender, size, and age.
How is Osteoporosis treated?
The treatment pathway chosen for the management of this condition is dependent on results of your bone density scan, gender, age, medical history and severity of the condition. Potential treatments for osteoporosis may include exercise, making positive lifestyle changes, vitamin and mineral supplements, and medications. Please consult your doctor for appropriate advice and treatment options.
How can Physiotherapy help?
Your physiotherapist will help you strengthen your bones and your muscles through a personalized and graduated rehabilitation program. Components of this rehabilitation program may include weightbearing aerobic exercises, resistance training using free weights/resistance bands/bodyweight resistance, and exercises to enhance posture, balance and body strength. Your physiotherapist will work with you to find activities that suit your needs and as per your physical activity level.
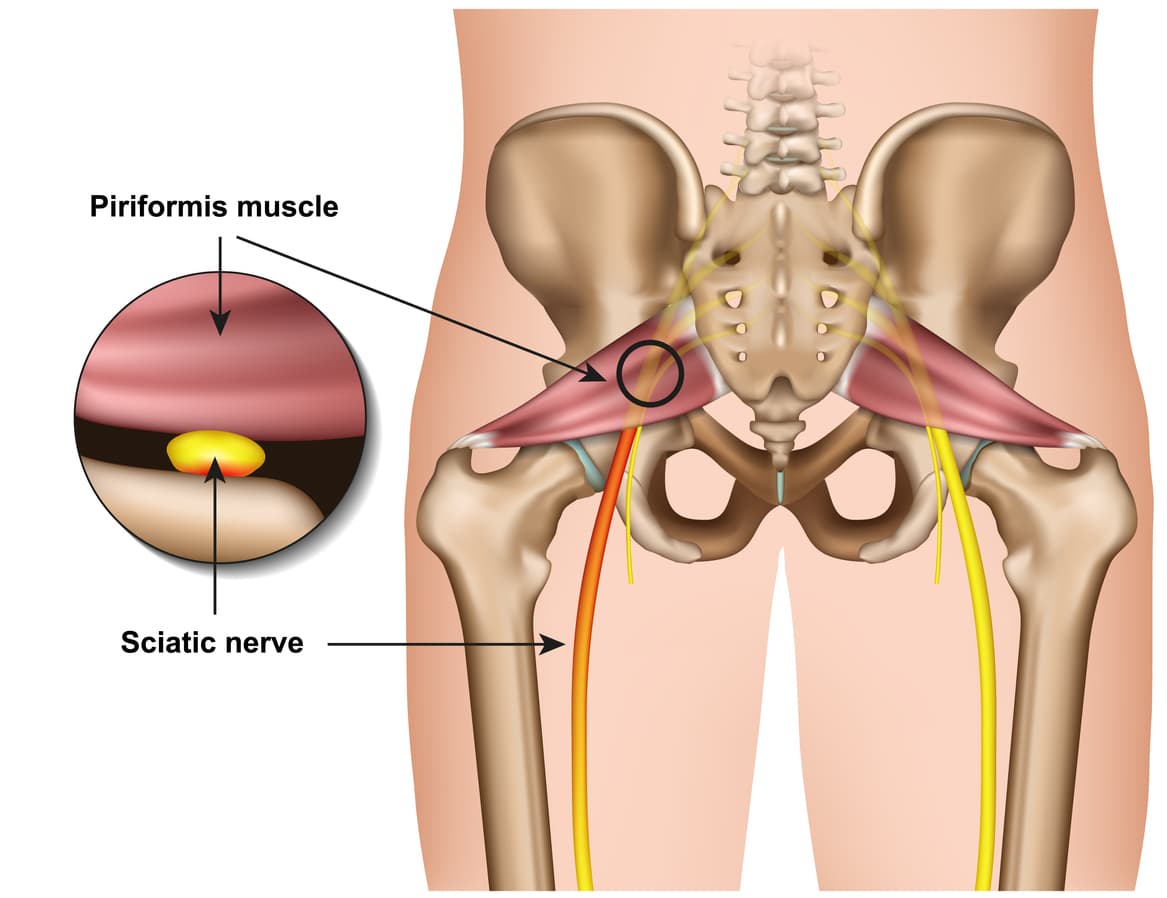
Piriformis syndrome refers to the dysfunction of the piriformis muscle which irritates the sciatic nerve. It is characterized by deep buttock region pain that radiates down leg and foot often accompanied by pins and needles and numbness traveling along the path of the sciatic nerve.
The simplistic reason for this widely distributed pain comes down to the piriformis muscle itself – Their close proximity means that direct trauma to the buttock region or the supporting structures can result in inflammation and muscle dysfunction which can compress and irritate the sciatic resulting in referred symptoms.
Piriformis syndrome symptoms may include:
Localised deep buttock region pain
Pain with continuous sitting or standing for 15 mins or over
Pins and needles along the leg down to the outer foot
Numbness in outer leg or foot (often resolves on movements)
Deep squatting or bending
Pain on direct palpation
Anatomy
The piriformis muscle originates from the outer surface of a large fused bone of our pelvis called the sacrum. It travels adjacently and inserts into the top of the hip joint. The piriformis muscle is a very active muscle involved in stabilizing the hip and pelvis during majority of our activities (walking, running, standing, sitting or standing, turning in bed). When the piriformis muscle contracts it helps the hip rotate outwards (external rotation) and lift thigh out and up (abduct).
The sciatic nerve originates from where the very base of the spine and the sacrum join known as the lumbosacral region (lower back and saddle region). In this region five separate branches of nerves travel outside of the bony openings of the spine called the nerve roots and connect into a single large nerve – the sciatic nerve. It then travels through the pelvis deep into the buttock region close proximity the piriformis and gluteal muscles. In some individuals the piriformis muscles can travel through the piriformis muscle subjecting them to piriformis syndrome.
Diagnosis
There are no specific tests to diagnose piriformis syndrome. Diagnosis of piriformis syndrome is made by the report of symptoms and by physical exam using a variety of movements to elicit pain to the piriformis muscle. In some cases, a contracted or tender piriformis muscle can be found on physical exam.
In cases where there is underlying pathology (such as disc injury, arthritis, sacroiliac dysfunction or hip injury) resulting in true sciatica – piriformis syndrome may develop to become an additional muscular dysfunction that is required to be addressed. Because symptoms can be similar in other conditions, radiologic tests such as MRIs may be required to rule out other causes of sciatic nerve compression, such as a herniated disc.
Consultation with a physiotherapist in this case is highly recommended as they will perform a comprehensive clinical examination to identify the root cause of your symptoms.
Exercises for piriformis syndrome
Corrective exercises with a combination of strength and flexibility regimen is an essential way to treat true piriformis syndrome (without involvement of other underlying pathologies).
The exercises outlined below follow a phase-by-phase progressive regimen to strength key muscles of the hip, buttock and legs.
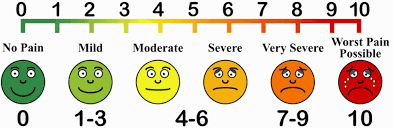
As you work through these exercises expect to feel some pain during and after your exercise. Pain you may feel during the exercise is an expected sign of muscle activity. Pain you may feel after the exercises is an expected sign of muscle healing and recovery. However, if you are unable to participate in the exercises due to symptom deterioration – it is highly recommended you consult your physiotherapist to rule out other potential causes.
Otherwise, to help you gauge the correct amount of pain you should expect during exercise – use this scale. The ideal range should be 2 to 5. If your baseline pain is over 6 or 7 – it is recommended that you consult your doctor for pain relief appropriate to manage your pain, followed by a consult with a physiotherapist. Your physiotherapist will be able to modify the following exercises or prescribe alternative exercises best suited based on your current level of function and symptoms.
Symptom noting – is a great way to keep track of your progress and symptom behaviour.
Take a diary
Note down pain before you begin the exercise.
Note down the pain rating after each exercise.
Note down pain at the end of the day
Repeat the pain recording process for the next 4-5 days
Examine the trend in your symptoms.
Interference with everyday tasks – Your participation or level of exertion with everyday activities may interfere with your symptoms impacting your exercise tolerance. It is therefore important to note any of these interferences’ contributory to your pain.
Phase 1 – is a beginner stage.
This phase is intended for gently priming muscle activation. It will demand your concentration on technique and compliance to change the possible compensation your body has been used to as a result of pain. This phase can last between 1-2 weeks.
Instructions:
3 sets of 10 repetitions. Hold each repetition for 8-10 seconds. Rest 10-15 seconds between sets, 30 seconds between exercises. Do this exercise 1-2 times per day.
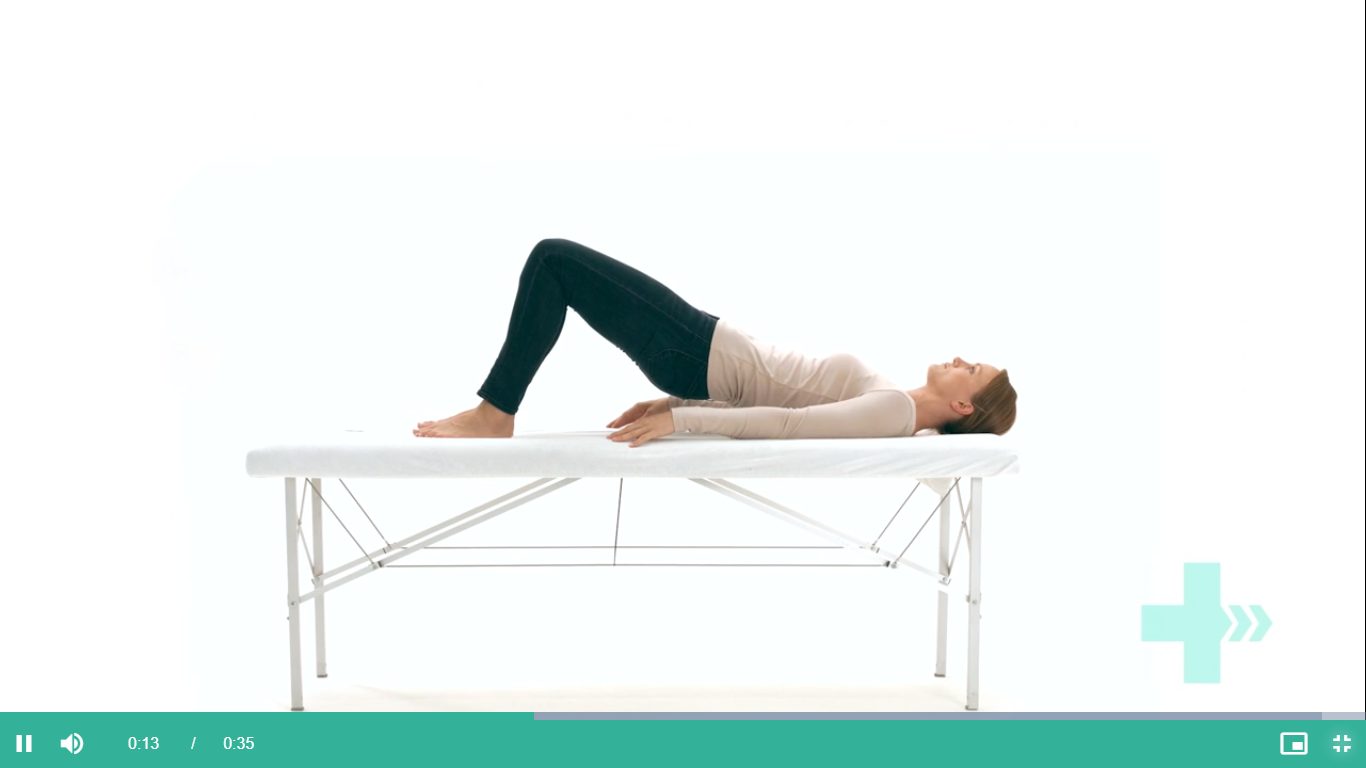
Bridges
Lie on your back.
Bend both knees and place your feet flat on the bed.
Lift your buttocks from the bed.
Place your buttocks back on the bed.
Repeat this exercise and remember to continue to breathe properly.
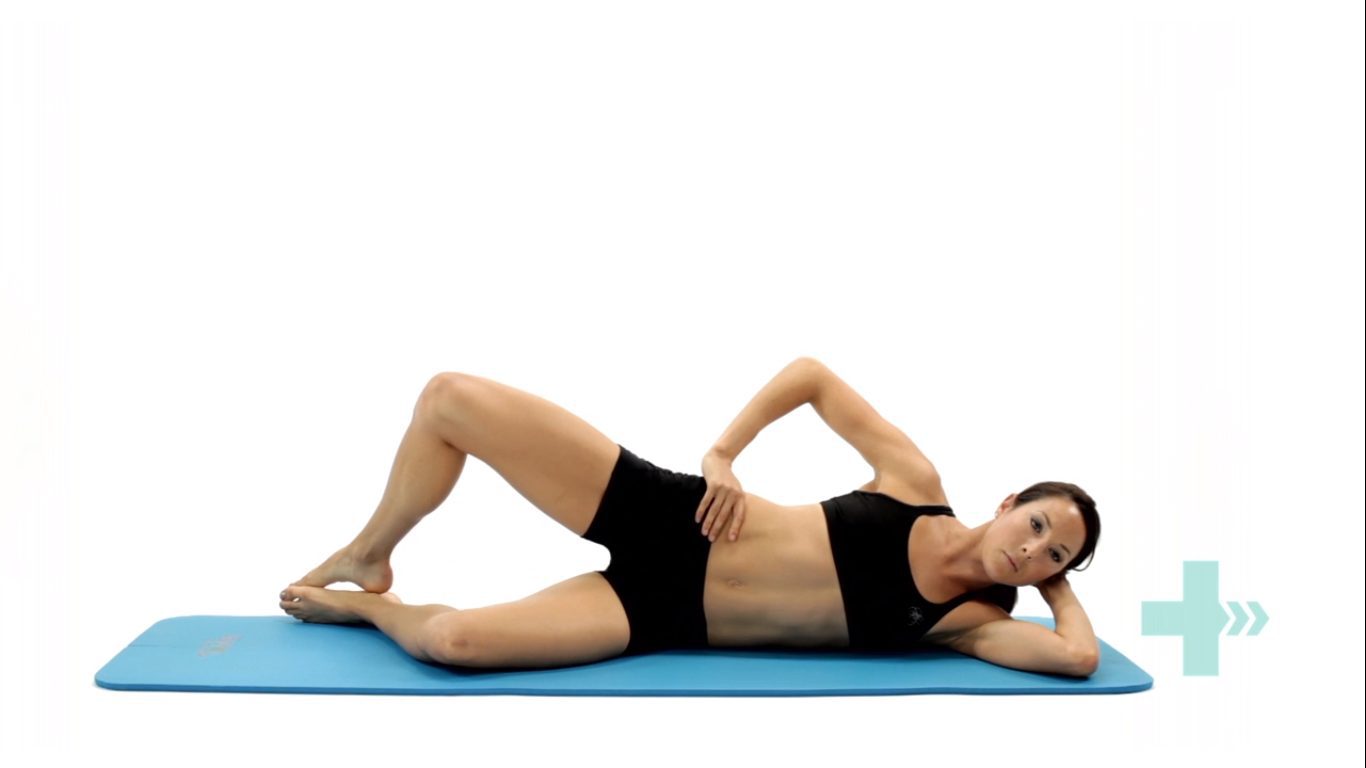
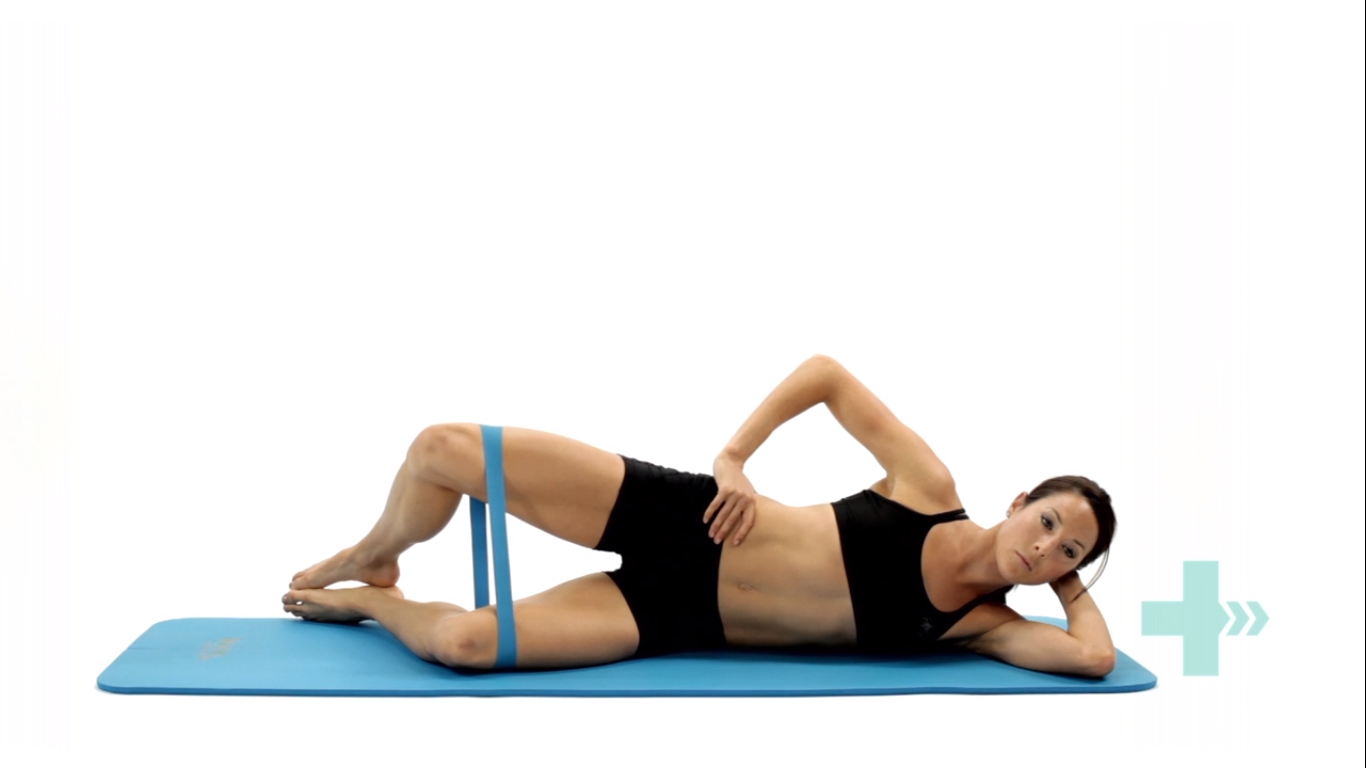
Clam shells
Lie on your side with your feet, ankles and knees together.
Bend the legs a little and tighten your core stability muscles.
Keeping the feet together, lift the top knee up.
Make sure you don’t roll your body back with the movement.
Control the movement as you bring the knee back down to the starting position.
Phase 2 – intermediate stage
The intermediate phase is similar to the beginner stage with the difference of using changing elements of progression to challenge the muscles capacity further. In this stage you may choose to progress the exercises by choosing to change ONE factor:
Increase repetitions
Increase hold time
Increase sets
Add appropriate resistance
Instructions:
3 sets of 10-15 repetitions. Hold each repetition for 10-15 seconds.
Rest 10-15 seconds between sets, 30 seconds between exercises.
Do this exercise 1-2 times per day.
Bridges with resistance
Tie a resistance band around both thighs, just above your knees.
Lie on your back with your knees bent and legs hips width apart.
There should be tension in the band.
Raise your hips up into a bridge, keeping the knees hips width apart.
Control the movement back down to the start position, maintaining constant tension on the band.
Clams with resistance
Lie on your side and place a band above your knees, approximately an inch or two above the knee joint.
Bend your legs a little, keeping the feet in line with your back.
Use your core stability muscles to keep the body stable.
Keeping your feet together, lift the top knee up against the resistance of the band.
Ensure you stay on your side and do not roll your hips and your body back with the movement.
Lower the knee back down, controlling the resistance.
Phase 3 – advance stage
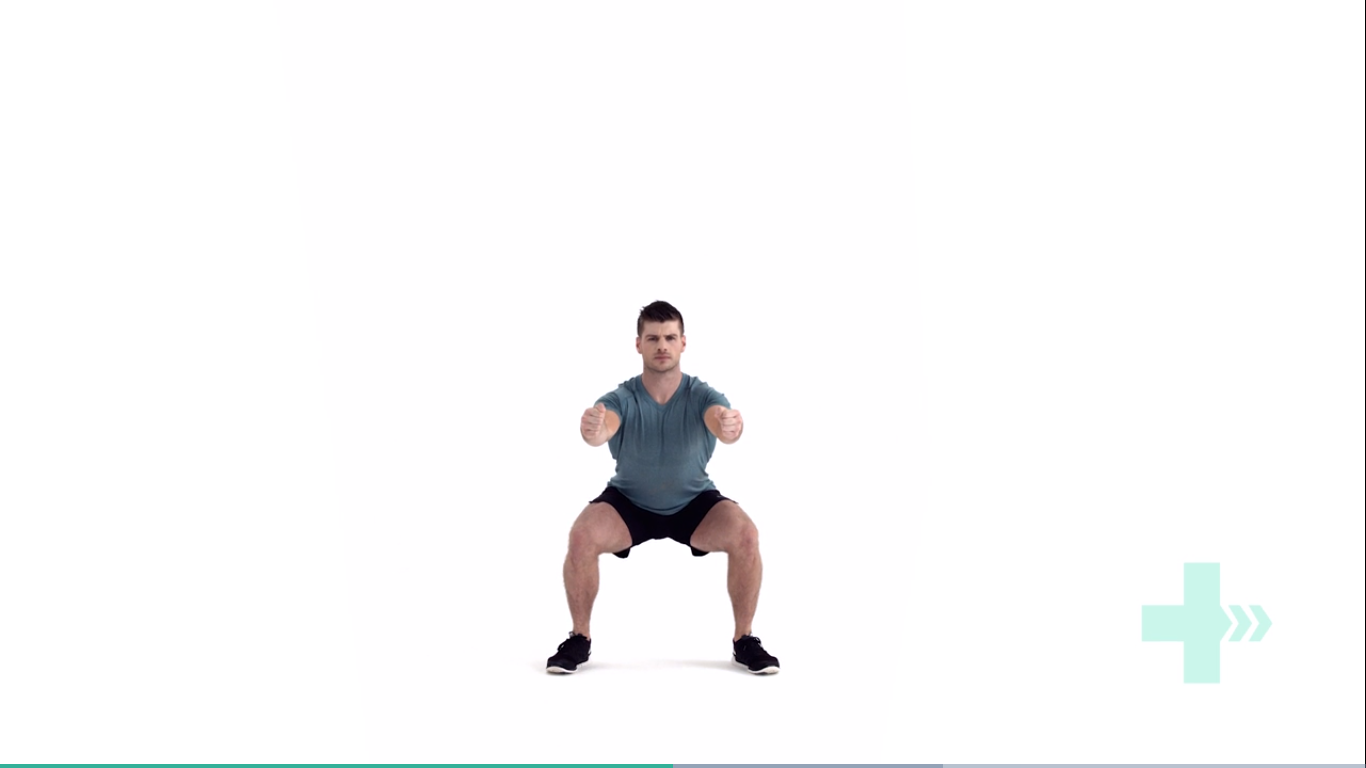
Body weight squats
Start position is standing straight with the arms out in front and bent at the elbows, the fists should be clenched and the palms facing inwards.
Move downwards into a squat position so that the knees are aligned over the toes and the heels are in contact with the floor, make sure the back is straight.
Keep the head and chest upright and the gaze horizontal.
Hold for 2 seconds and return to the start position.
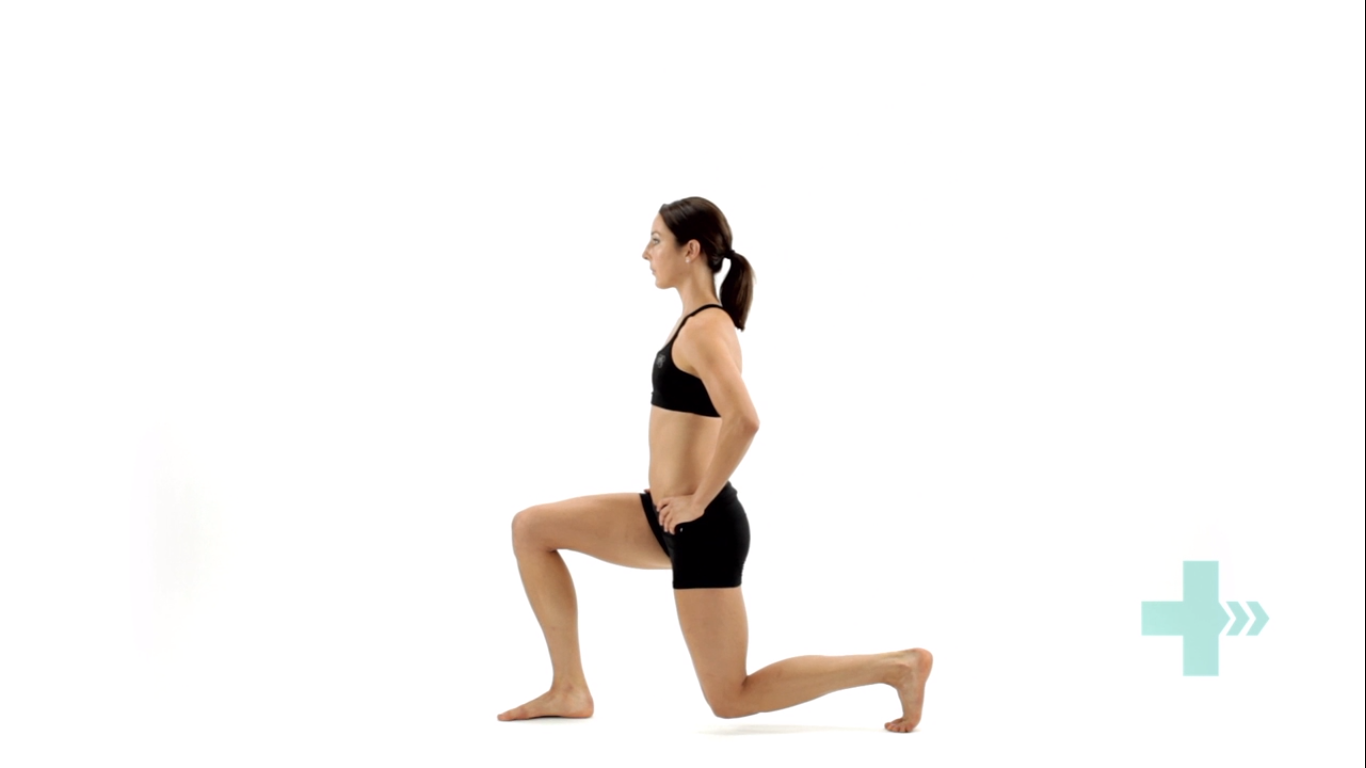
Lunges
Stand straight with your arms to the side or on your hips.
Take a large step forwards on your affected leg, then drop your hips directly down between both feet, bending your hips and knees to a 90 degrees.
Push back up to the starting position, and repeat.
Make sure you take a large enough step that your front knee does not travel over your foot, and ensure your knee travels directly forwards.
Keep your body up straight throughout the movement.
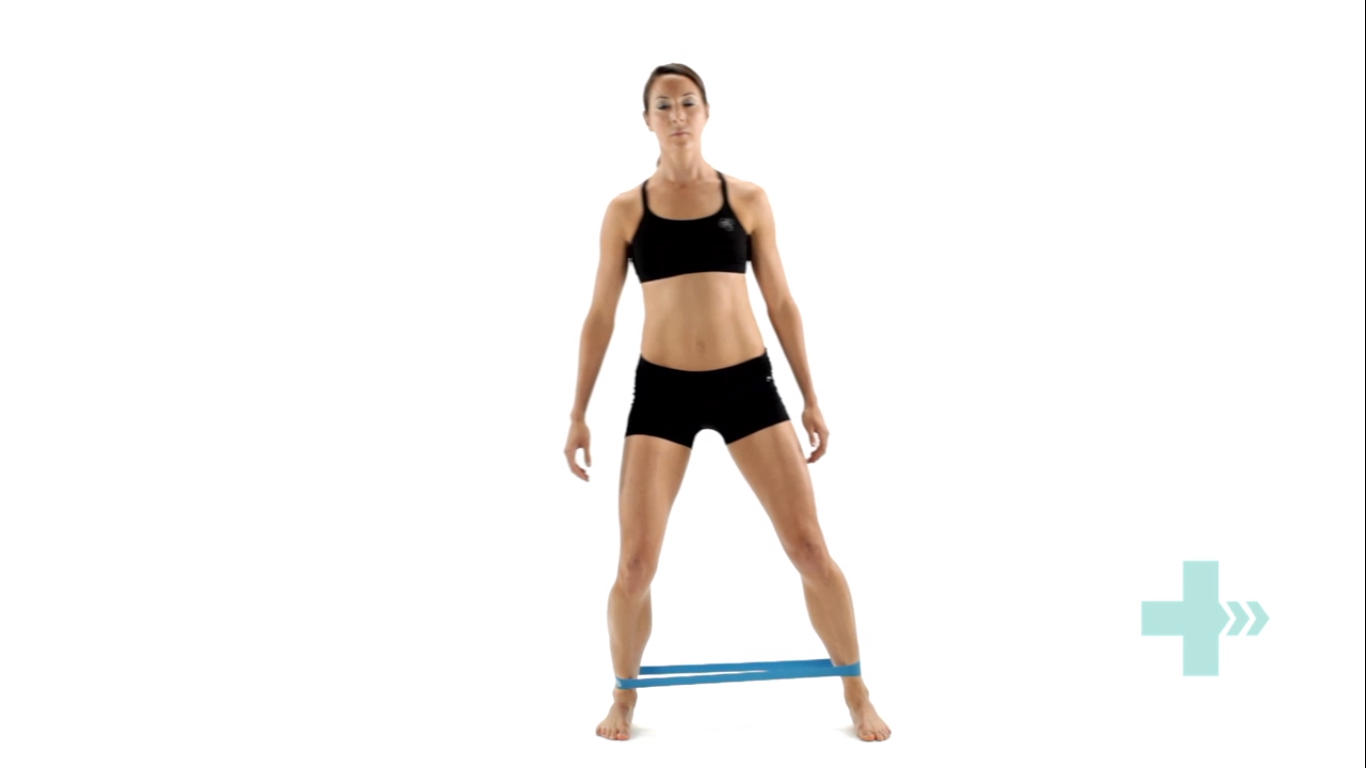
Crab walks
Place a band around your ankles and gather some tension.
Side-step keeping constant tension on the band.
Make sure you do not bring your feet too close together and keep your toes and knees pointing forwards.
Phase 4 – return to activities
Stretching
Do you always need to stretch the muscle? The answer is NO. While stretching is an important tool to improve muscle elasticity. You may not always need to stretch a muscle if it is NOT tight. Thus, stretching is recommended to be limited to areas you feel are TIGHT when you perform a given movement. Check the affected side and unaffected side – don’t need to stretch a muscle that doesn’t need to be stretched.
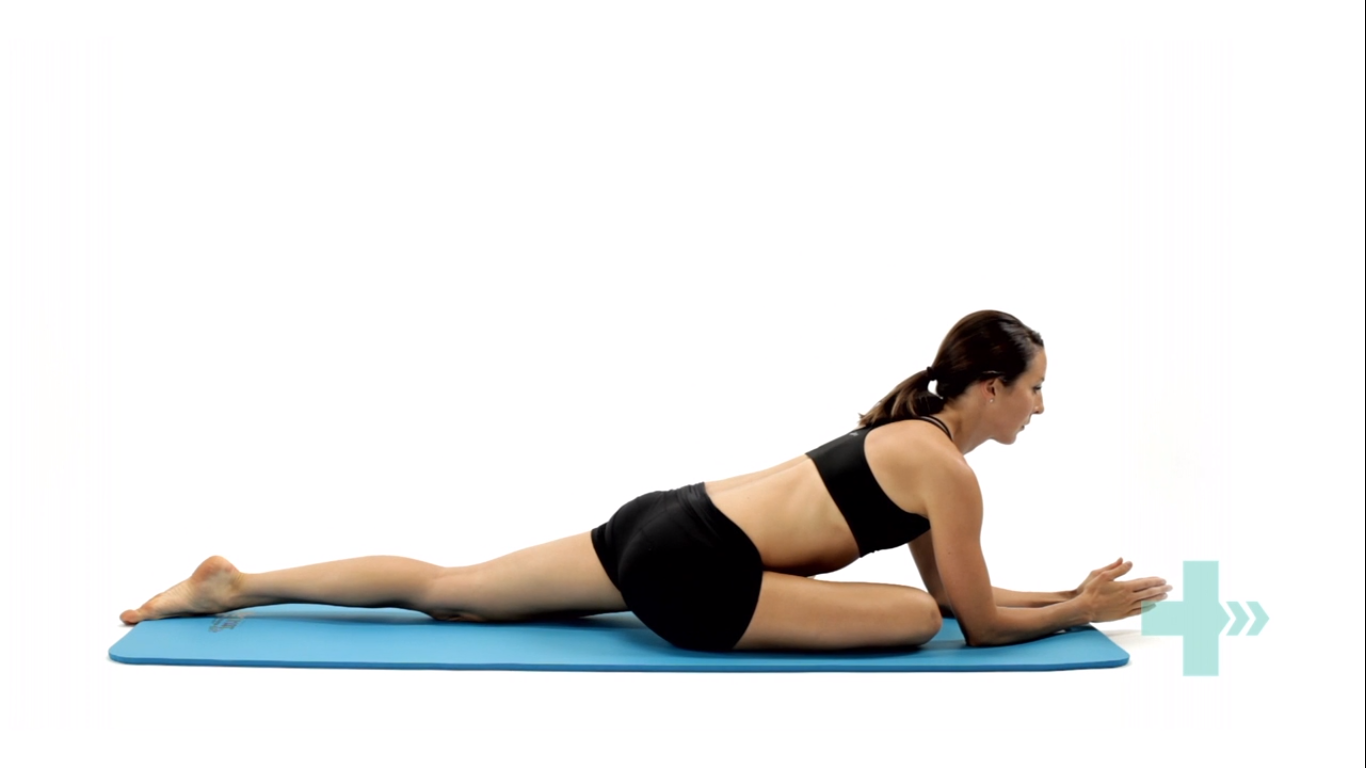
Seated piriformis stretch
Start in a seated position.
Cross the symptomatic leg your ankle is resting on, to the opposite knee.
Apply gentle pressure to the knee as you lean forward, increasing the depth of the stretch.
Hold this position, you should feel a comfortable tension with no pain.
Pigeon stretch
Start on your hands and knees.
Cross the symptomatic leg underneath you, then lower your hips down to the ground.
Rest your body forwards on your arms.
You should feel a stretch across the buttock.
Here are definitions of common terms for body parts you may hear your doctor or physio use!
Ligaments
Ligaments are cordlike extensions that serve to connect ends of two bones to form a joint. They are made up of strong, durable, slightly elastic bandlike structures comprised of collagen fibres. The structural make up of ligaments is advantageous providing joint stability by limiting excessive movement.
Tendons
Similar to ligaments, tendons contain densely packed bundles of tough collagen fibres that hold muscles together to the bone. They are located at the ends of every muscle in the human body. Bound together in tight sheaths they are made to withstand tension and transmit forces exerted by the muscle to the bone to cause movement.
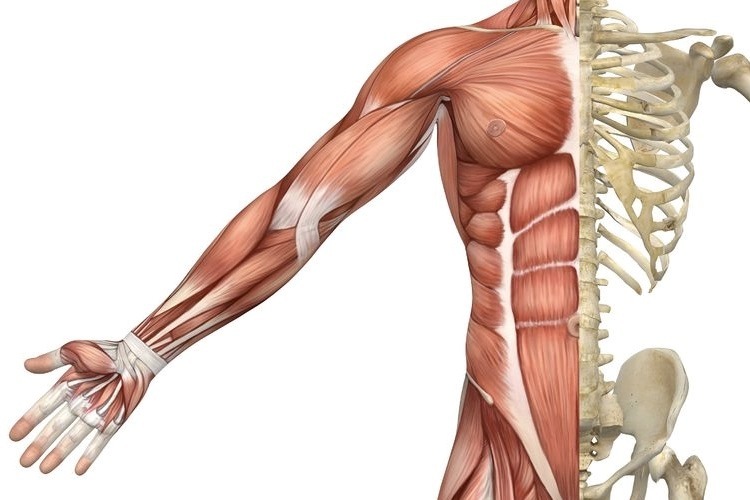
Muscles
Human body is made up of over 600 muscles categorised into three different types – cardiac, smooth and skeletal muscle.
Cardiac muscle – is only found in the walls of the heart. Its contractions help propel blood through the blood vessels to all part of the body.
Smooth muscle – is found mainly in the lining of internal organs (except the heart) including digestive and uninary tract organs, blood vessels. Smooth muscle works to transport substances through the organs by alternately contracting and relaxing.
Skeletal muscles – Skeletal muscles are the most abundant type of muscles that form the flesh of the body. They are attached to bones of the skeleton by tendons. They are responsible for voluntary movements of body. Facial expression, mobility, postural control and breathing are some of the movements we observe when skeletal muscles are subjected to voluntary control.
Bones
Skeletal system of the human body is made up of 206 bones. Bones are most involved in providing an architectural framework by providing body shape, support and protection of vital organs and for locomotion. Besides these functions, bone is a reservoir for mineral and fats as a source of stored energy and formation of blood cells. Bones are classified by their shape as long, short, flat and irregular. They are connected by ligaments to form joints.
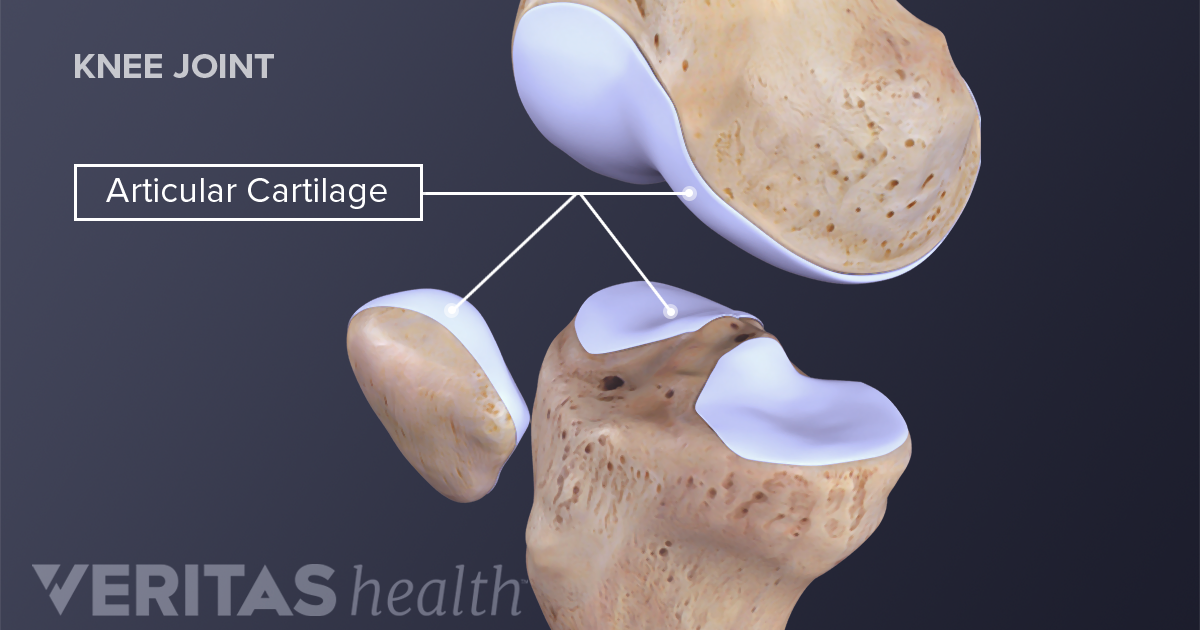
Cartilage
There are three different types of cartilage found in the human body – hyaline, elastic and fibrocartilage. Hyaline cartilage is the most common cartilage in the human body. It covers the ends of most bones at movable joints, connects ribs to the breastbone, forms the voice-box and nasal passages. It consists of high water content that provides resilience to withstand great compressive forces found predominantly in joints.
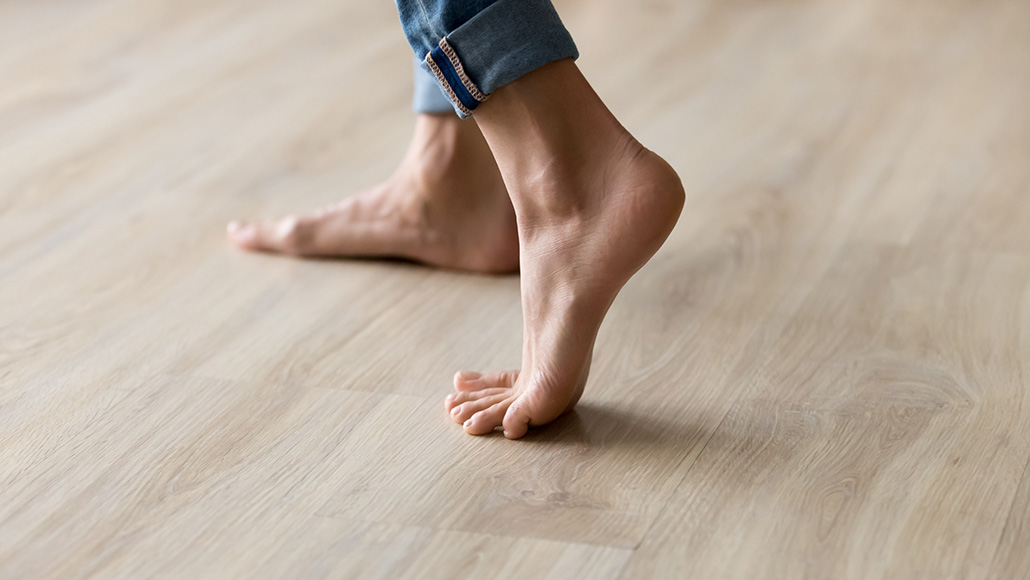
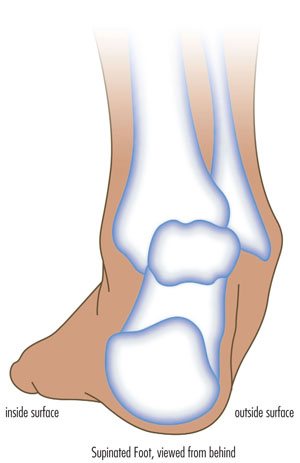
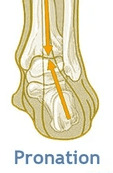
In the foot, pronation should occur naturally when the foot comes into contact with the ground. Pronation will appear as the foot rolling inward and the arch flattening.
What are the benefits?
Dissipates the force that the foot receives from the ground
Allows the foot to become a stable and mobile adaptor to enhance movement opportunity
Loads the muscles of the extensor chain (calf, quads, glutes) to convert ground reaction forces into forward momentum so we can propel efficiently.
So why have I been told this is bad?
So as you are now aware, pronation is very normal and a critical movement to ensure we move and propel ourselves forward efficiently.
What you may have heard someone say to you is that you ‘overpronate’?
Firstly, overpronation is subjective and not as black and white as it is sometimes made out to be. Overpronation has be defined as: ‘a foot that rolls inward toward the arch excessively’.
What we must understand is that a pronation can only happen when the foot has a stable tripod on the ground. This means that the calcaneus (heel bone), 1st metatarsal (big toe knuckle), 5th metatarsal (little toe knuckle) must all remain in contact when the foot rolls inwards and the arch flattens.
So, If you have been told you are ‘overpronated’ , it is most likely that your whole foot is ‘everting’ NOT ‘overpronating’.
What is Eversion?
Eversion can be defined as: ‘the process of turning inside-out’.
In pronation your heel must naturally ‘evert’ (sole of the heel will move away from the midline of the body) NOT your whole foot.
If your ‘whole foot’ everts (turns out) you will no longer have a stable foot tripod as the 5th metatarsal (little toe) will lose contact with the ground.
The key to ensuring this does not happen is to provide an environment for the bones of the midfoot (middle of the foot) and forefoot (toes) to experience the opposite motion to that of the heel. This will mean that the foot has an opportunity to truly pronate with a tripod on the ground.
So how can you help me do that?
At Physio fusion we can help you to bring your own body into alignment and create an environment in which the healing can begin
Foot strengthening exercises
Footwear advice
Referral to other healthcare specialists for further assistance (e.g. podiatrists)
To find your nearest Physio Fusion clinic and book an appointment call 09 6266186 or visit our websitehttps://physiofusion.co.nz
Low back pain is a common health problem which affects up to 80% of the population at some stage in their life.
In New Zealand ACC spends in excess of $130 million a year treating back pain related injuries.
Most back pain occurs between the ages of 25 and 60, and most typically in the 40s.
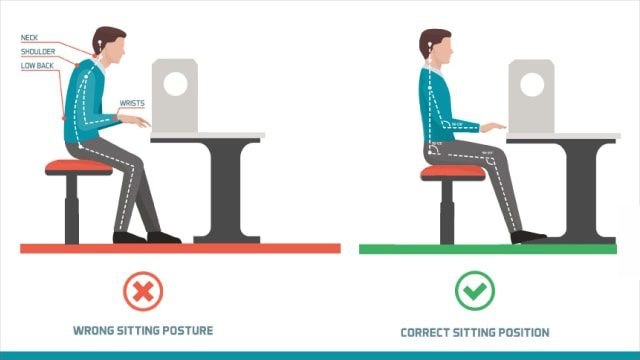
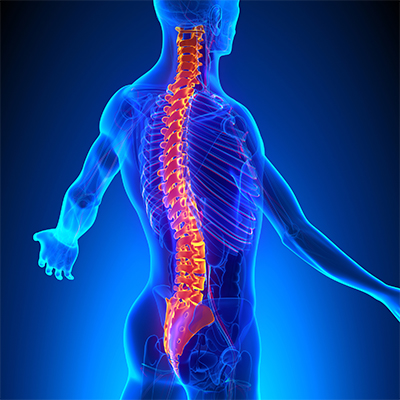
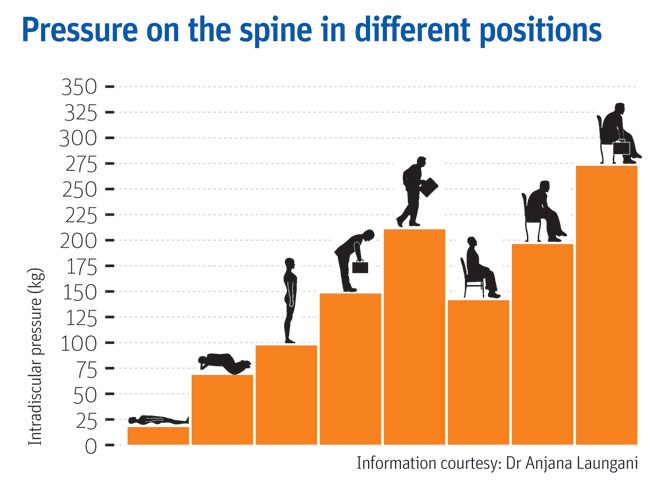
In an era of smart devices, posture has never been more important or harder to achieve. As technology continues to grow, sitting at a desk on a computer or on our phones is becoming more prevalent at work. Having a sedentary desk job can result in sitting for around 8 hours a day. This position actually increases the load on your spine more than standing. Spinal pressure “sits” around 140mm pressure. This pressure usually does not hurt the back right away however, builds up over time and can even change the structure structure of your spine. So, if you slouch then spinal pressure increases to 190mm; add some weight and you’ve put 275 pounds of pressure on your spine.
A compromised spine constricts your blood vessels and nerves, causing problems with your muscles, discs, and joints. And all of these problems can lead to headaches, fatigue, and even breathing problems. Your back is a delicate machine. When one part falls out of alignment, it can affect everything setting off a domino effect and wreak havoc throughout your back and body.
Below is a graph showing different postures and the pressure it exerts on the spine;
But, remember: While you may feel comfortable and supported in your chair and find a perfect sitting posture, staying in the same position for long periods is not healthy for your spine. Varying your postures by occasionally standing and moving around for at least a few minutes each half hour will help keep your spinal joints, muscles, tendons, and ligaments loose and pain free.
Stand Up for Your Spine
If you don’t have a sit-stand desk, you can still combat “sitting disease” and protect your spine. Consider these tips:
Do some work standing at a high table or counter.
Use a lumbar roll behind your back when sitting to improve seated posture
Set a timer on your computer for a stand-and-stretch break every 30 minutes.
Exercise to assist in improving body weight to lessen additional load on the spine
Strengthen the core to provide additional support
The focus is simple: Reduce your sitting throughout the day. But, remember that varying postures is best for your back and neck, so do not go the opposite extreme and never sit. Alternating sitting, standing and movement throughout your day is the best way you can keep your spine safe and body healthy—at work and beyond
Still having back pain?
Schedule an initial assessment with one of our Physiotherapists so they can determine the root of the problem. During this assessment your physiotherapist will be able to decide whether your pain is a source of nerve root irritation, discogenic, postural related, or musculoskeletal. After arriving with the consensus of the problem, we will be able to use many techniques to relieve the back pain. These include: manual therapy, therapeutic exercise, and postural recommendations.
To find your nearest Physio Fusion clinic and book an appointment call 09 6266186 or visit our websitehttps://physiofusion.co.nz
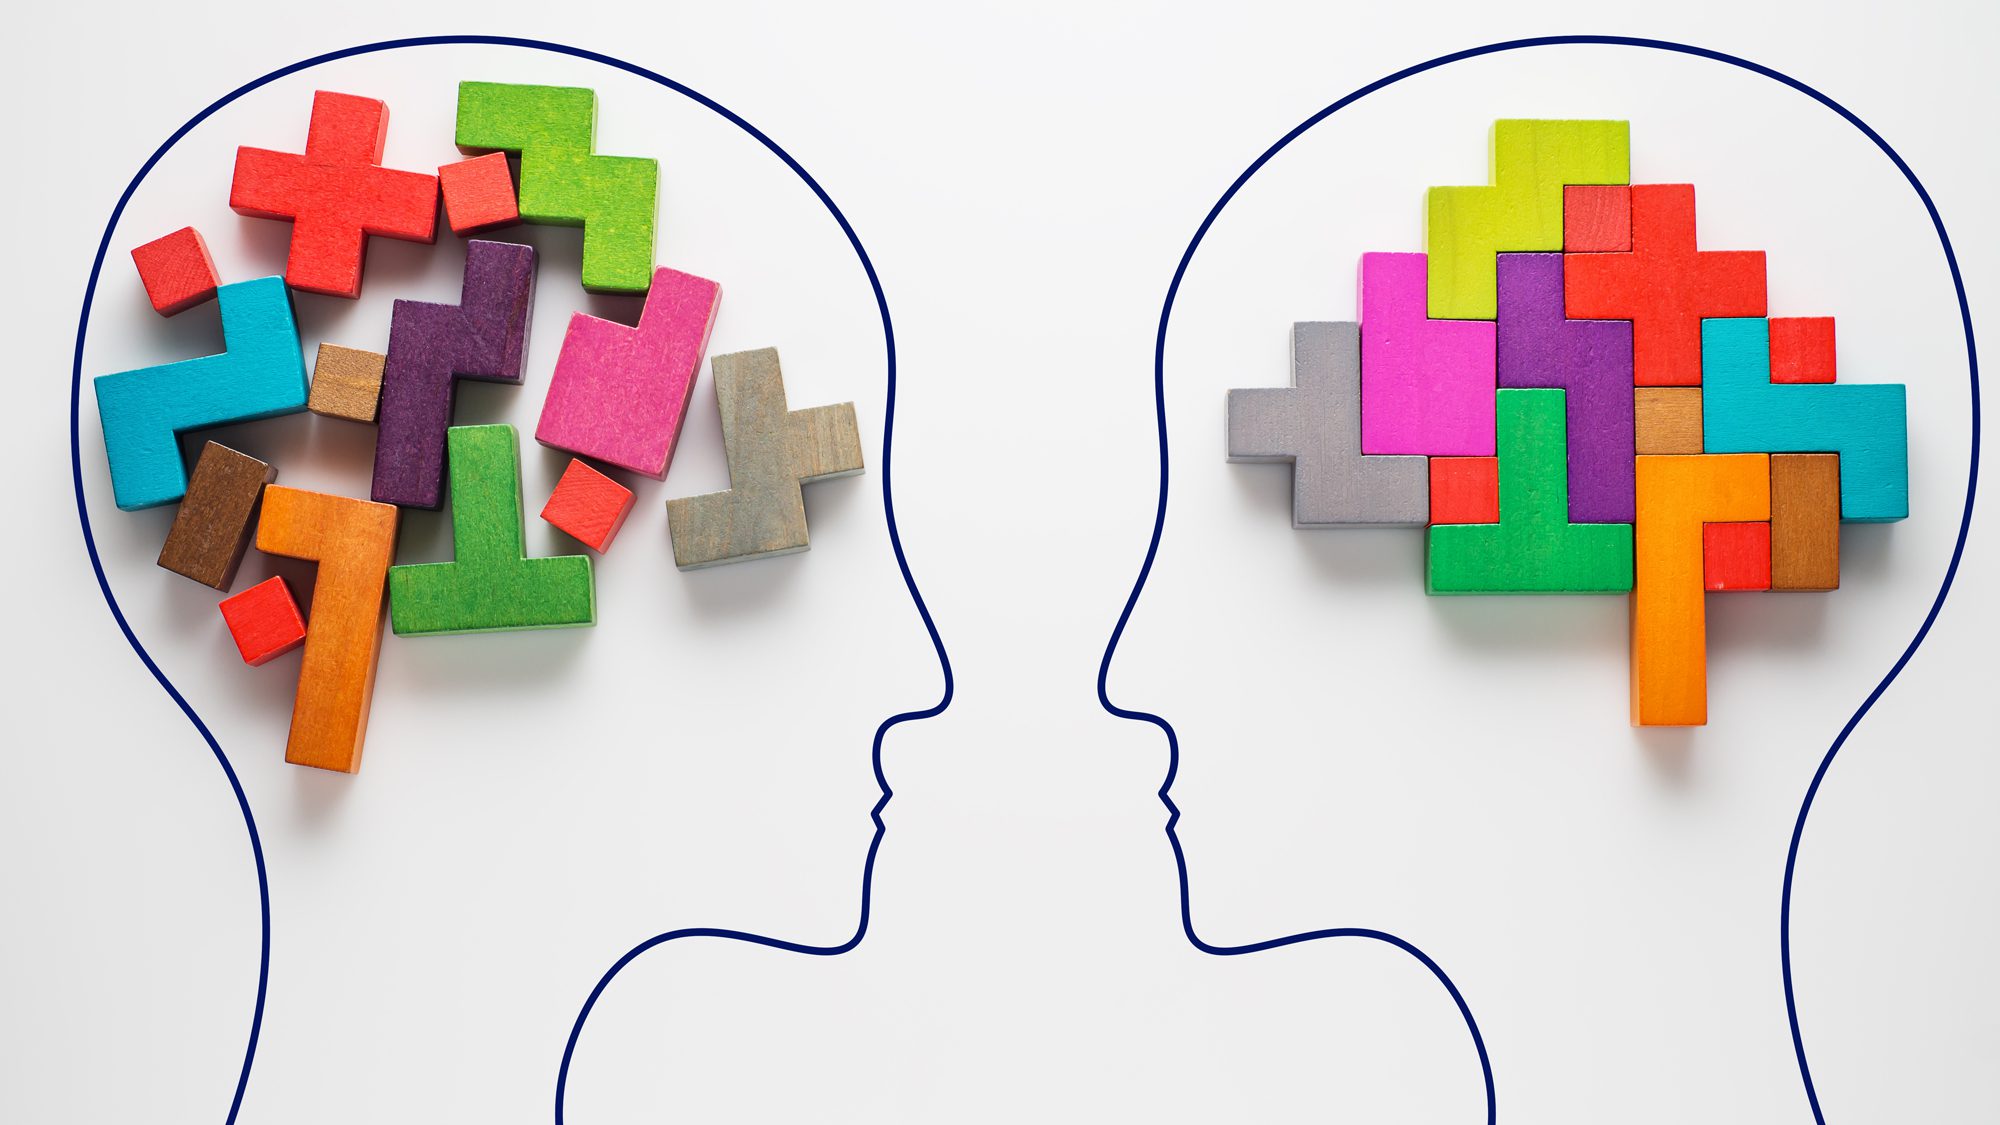
I know how hard it can be when it comes to working out and its really easy to find an excuse to avoid lockdown workouts but it’s not just about staying in shape its also about keeping active to feel mentally strong. We know that exercise does wonders for mental health and at a time where its all uncertainty, anxiety, and a daily dose of doom and gloom, we all need to work out that frustration somewhere!
If you’re struggling with a lack of motivation or negative mindsets there’s only one way to turn it all around: Take ACTION
How much exercise is enough?
You’ve heard the saying something is always better than nothing and that’s the case when it comes to exercise. The current recommendation for adults according to Best Exercises for Health and Weight Loss.org is to aim for 150 minutes of moderate intensity activity every week (or 75 minutes of vigorous intensity) with two sessions of strength building activities per week. That’s about 30 minutes of movement, five times per week.
This is a quick full body routine:
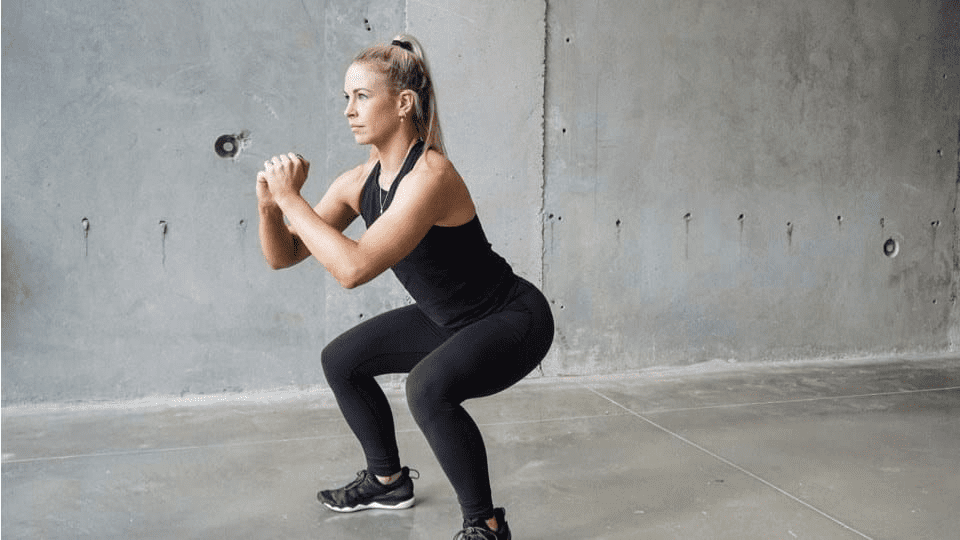
Bodyweight Squats
Stand with your feet shoulder-width apart. Engage your core muscles and gently squat down. As you squat, bend from your hips. Keep your back straight as you push your hips back and counterbalance by leaning your torso forwards. Keep your knees aligned with your toes. Your weight should be evenly on your heels and the balls of your feet, not your toes. It might help to image your are trying to sit down in a chair that is too far away from you. Tense your bottom muscles at the bottom of the squat and keep them tense as you straighten back up to the start position.
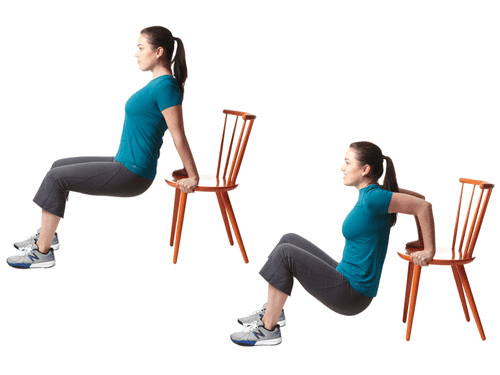
Arm dips
Start in a seated position. Place your hands on the seat of the chair and use your arms to move yourself forwards towards the front of the chair. You will need to move your feet further forwards to help your stability. From this position, use the strength of your arms to slowly lower your body directly down towards the floor and then raise yourself back up. Do not actually sit on the floor and keep your hands close in beside you. Relax and repeat.
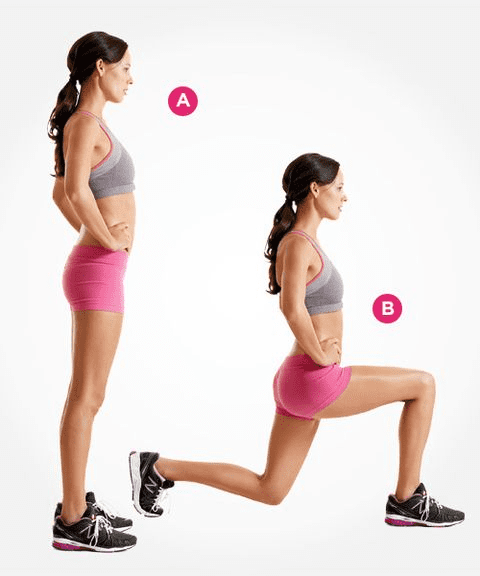
Lunges
Stand straight with your arms to the side or on your hips. Take a large step forwards on your affected leg, then drop your hips directly down between both feet, bending your hips and knees to a 90 degrees. Push back up to the starting position, and repeat. Make sure you take a large enough step that your front knee does not travel over your foot, and ensure your knee travels directly forwards. Keep your body up straight throughout the movement.
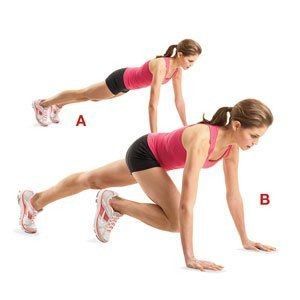
Mountain Climbers
Adopt a plank position insuring your hands are directly beneath your shoulders.
Fully flex one hip and hold.
Extend the bent leg to the rear and repeat the movement pattern on the opposite side
The restrictions and change brought by the outbreak of COVID-19 has resulted in a great deal of control being taken from our hands; this has been anxiety provoking for many of us. Nevertheless, it’s important to re-evaluate, acknowledge and place focus upon the matters that we DO have control over so that we can gain our personal power back!
Lockdown Productivity Tips
Check in with yourself: how is your body and mind feeling. Embrace your emotions and give yourself permission to feel the way toy do.
Stay connected: Social connection is inevitably limited at the moment but catching up with people via text or facetime will help prevent feelings of isolation.
Maintain some form of routine: Maintaining a routine helps provide some structure do days which often all seem to merge into one.
Get fresh air where possible: Daily fresh air can provide an easy change of scenery when we are stuck at home most of the day.
Gentle exercise is a MUST!
Stay Hydrated: Drinking enough water is important to keep your body hydrated and makes sure your body functions properly.
Eat well- You’d be surprised how your diet can affect how you feel. Gut health in particular is linked to mental health.
Get to that “thing” you’ve been delaying for months
Pick up a good book
Learn new habits or rediscover old ones
These may seem like simple strategies but sometimes it’s the simple things that are most effective
“One day this will all be over and we will be grateful for life in ways we never felt possible”
The gratitude we will have for the things we once took for granted will be unmeasurable- getting on a plane, an impromptu visit to the cinema, a shopping spree, going to the gym, even meeting a friend for lunch at a café. Keep going, nothing lasts forever and we have so much to look forward to. In the mean time take each day as it comes, be kind, support those who are struggling and keep going! You are stronger and more resilient than you know!
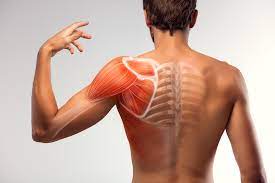
You may have seen videos or posts online about people talking about a specific area of your shoulder known commonly as the “Rotator Cuff” and wondered what they were on about. Your shoulders do a lot of important things you might take for granted! They help you get something off a high shelf, comb your hair, or play a game of cricket.
It’s a complicated process that your body makes look easy. And your rotator cuff is a big part of that. It protects and stabilizes your shoulder joint and lets you move your arms over your head. It’s importance is widely used in sports like swimming, tennis and netball.
In New Zealand healthcare, shoulder injuries have one of the highest prevalence when it comes to ACC claims and overall cost. Within this, rotator cuff injuries are among the most common pathologies affecting New Zealanders. Other pathologies include acromioclavicular injuries, dislocations, osteoarthritis and frozen shoulder.
So, what exactly is the cuff and how does it influence the shoulder?
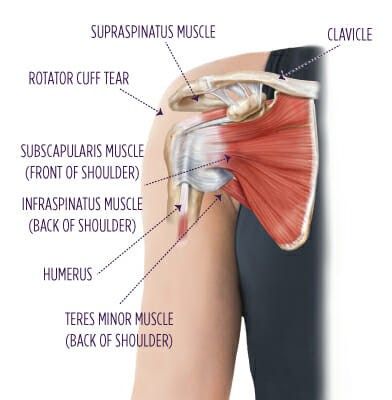
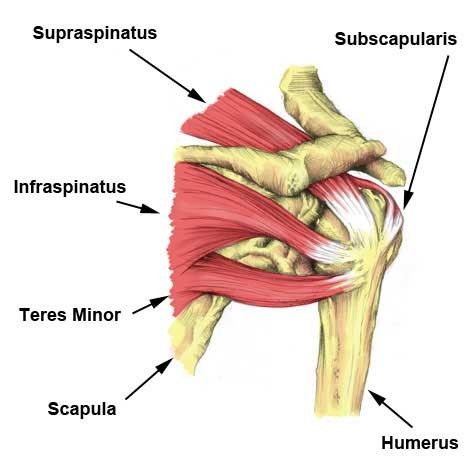
The rotator cuff (RC) is a combination of four muscles that run through and attach onto specific areas of the humeral head (top of the arm bone).
Supraspinatus, Infraspinatus, Teres minor and Subscapularis are the four muscles comprising the RC and each one plays an important role however they all contribute to shoulder stability:
Supraspinatus
Infraspinatus
Teres Minor
Subscapularis
A thin triangular muscle that helps perform abduction
A thicker, triangular muscle that performs external rotation.
The smallest muscle of the cuff, helps with rotation as well
The largest muscle of the cuff performs internal rotation (arm behind your back!)
Many people suffer from shoulder pain, so here are the most common injuries that can happen at the rotator cuff:
Rotator Cuff Tear:
A rotator cuff tear is often the result of high levels of load over a short amount of time or a high impact force stressing one or more of the tendons/muscles. Fortunately, majority of tears are partial. Tears are more common in people with jobs that involve heavy loading or lifting or in high impact sports like rugby. It also can happen suddenly if you fall on your arm or try to lift something heavy. Common and easily treatable with conservative management by a physiotherapist, a rotator cuff tear can come right.
Rotator Cuff Tendinopathy:
A rotator cuff tendinopathy is the most common shoulder pain complaint/injury resulting in inflammation and irritation of one or more of the cuff tendons. This pathology is more common in individuals who have an occupation where repetitive use of the shoulder, particularly in an overhead position such as carpenters or painters, or individuals that play highly repetitive, throwing sports like tennis, baseball or volleyball. Once again, this injury is treatable by a physiotherapist, conservative management can be very effective in treating these injuries with a thorough, well planned exercise program to help get patients back to doing what they love.
Majority of people experience pain around the shoulder joint, with some movements being highly provocative. Tenderness on touch at the affected site is also common – this helps your physiotherapist hone in on potentially which tendon is causing those problems!
Medical management vs Physio management
Medical management will be advised by your local GP if you decide to see them first. They might prescribe NSAIDs (anti-inflammatory medications such as ibuprofen) to help with the pain you’re experiencing and recommend you see a physiotherapist. Depending on your injury as well as your ability to function, surgery may be an option if conservative medical and physio treatments don’t help. Most people get by without the need of surgery but some tears can be too large to heal without the use of surgical intervention.
Physiotherapy management is designed around reducing pain and disability, restoring range of motion and helping people return to work or sports to perform how they were prior to the injury. In the early stages of these injuries, rest and ice and/or heat are recommended to allow the inflammation to settle – then your physiotherapist will begin to introduce a detailed exercise program, this may include:
Isometric (static hold) exercises
Resisted movements using bands
Range of motion exercises to restore lost movement
Functional loading – task specific or sport specific
If this is successful, the last step is to build back up the strength that was lost over time – this is done by concentrically (against gravity) loading the affected tendons/muscles in a way that they adapt and lay down more tissue, grow and becoming stronger in hopes that you get to return to what you enjoy!
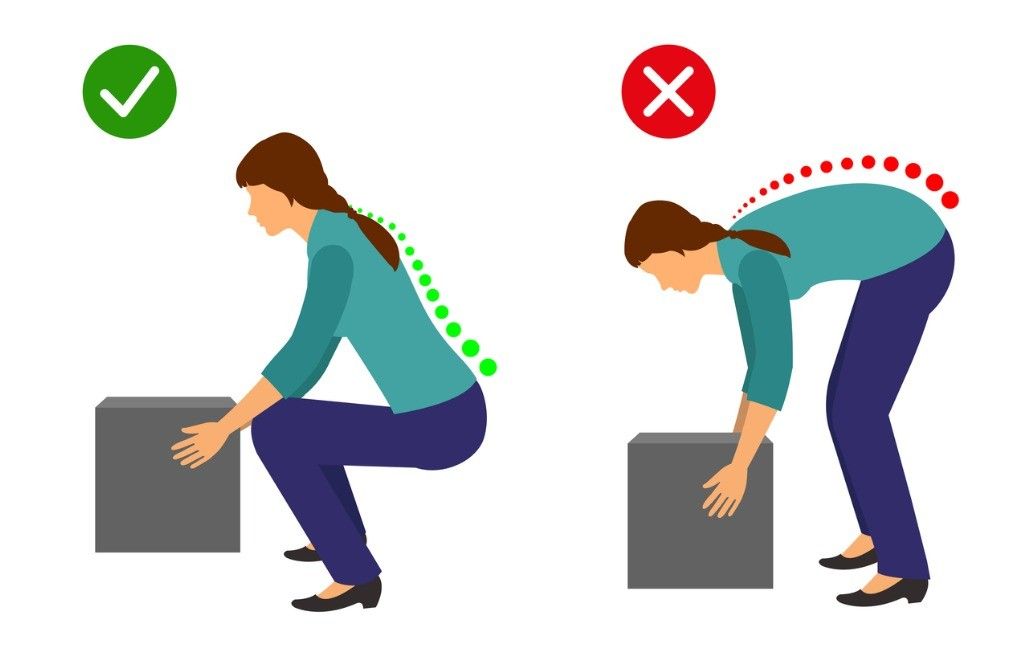
One common belief about lifting is that rounding your back when lifting an object is considered dangerous while lifting with a straight back is considered safe…
However, there is a lot of misinformation circulating around lifting mechanics and what is deemed “good technique” versus “bad technique.”
Here are some key myths and misinformation that you may have heard:
A ROUNDED BACK WHILE LIFTING OVER STRESSES THE BACK MUSCLES AND LIGAMENTS
Research has shown that regardless of lifting position, whether you’re stooped, squatting or weightlifting, your back has to produce the same amount of force. Statistically speaking, it’s not significantly different.
FLEXING THE SPINE WHILE LIFTING INCREASES THE LOAD ON THE LUMBAR DISCS
Under heavy loads, discs are unlikely to fail unless >95% flexion is achieved (which is near impossible)
With low loads, the disc is unlikely to fail unless you do thousands of repetitions continuously
Your body is an amazing adapter, this includes discs! Your discs can adapt and become more and more able to handle loads when stressed appropriately
THESE COMPOUND TO CAUSE INJURIES AND PAIN TO THE BACK MUSCLES AND DISCS
Resistance training has demonstrated through countless studies the ability to increase bone mineral density (BMD) of the lumbar spine. BMD is actually positively associated with the strength of the spinal discs and ligaments at that level. With appropriate loading and training, disc, ligament, bone and muscles are going to adapt favourably
A NEUTRAL SPINE IS SAFER, STRONGER, MORE EFFICIENT AND BETTER TO LIFT WITH
There is no significant difference between activities that encourage more spinal flexion and one’s that do not in the long term
Lifting with lumbar flexion is not a risk factor for low back pain
Research has shown lifting with a bent back is more metabolically and neuromuscularly efficient
When the spine is in extension during bent over activities, the hip is actually flexed to a greater degree – decreasing the ability for the glutes and hamstrings to create as much internal torque. Flexing the spine reduces this effect and reduces the moment arm for the hip extensors
STOP BACK PAIN & INJURIES BY LIFTING WITH A NEUTRAL SPINE
Your lumbar spine flexes every time your hip flexes! It is impossible to isolate one versus the other. It is also impossible to not flex while doing common movements
Extreme flexion however (>/=100%), may pose an increased risk under heavy loads, but not at light loads
You may still be wondering why you have back pain (stay tuned for our next blog!). Your pain may not be directly related to your lifting strategy.
Could you have pain with forward bending? Absolutely.
Is bending at the lumbar spine an increased risk for pain or injury? In the vast majority of situations, no.
If I have pain with forward bending, is it bad to temporarily limit doing so? Not at all.
Should I fear bending at the spine with or without pain or injury? No. Being fearful of flexing/moving your spine is actually a stronger predictor of disability and back pain.
Work on moving through your spine, after all it’s what it is designed to do! Choose comfortable movements and gain confidence over time, then build up your strength gradually with resistance training – try and not to push too fast, we want nice, healthy adaptation! Give your body time to adapt, back pain is not quick fix sometimes but you are resilient and with healthy, normal movements and some patience, you will be okay.