fbpx
Your first step to recovery

Fix the grinding in your knees when you squat

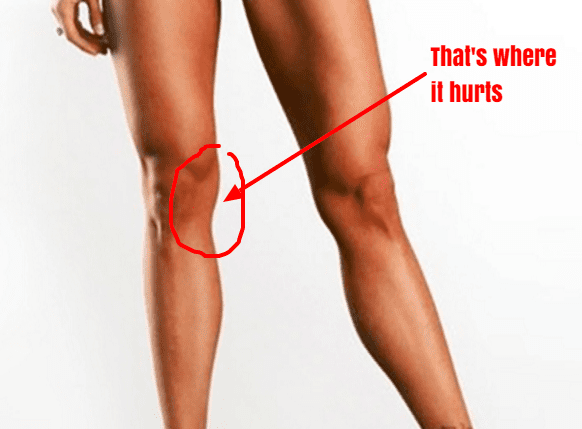
There can be multiple reasons why your knees sound like popping popcorns or grating stones when you squat.

Generally popping in the knees is attributed to stiffness of the quadriceps muscle and the fascia that surrounds the knee joint. Overtime, stiffness causes pressure to build up under knee cap, which on movement can cause a sudden release causing a ‘popping’ sound. As worrying as it may be, most of the time popping noises in the knee without pain is NORMAL. However, for others the noise can be accompanied with a grinding sensation under the knee cap which is painful. This suggests there is an underlying pathology that needs to be addressed.

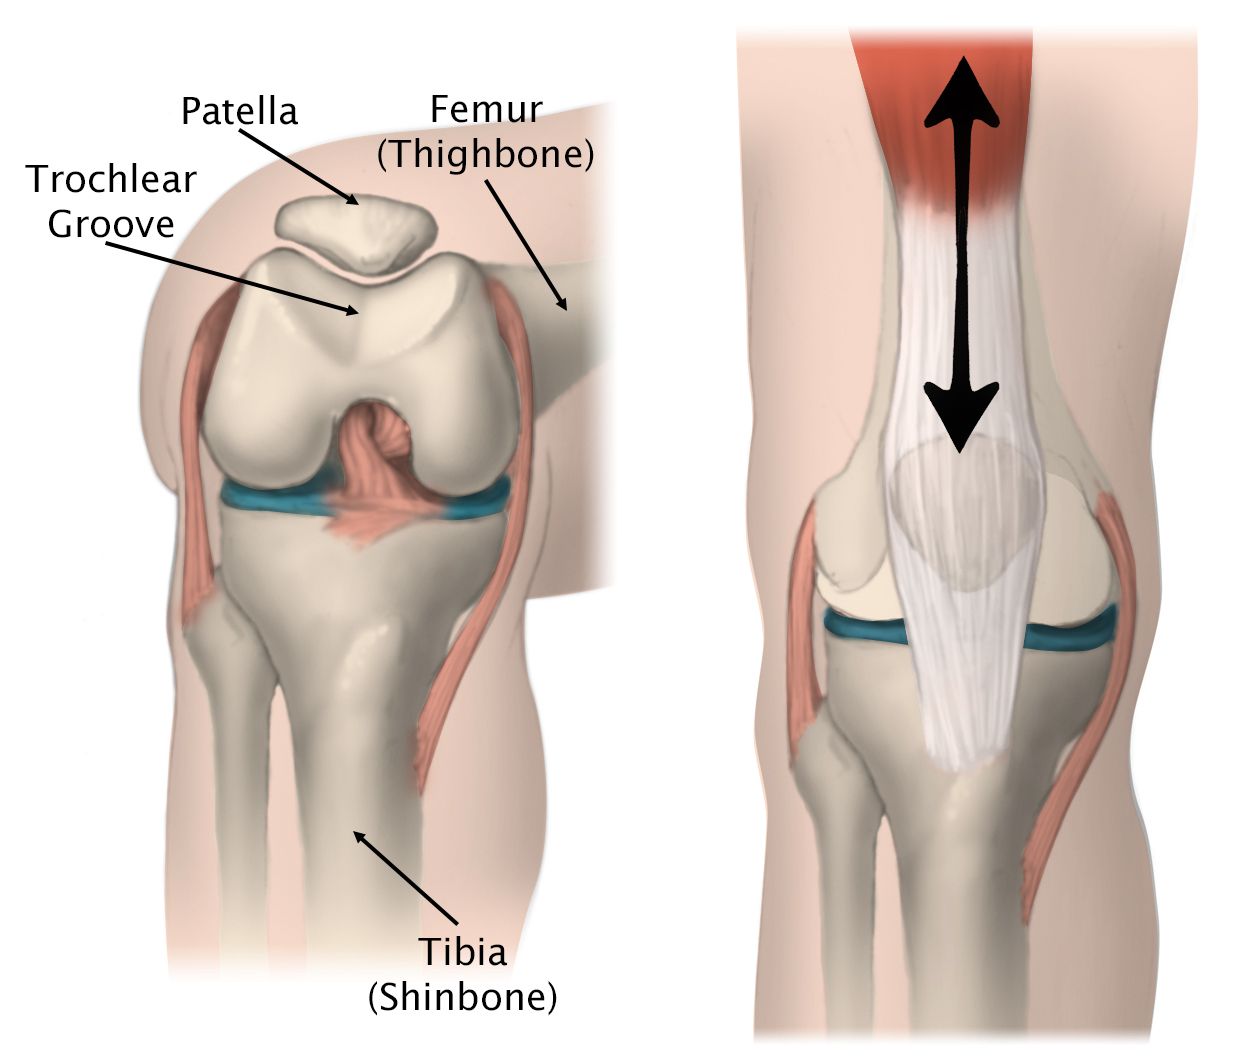
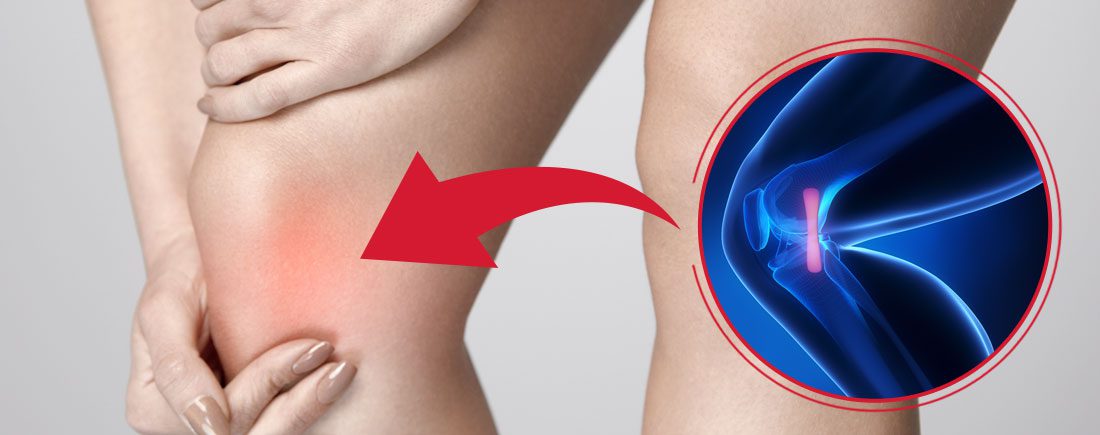
This is something we would clinically consider to be Patella Femoral Pain Syndrome aka Runner’s knee – an umbrella term that encompasses the idea of dysfunctional knee cap tracking.

When you straighten and bend your knee, naturally your knee cap tracks up and down between its groove (trochlea groove) – like a train moving up and down a train track.

When the quadricep muscles on the outside (vastus lateralis) and inside (vastus medialis oblique) part of the leg are working in synchronization as they should, your knee cap is able to track up and down properly. However, if the quadriceps muscle (Vastus lateralis) is overly activated and the fascia (Iliotibial band & lateral retinaculum) on the outer part of you knee cap is excessively stiff, the knee cap gets pulled to the outside.

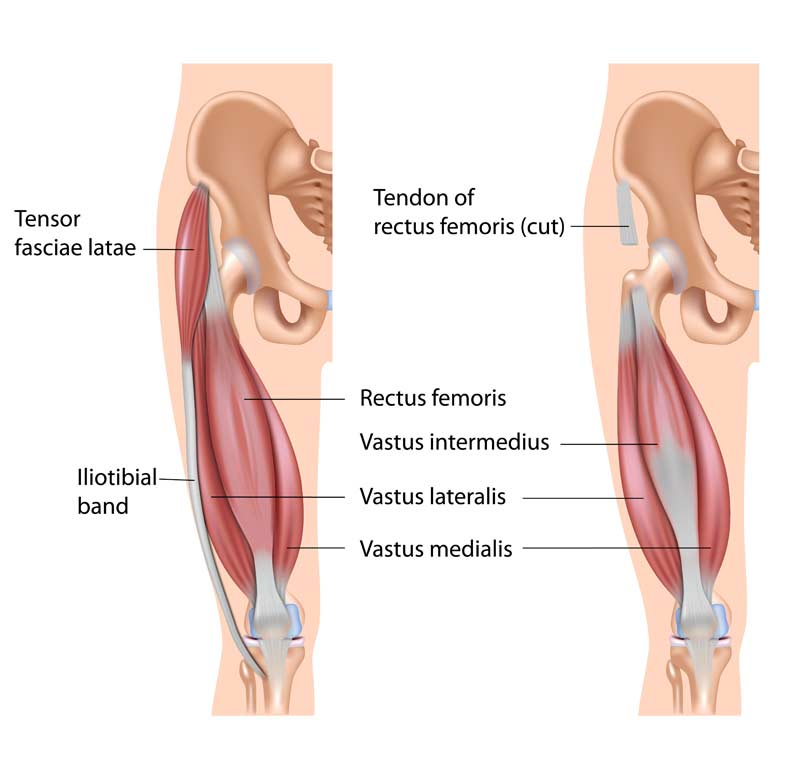
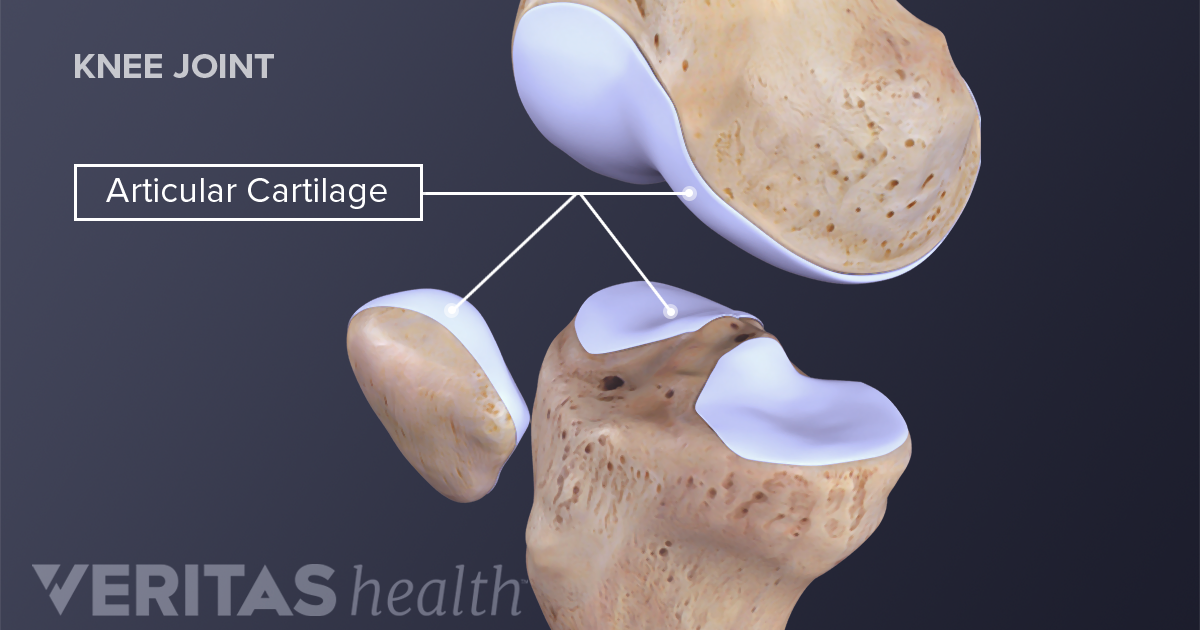
Essentially the train is being pulled and tilted more to the outside. Eventually overtime, repetitive or violent lateral pull of the knee cap increases friction in the knee grating the smooth underside of the knee cap called, chondromalacia. Additionally, the constant pulling and stiffness of the lateral side will cause stretching on the inside of muscles. On top of that, pain and swelling will cause the muscles in the inside of the leg to shut down.

Here are two steps to managing your symptoms.
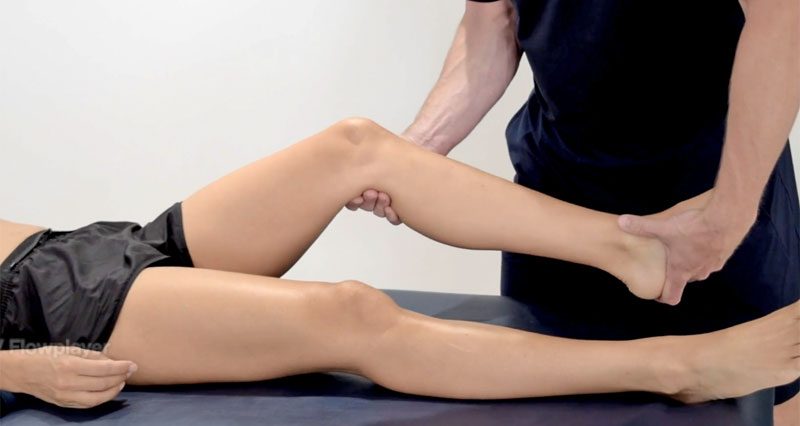

STEP ONE

  1. Foam roller or tennis ball

Instructions:

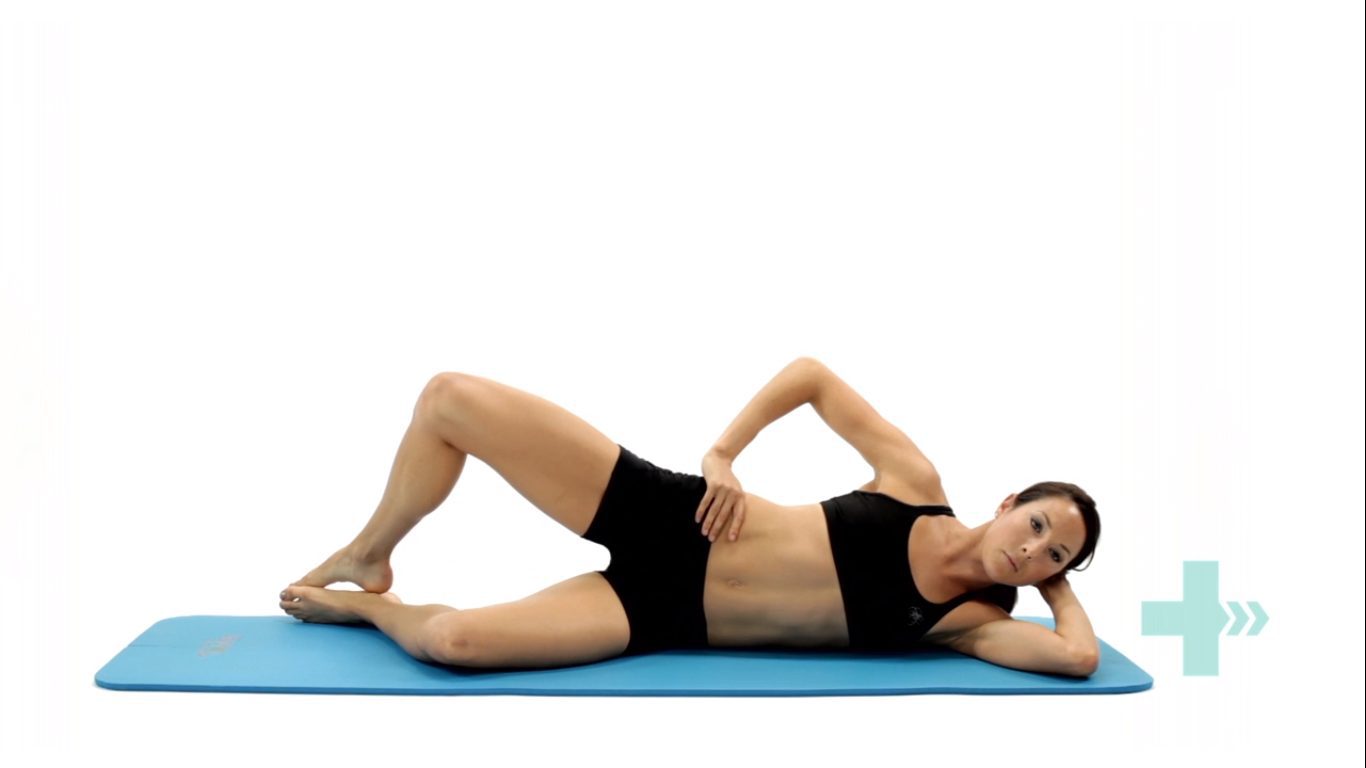
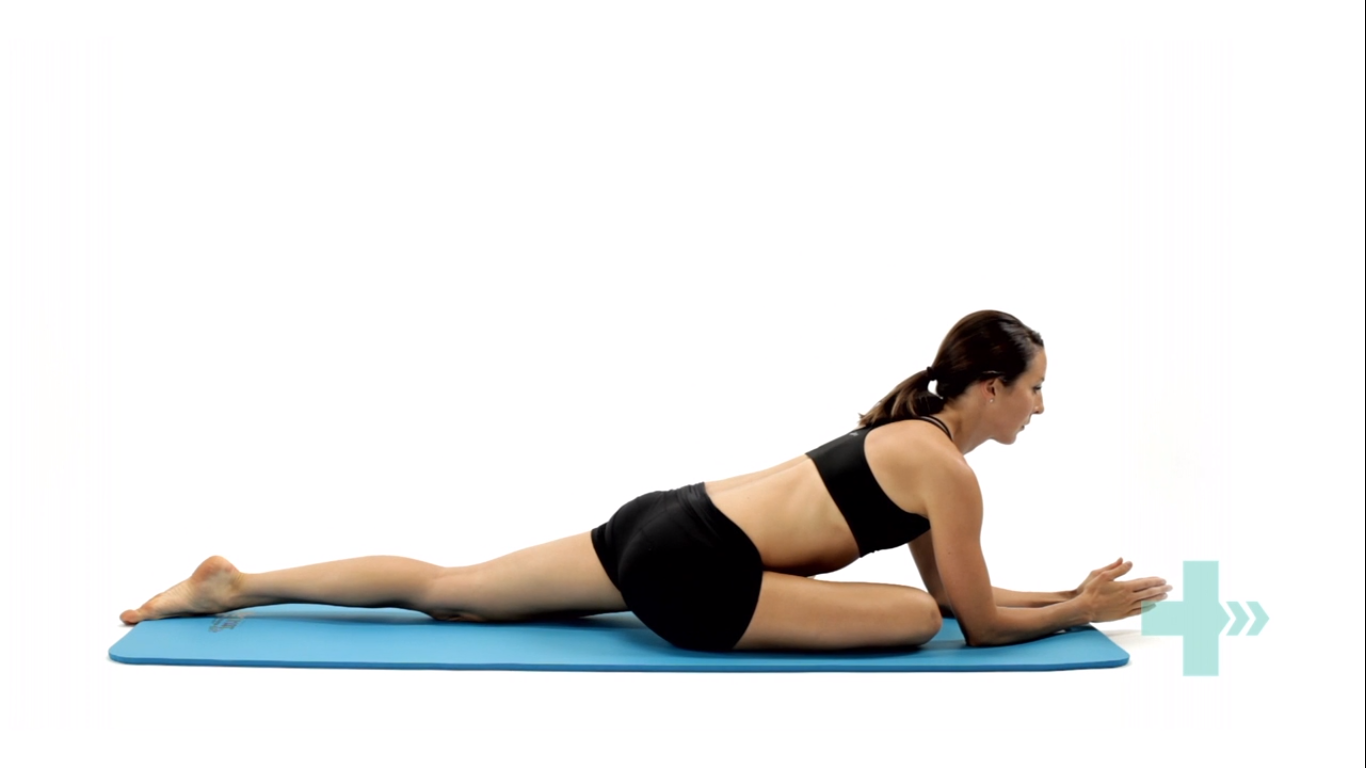
  • Lie on your front and place the foam roller underneath your leg.
  • Bend the opposite leg and bring it out to the side to help you move back and forth.
  • Roll the entire length of the thigh muscle, staying off the knee joint.

Make sure you move through the length of the muscle close to the knee cap as you can. You should be looking for stiff spots in the muscles and any sore spots you feel concentrate on it for couple of seconds and work deeper in to the tissue. You should also move in the inside and outside of the quadriceps muscles. Do this with you knee straight and then move into knee flexed position to optimize the release.

For a more concentrated release, use a tennis ball or a lacrosse ball especially at the quadriceps tendon where much of the stiffness is likely present. The reduced surface area of the ball allows you to work on specific spots a lot better to break down deeper areas of stiffness and create more mobility.

Do this mobility routine for 1-2 minutes


  1. Quadricep stretches

  • Start in a standing position. Use support if required for balance.
  • Raise one leg behind you grabbing hold of your ankle, or your lower leg.
  • Lift and hold for 20-30 second, and then repeat for the other leg.
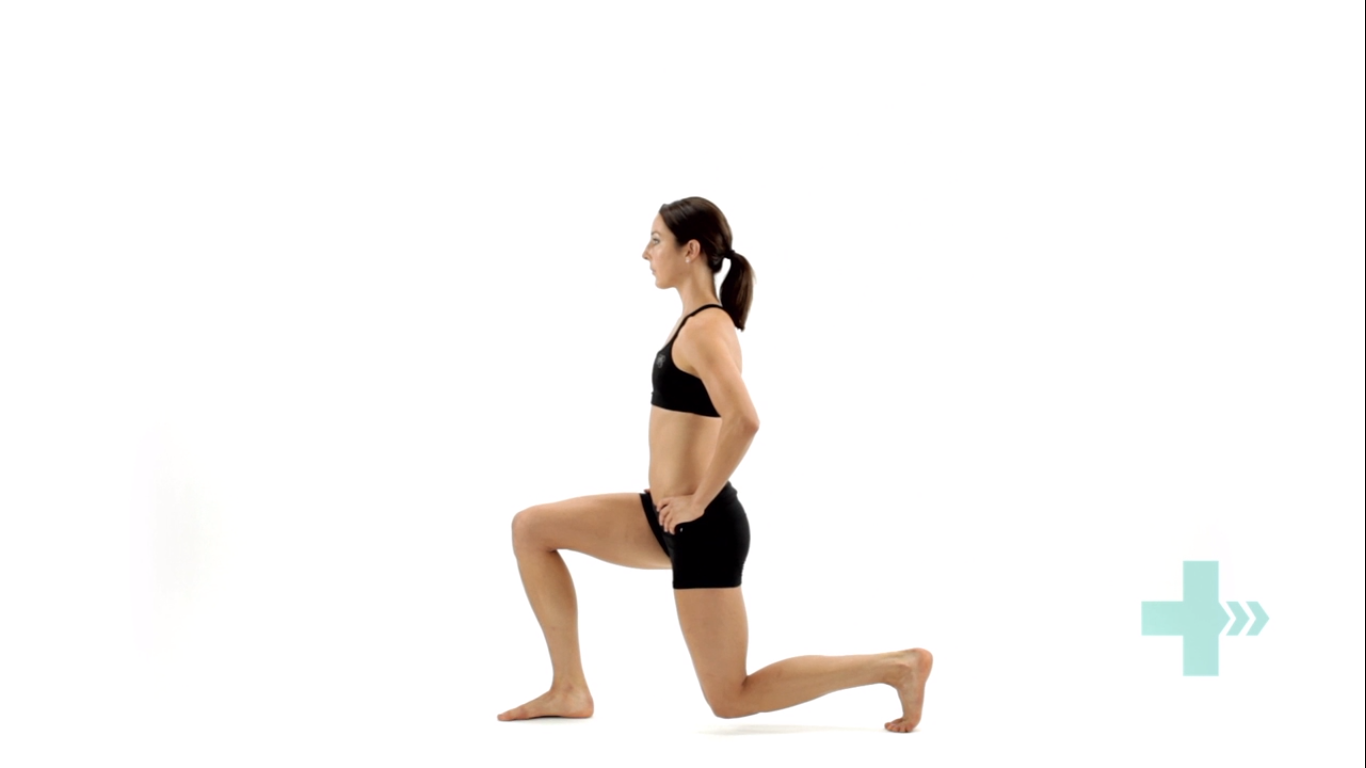
  • Get into a lunge position with back leg flat on floor
  • Bend your knee and slowly pull your leg into a stretch
  • Hold this stretch for 20-30 seconds
  • For comfort place a rolled face towel under the knee cap

Modified quadricep stretch

For some people if kneeling down is irritating for the knee you can modify the stretch.

  • Rest your leg on the chair with your foot against the back rest
  • Make sure your stance leg is far enough in front of the chair
  • Lunge forward until stretch is felt
  • Do this for 20-30 seconds.

NOTE: Long duration stretches of over a minute and more can decrease the potential for you to create strength and power in those muscles during your workout. So, prior to your workout focus on short duration stretches.


  1. Functional mobility stretch

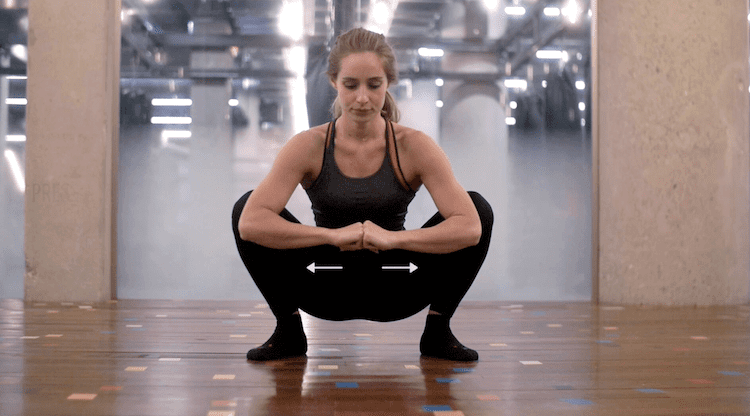
Deep squat sits are great to expand the stretch. If your symptoms are not aggravated, try deep squat sits for 30 seconds up to a minute.

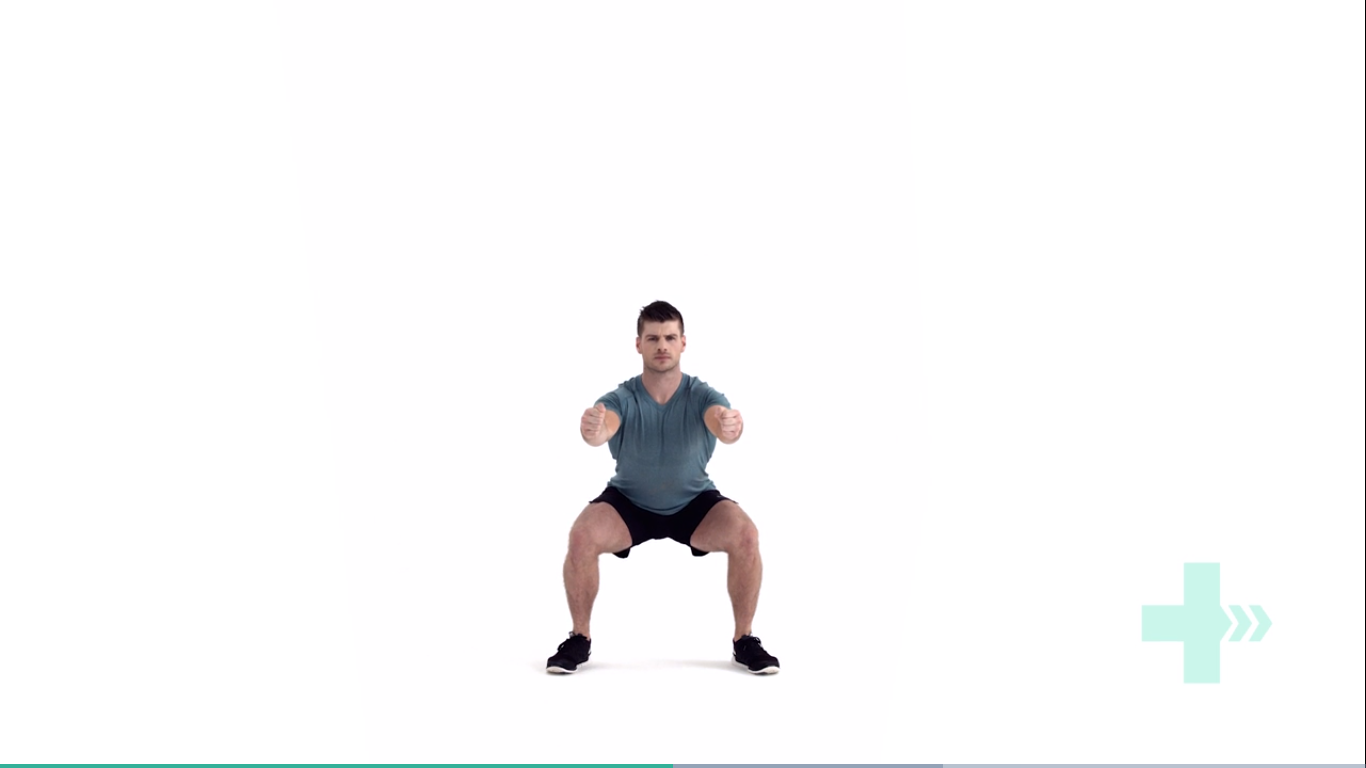
  • Stand with feet shoulder width apart
  • Point your feet out to about 45 degrees
  • Sit in to a deep squat keeping the pressure evenly distributed across feet

STEP TWO

Now that you’ve resolved the stiffness in the lateral portion of your knee, next step is to address the muscles imbalances caused by pain and swelling. That is, turning back the firing of the quadriceps muscles.

An effective way to address this, is by doing what we call close chain exercises – these are exercises done where your feet are on the ground, such as squats. Initially you want start slow and high. Mini squats are great because they allow you to strengthen your quadriceps without putting too much compressive forces into your knee. As you get comfortable, advance to a deeper squat and slowly begin to work towards building you strength by adding on weight.

Mini bodyweight squats

  • Stand behind a chair or table and place your hands onto the back rest.
  • Keeping your back straight, bend both knees into a semi-squatting position, allowing your hands to slide forwards.
  • Your hips should travel backwards as you counterbalance by leaning your chest forwards.
  • Push through your buttock and thigh muscles as you return to standing, and repeat.

Deep bodyweight squats

  1. Hold on to the dumbbell, keeping it close to your chest.
  2. Step your feet wide apart and turn the toes out slightly.
  3. Drop down into a deep squat position, keeping your feet on the floor.
  4. Control the movement back to the start position.

Caution: Avoid deep squats especially if you have ongoing grinding pain. Do not push in to pain, as this will only increase the forces and worsen your symptoms. At this point, it is highly recommended that you come in to see a physiotherapist to examine a potential underlying pathology.

Repetitive Strain Injury (RSI) Explained


RSI is typically defined as an overuse disorder- a gradual build-up of overload to nerves, tendons, and muscles arising from repetitive movements or activities. Repetitive use of the same motions leads to inflammation and damage to these soft tissues. This disorder mostly affects the upper limb- particularly the elbows, hands and wrists.


Causes

Possible causes of RSI include but are not limited to:

  • Undertaking the same and repetitive movements and stressing the same muscle groups
  • Working in cold environments
  • Assuming a sustained and/or awkward posture for prolonged periods of time
  • Undertaking a particular activity for prolonged periods of time with no rest-breaks
  • Frequent and prolonged use of vibrating equipment
  • Adopting poor postures from working at inappropriately designed workstations
  • Undertaking a motion which involves carrying and/or lifting heavy items


Symptoms

RSI leads to a gradual development of a broad variety of symptoms, which range from mild to severe in severity. RSI particularly affects the muscles and joints of your wrists, hands, elbows, forearms, shoulders, neck. Having said this, RSI can affect other areas of the body as well.

Common symptoms may include:

  • Pain
  • Tingling
  • Cramping
  • Increased sensitivity to heat and cold
  • Tenderness
  • Fatigue
  • Loss of strength
  • Throbbing
  • Soreness
  • Achiness
  • Stiffness
  • Struggling with typical activities of daily living, such as gripping and twisting motions, carrying light weights, writing, kitchen prepping, dressing, personal cares etc

You may develop these symptoms when you undertake a task repetitively for a period of time, and can settle when you stop. Symptoms may settle over a few hours or over the course of a few days. However, if left untreated or is poorly managed, a minor RSI may gradually progress to a nasty chronic injury.


Diagnosis


If you experience mild discomfort whilst completing particular activities at home or at your job, it is a good idea to see your GP or physiotherapist to talk about RSI. But an RSI is not always simple to diagnose as there is no particular clinical test for it. Your GP will enquire about your medical history, occupation and work environment, and other activities to attempt to identify any repetitive motions you undertake that may be the cause of your symptoms. A physical examination will be undertaken, where they will assess your movement, check for pain, inflammation, sensation, tenderness, strength and reflexes in the impacted body part. RSI may be triggered by specific health disorders like bursitis, carpal tunnel, tigger finger, ganglion cyst, or tendonitis (inflammation in your tendons). Your GP can refer you on further diagnostic tests such as X-rays, Ultrasounds, blood tests, MRIs, nerve conduction tests etc, to determine if these underlying disorders may be the cause of your symptoms. You may be also be referred onto a physiotherapist and acupuncturist for conservative treatment and management for mild-moderate issues. If symptoms persist, you will then be referred onto a specialist.


Management

Initial treatment options for the management of RSI symptoms is conservative. This includes:

  • Rest, Ice, Compression, and Elevation (RICE principles)
  • Taking regular breaks between tasks and looking after your posture
  • Undertaking your activities and movements with appropriate form and posture
  • Intake of Nonsteroidal anti-inflammatory drugs (NSAIDs), both oral and topical as prescribed by the GP
  • Use of cold and heat to the impacted area
  • Administration of steroid injections into inflamed joints and tendons
  • Tailored exercise prescription from physiotherapists to correct posture and strengthen and stretch affected muscles
  • Acupuncture
  • Stress reduction and relaxation training
  • Use of splints and braces to help protect and rest the affected muscles and tendons

Ergonomically appropriate adjustments to your workstation and work environment may be recommended by your physio and GP- for example resetting your desk and chair if you’re working at computer, and alterations to your equipment and activities/motions to lessen the strain and stress on your muscles and joints. Surgery may be necessary in some cases.


Prevention

Minimizing repetitive actions particularly if they involve the use of heavy machinery or vibration. Improving your working posture and work-environment as well a taking regular breaks. Employers often undertake risk-assessments when you join a company to determine that the work area is ergonomically fit, comfortable and appropriate for you. You may be able to request for an assessment if you have not had one or are having issues with your work environment

Osteoporosis


Osteoporosis is a condition which results in weak and brittle bones- to such degree that a fall or even mild stresses like coughing or bending over may result in a fracture. Bones are living tissues which are continually being broken down and replaced. However, your bones become osteoporotic when the formation of new bone does not keep up with the loss of old bone. This condition typically develops over time without any pain or other major symptoms, and is generally not diagnosed until you have sustained a fracture. The hip, pelvis, upper arm, spine and wrists are the most common structures affected by osteoporosis- related fractures.


How do you know if you have Osteoporosis?


Because there are no obvious early warning signs and symptoms, it is difficult to pre-diagnose osteoporosis. You may be unaware that you have this condition perhaps till you have one of the following:

  • Sustained a fracture from an incident more easily than you should have- like a simple fall or a bump
  • A decrease in the height of your spinal vertebrae over time
  • Change in posture – stooping or bending forwards
  • Back pain, due to a fractured or collapsed vertebra

Please see your doctor if you experience the following:

  • If you are over the age of 50 and have sustained a fracture
  • Sustained a spine, wrist, or hip for the first time
  • Sustained a fracture more easily than you should have (a simple fall or after a slight bump)


Risk factors

Key factors which may increase your risk of developing osteoporosis include:

  • Females- particularly post-menopausal Caucasian and Asian women
  • Over the age of 50
  • Excessive consumption of caffeine or alcohol
  • Smoking
  • Having a smaller or petite body frame
  • Poor physical activity levels and leading a very sedentary lifestyle
  • Family history of osteoporosis
  • Having low levels of vitamin D and poor dietary calcium intake
  • Decreasing levels of testosterone with ageing in men
  • Estrogen deficiency in women (irregular periods, early (before turning 40) or post-menopausal, surgical removal of the ovaries)
  • Use of long-term medication such as thyroid and epilepsy medications, corticosteroids
  • Having medical conditions such as gastrointestinal diseases; endocrine diseases; rheumatoid arthritis; cancer; and blood disorders


How will you be diagnosed?

Your doctor will review your signs and symptoms, family and medical history. You may be referred on for a specialized X-ray or CT scan to evaluate the bone density to help diagnose osteoporosis. Your bone density will be classified by comparing it to the typical bone density for a person of equivalent gender, size, and age.


How is Osteoporosis treated?

The treatment pathway chosen for the management of this condition is dependent on results of your bone density scan, gender, age, medical history and severity of the condition. Potential treatments for osteoporosis may include exercise, making positive lifestyle changes, vitamin and mineral supplements, and medications. Please consult your doctor for appropriate advice and treatment options.


How can Physiotherapy help?


Your physiotherapist will help you strengthen your bones and your muscles through a personalized and graduated rehabilitation program. Components of this rehabilitation program may include weightbearing aerobic exercises, resistance training using free weights/resistance bands/bodyweight resistance, and exercises to enhance posture, balance and body strength. Your physiotherapist will work with you to find activities that suit your needs and as per your physical activity level.


Piriformis Syndrome

Piriformis syndrome refers to the dysfunction of the piriformis muscle which irritates the sciatic nerve. It is characterized by deep buttock region pain that radiates down leg and foot often accompanied by pins and needles and numbness traveling along the path of the sciatic nerve.

The simplistic reason for this widely distributed pain comes down to the piriformis muscle itself – Their close proximity means that direct trauma to the buttock region or the supporting structures can result in inflammation and muscle dysfunction which can compress and irritate the sciatic resulting in referred symptoms.

Piriformis syndrome symptoms may include:

  • Localised deep buttock region pain
  • Pain with continuous sitting or standing for 15 mins or over
  • Pins and needles along the leg down to the outer foot
  • Numbness in outer leg or foot (often resolves on movements)
  • Deep squatting or bending
  • Pain on direct palpation

Anatomy


The piriformis muscle originates from the outer surface of a large fused bone of our pelvis called the sacrum. It travels adjacently and inserts into the top of the hip joint. The piriformis muscle is a very active muscle involved in stabilizing the hip and pelvis during majority of our activities (walking, running, standing, sitting or standing, turning in bed). When the piriformis muscle contracts it helps the hip rotate outwards (external rotation) and lift thigh out and up (abduct).

The sciatic nerve originates from where the very base of the spine and the sacrum join known as the lumbosacral region (lower back and saddle region). In this region five separate branches of nerves travel outside of the bony openings of the spine called the nerve roots and connect into a single large nerve – the sciatic nerve. It then travels through the pelvis deep into the buttock region close proximity the piriformis and gluteal muscles. In some individuals the piriformis muscles can travel through the piriformis muscle subjecting them to piriformis syndrome.

Diagnosis

There are no specific tests to diagnose piriformis syndrome. Diagnosis of piriformis syndrome is made by the report of symptoms and by physical exam using a variety of movements to elicit pain to the piriformis muscle. In some cases, a contracted or tender piriformis muscle can be found on physical exam.

In cases where there is underlying pathology (such as disc injury, arthritis, sacroiliac dysfunction or hip injury) resulting in true sciatica – piriformis syndrome may develop to become an additional muscular dysfunction that is required to be addressed. Because symptoms can be similar in other conditions, radiologic tests such as MRIs may be required to rule out other causes of sciatic nerve compression, such as a herniated disc.

Consultation with a physiotherapist in this case is highly recommended as they will perform a comprehensive clinical examination to identify the root cause of your symptoms.

Exercises for piriformis syndrome

Corrective exercises with a combination of strength and flexibility regimen is an essential way to treat true piriformis syndrome (without involvement of other underlying pathologies).

The exercises outlined below follow a phase-by-phase progressive regimen to strength key muscles of the hip, buttock and legs.

As you work through these exercises expect to feel some pain during and after your exercise. Pain you may feel during the exercise is an expected sign of muscle activity. Pain you may feel after the exercises is an expected sign of muscle healing and recovery. However, if you are unable to participate in the exercises due to symptom deterioration – it is highly recommended you consult your physiotherapist to rule out other potential causes.

Otherwise, to help you gauge the correct amount of pain you should expect during exercise – use this scale. The ideal range should be 2 to 5. If your baseline pain is over 6 or 7 – it is recommended that you consult your doctor for pain relief appropriate to manage your pain, followed by a consult with a physiotherapist. Your physiotherapist will be able to modify the following exercises or prescribe alternative exercises best suited based on your current level of function and symptoms.

Symptom noting – is a great way to keep track of your progress and symptom behaviour.

  • Take a diary
  • Note down pain before you begin the exercise.
  • Note down the pain rating after each exercise.
  • Note down pain at the end of the day
  • Repeat the pain recording process for the next 4-5 days
  • Examine the trend in your symptoms.

Interference with everyday tasks – Your participation or level of exertion with everyday activities may interfere with your symptoms impacting your exercise tolerance. It is therefore important to note any of these interferences’ contributory to your pain.

Phase 1 – is a beginner stage.

This phase is intended for gently priming muscle activation. It will demand your concentration on technique and compliance to change the possible compensation your body has been used to as a result of pain. This phase can last between 1-2 weeks.

Instructions:

3 sets of 10 repetitions. Hold each repetition for 8-10 seconds. Rest 10-15 seconds between sets, 30 seconds between exercises. Do this exercise 1-2 times per day.

Bridges


Lie on your back.
Bend both knees and place your feet flat on the bed.
Lift your buttocks from the bed.
Place your buttocks back on the bed.
Repeat this exercise and remember to continue to breathe properly.


Clam shells


Lie on your side with your feet, ankles and knees together.
Bend the legs a little and tighten your core stability muscles.
Keeping the feet together, lift the top knee up.
Make sure you don’t roll your body back with the movement.
Control the movement as you bring the knee back down to the starting position.


Phase 2 – intermediate stage

The intermediate phase is similar to the beginner stage with the difference of using changing elements of progression to challenge the muscles capacity further. In this stage you may choose to progress the exercises by choosing to change ONE factor:

  • Increase repetitions
  • Increase hold time
  • Increase sets
  • Add appropriate resistance

Instructions:

  • 3 sets of 10-15 repetitions. Hold each repetition for 10-15 seconds.
  • Rest 10-15 seconds between sets, 30 seconds between exercises.
  • Do this exercise 1-2 times per day.

Bridges with resistance


Tie a resistance band around both thighs, just above your knees.
Lie on your back with your knees bent and legs hips width apart.
There should be tension in the band.
Raise your hips up into a bridge, keeping the knees hips width apart.
Control the movement back down to the start position, maintaining constant tension on the band.


Clams with resistance

Lie on your side and place a band above your knees, approximately an inch or two above the knee joint.
Bend your legs a little, keeping the feet in line with your back.
Use your core stability muscles to keep the body stable.
Keeping your feet together, lift the top knee up against the resistance of the band.
Ensure you stay on your side and do not roll your hips and your body back with the movement.
Lower the knee back down, controlling the resistance.


Phase 3 – advance stage

Body weight squats

Start position is standing straight with the arms out in front and bent at the elbows, the fists should be clenched and the palms facing inwards.
Move downwards into a squat position so that the knees are aligned over the toes and the heels are in contact with the floor, make sure the back is straight.
Keep the head and chest upright and the gaze horizontal.
Hold for 2 seconds and return to the start position.


Lunges

Stand straight with your arms to the side or on your hips.
Take a large step forwards on your affected leg, then drop your hips directly down between both feet, bending your hips and knees to a 90 degrees.
Push back up to the starting position, and repeat.
Make sure you take a large enough step that your front knee does not travel over your foot, and ensure your knee travels directly forwards.
Keep your body up straight throughout the movement.


Crab walks

Place a band around your ankles and gather some tension.
Side-step keeping constant tension on the band.
Make sure you do not bring your feet too close together and keep your toes and knees pointing forwards.


Phase 4 – return to activities

Planning on running a marathon? A sports dietitian on what to eat for  long-distance running


Stretching

Do you always need to stretch the muscle? The answer is NO. While stretching is an important tool to improve muscle elasticity. You may not always need to stretch a muscle if it is NOT tight. Thus, stretching is recommended to be limited to areas you feel are TIGHT when you perform a given movement. Check the affected side and unaffected side – don’t need to stretch a muscle that doesn’t need to be stretched.

Seated piriformis stretch 

Start in a seated position.
Cross the symptomatic leg your ankle is resting on, to the opposite knee.
Apply gentle pressure to the knee as you lean forward, increasing the depth of the stretch.
Hold this position, you should feel a comfortable tension with no pain.


Pigeon stretch


Start on your hands and knees.
Cross the symptomatic leg underneath you, then lower your hips down to the ground.
Rest your body forwards on your arms.
You should feel a stretch across the buttock.


Managing your Medial Knee Pain: MCL injuries

What is it?

Although your knee has free movement going forwards and backwards, its’ sideward movements are restricted by the robust collateral ligaments on either sides of your knee. The medial collateral ligament (MCL) is situated on the inner part of your knee, but on the outside of your joint. The MCL connects the top of your shinbone (tibia) to the bottom of your femur (thighbone). It helps hold your bones together, provides stability and prevents your knee from bending sideways away from your body.

Injuries to the MCL are from the result of a direct blow to the outer part of your knee- and is most commonly seen in contact sports such as football and soccer. These injures may either over-stretch or cause a tear in the ligament. Whilst surgery may be needed in some severe cases, it is not always the go-to form of management.

Read on to know how physiotherapy can help manage your MCL related-knee pain.


Mechanism of Injury

Injury to the MCL typically occurs when a force drives the lower leg in a sideward direction away from your upper leg and body. Awkwardly landing from a height, twisting of your knee with your foot fixated to the ground, or from a direct blow to the outer part of your knee- most commonly seen in contact sports, are frequent causes of injury to the MCL.


Grading of MCL Injuries

MCL injuries are often graded using the system below:

Grade 1: Regarded as a minor injury- means that the MCL has been overstretched but not torn

Grade 2: Regarded as a moderate injury- means that there is a partial tear in MCL, and presents with some degree of instability in the knee

Grade 3: Regarded as a severe injury- means that the MCL has completely ruptured/torn, and presents with noticeable joint instability


Often 3 MCL injuries are associated with concurrent medial meniscus and ACL ligament damage, which may need surgical intervention. But, the good news is that most MCL injuries may be treated well with conservative physiotherapy management. It usually takes between 2-8 weeks for Grade 1 and 2 MCL injuries to heal, and a graduated rehabilitation programme is highly commended for prevention of future injury.


Signs and Symptoms

Because injury to the MCL may present with similar symptoms as with other knee injuries such as ACL damage, it is vital to have a medical professional such as your physiotherapist evaluate your injury.

Common symptoms of an MCL injury may include:

  • Tenderness and pain along in the inner part of your knee
  • Swelling in the knee
  • Experience catching and locking sensations in the knee joint
  • A ‘pop’ sound at the time of injury
  • Actual or feeling of giving way of the knee (often indicate grade 2 or 3 injury)


Diagnosis

Your physiotherapist will discuss your injury and its presenting symptoms, past medical history (including a history of any prior knee injuries) and will also undertake a thorough physical examination. During the physical examination, your physiotherapist will assess the structures of your injured knee and compare them to the non-injured side. The range of motion, strength and stability of your knee will be assessed. You may be referred on for imaging such as X-rays and Ultrasounds to help aid the diagnosis. For more severe MCL injuries, and if your symptoms do not resolve with conservative physiotherapy management, you may be referred onto a specialist who may consider referring you for an MRI to get a deeper look at your knee.


Management

The management options for MCL injuries will be dependent on the severity of the injury. In the initial stages of injury, management is focused on controlling swelling and pain, whilst allowing your body to initiate healing processes via inflammation. This is typically achieved through the P.O.L.I.C.E. principles (Protect, Optimal Loading, Ice, Compression and Elevation).

Over the counter medication such as ibuprofen and paracetamol may be taken to reduce pain. Other stronger painkillers and NSAIDs may be prescribed by your doctor to help reduce swelling and inflammation as well.

After assessing your knee, your physiotherapist will frame a rehabilitation programme with exercises tailored to your needs. The purpose of physiotherapy is to help restore your knee’s range of motion, stability and strength, which in turn will then allow you to safely return to your usual day-to-day and sporting activities as soon as possible.

Management of most MCL injuries usually only involves knee bracing and physiotherapy treatment. However, in some cases, surgery may be recommended. Particularly if there is damage to more than one ligament or structure in your knee or if you continue to experience instability in spite of physiotherapy.

EASY STRETCHES DESK STRETCHES

Sitting at a desk working, studying or surfing the net for long hours at a time makes it extremely difficult to maintain proper posture. That’s because our bodies are not designed for hours of idle sitting. So as the clock gets ticking many of us have the tendency lean forward, slouch our shoulders and hunch our backs.

Unfortunately, this increases pressure on multiple areas in your body. This explains why most of us experience pain and stiffness in our neck, shoulders, back and in some cases your tailbone!

So what do I need to do you ask?

The answer is simple, STAND, MOVE AND STRETCH!

It sure does sound easier said than done, especially if you are pressed with time to complete set work tasks. BUT the good news is that stretching or moving is a buildable habit that can be easily implement as you work. It doesn’t take long!

For starters set an alarm to take micro 2–3-minute break for every 20-30 minutes. Use this time to stand up, walk over to a colleague, go for a toilet break, drink water or make yourself tea or a coffee.

Or try out these simple easy stretches while you sit or stand at your desk

So let’s get started!

SPINAL TWIST:

  • Sit up tall, relax your shoulders
  • Cross one leg over the other, then place your opposite elbow on your top thigh.
  • Take a deep breath and as you exhale slowly twist your body (not your neck) and look over your shoulder.
  • Hold for 10 seconds.
  • Slowly return to resting position and repeat on the other side.

BACK ARCHES

  •  Sit tall, set your feet flat on the ground hip-width apart.
  • Rest your hands behind your hips, then slowly arch your back as you gently tilt your head back.
  • If you experience pain or discomfort in your neck or tingling in your arms – do this stretch without head tilt.
  • Hold for 10 seconds, return to start and repeat

ARM REACHES 

  • Sit up tall with your feet flat on the ground.
  • Interlace your fingers and stretch your arms straight as you turn your palms up to the ceiling.
  • Hold this position for 10 seconds and repeat

SHOULDER CIRCLES

  • Sit or stand up tall, feet hip width apart
  • Relax your arms and shoulder, begin by rolling your shoulder backward in a circular motion.
  • Do this 5 times, repeat forward circles

NECK CIRCLES

  • Sit or stand up tall, with feet planted flat on floor
  • Slowly begin to roll your head in a clockwise position
  • Do this 20 seconds, then repeat in a counterclockwise direction

CHEST STRETCH


  • Stand close to wall or a door frame
  • Place your forearm in a 90-degree angle at shoulder height.
  • Take one step forward on the leg closest to the wall and slowly rotate your chest away until you feel a stretch across your chest.
  • Do not hunch or round your shoulders.
  • Hold the stretch for 20 seconds, repeat
  • Do this both for both sides

BACK EXTENSIONS

  • Stand with your legs at hip width apart and straight.
  • Place your hands on your hips.
  • Lean your body backwards, trying to arch in the lower back as much as you can, lifting your chest up towards the ceiling.
  • Try to avoid allowing your hips to swing forwards too far.
  • Hold this position for 10 seconds, return to start position & repeat 5 times.

 FLOOR REACHES

  • Sit on a chair with upright posture
  • Slowly bend forward to plant your hands on the floor.
  • Hold for 10 seconds, return to start

SHOULDER BLADE SQUEEZE

  • Start in an upright position.
  • Practice bringing your shoulder blades back and down.
  • Picture gently drawing your shoulder blades towards the centre of your lower back.
  • This is a subtle movement, ensure you do not over strain your shoulder blades when performing this action.
  • Hold for 10 seconds, repeat 3-5 times

SHOULDER BLADE STRETCH

  • Clasp your hands together and hold them in front of your body.
  • Push your arms as far forward as you can whilst rounding your shoulder blades.
  • Gently drop your chin down to your chest.
  • Hold this position while you feel a stretch between your shoulder blades.

 WRIST STRETCHES

  • Stretch out your arm straight in front of you with your palm facing away
  • Use your opposite hand to gently pull your palm back
  • Hold for 5 seconds, repeat with your palm facing your body

Dealing with Rheumatoid Arthritis

Rheumatoid arthritis (RA), a chronic inflammatory condition associated with swelling, pain, fatigue, and joint deformity. Although there are no known cures for this condition at present, a combination of treatments are available to help manage your symptoms. RA is the 2nd most common form of arthritis after osteoarthritis and is known to affect 1–2% of New Zealand’s population.


Signs and Symptoms

RA may develop very quickly or gradually over time, with its signs and symptoms, as well as the severity varying from one person to another. This condition is associated with episodes of remission and flare ups, with or without apparent triggers.

Other symptoms may include


  • Swollen, tender joints- (often accompanied by warmth and redness)
  • Joint pain
  • Joint stiffness which worsens in the mornings and after a period of inactivity
  • Fever, loss of appetite weakness, and fatigue
  • Muscle pain
  • Changes to the skin and nails

In the early stages of RA, you may notice its impact on your smaller joints- especially in your toes and fingers. And as this condition develops, your symptoms typically branch out to the bigger joints- your shoulders, ankles, knees, wrists, hips and elbows. Symptoms are likely to affect your joints bilaterally. Over time, RA also causes joints to deform and shift out of place.

Because RA is a systemic condition, it is estimated that approximately 40% of the RA population may experience symptoms and signs other body systems than the joints. These may include:

  • Kidneys, lungs, heart
  • Skin, eyes, mouth
  • Bone marrow
  • Nerves and blood vessels


Causes and Risk Factors

Your immune system is designed to help protect your body from infection and disease. However, in RA, changes occur in your immune system that (for poorly understood reasons), causes it to mistakenly attack the healthy soft-tissues of joints resulting in pain, swelling and inflammation. Because of this ongoing process, over time damages to the lining of your joints and other soft-tissues may lead to bone erosion and joint deformity. It can also have an impact on your heart, lungs, nerves, eyes and skin.

One can get RA at any age, although it is more probable to develop in those in the age bracket of 25-50 years old. Though rare, under 16s may also develop Juvenile RA or Still’s disease.

Risk factors for the development of RA include:

  • Family history of RA
  • Age bracket of 25-50 years old
  • Smoking
  • Women are more likely to develop RA than men
  • Obesity


Diagnosis


At present there is no single test to confirm a clinical RA diagnosis. It is often difficult to differentiate this condition in its initial stages from other forms of connective tissue inflammation (fibromyalgia, lupus, gout etc.).

Your doctor will get your full medical history (as well as any familial history of RA), discuss your signs and symptoms, undertake a physical assessment- particularly of your joints, and refer you on for imaging and blood tests. X-rays may help evaluate RA progression in your joints over time, whilst MRI and ultrasound imaging may help evaluate the severity of RA in your body. The blood test will evaluate your level of anti-bodies and proteins (including the rheumatoid factor protein that is present in approximately eighty percent of the RA population), and markers of inflammation.


Management

At present, though there is no cure for RA, a range of treatments are available which may help slow its’ progression and reduce pain and inflammation, minimise and/or prevent joint damage and maximise joint movement.

A combination of prescribed medication as advised by your doctor and other treatment options as noted below are recommended:

  • Cease smoking if you are smoker
  • Physiotherapy will help improve and maintain your joint range of motion, increase your muscle strength, and decrease your pain. Additionally, your physiotherapist or occupational therapist will be able to teach you ways of using your body efficiently to reduce stress on your joints
  • Finding a balance between rest and activity
  • Use of heat and cold packs to help ease pain and inflammation
  • The use of splints or braces for joint support as needed
  • Hydrotherapy- exercising in water reduces the pressure on your joints, whilst the warmth of the water will relax your muscles and help lessen your pain.
  • Seeking regular medical advice and check-ups to monitor your RA symptoms and the progression of the condition
  • Adopting a healthy and active lifestyle

Carpal Tunnel Syndrome – What is it?

Have you been experiencing pain, pins and needles or numbness in your wrist and hands, especially after using the keyboard, chopping up a few veges, reading a book, using your mobile phone or with driving?

If you answered yes – then you are most likely to have Carpal tunnel syndrome.

What is Carpal Tunnel Syndrome?

Carpal tunnel syndrome is the most common condition in the arm. It is caused by compression of one of the three major nerves in the forearm – the median nerve, which travels through the wrist into the hand and fingers. Entrapment of the median nerve usually due to inflammation, occurs in the wrist commonly resulting in tingling of the wrist and hand (in some cases forearm), numbness, pain and weakness of the hand.

Signs and Symptoms

Often unrelated to a specific incident or an injury, symptoms of carpal tunnel syndrome usually develop gradually overtime. Symptoms may be worse in the morning and night. Many people find that the frequency and duration of symptoms increase as the conditions worsen.

Signs and symptoms may include:

  • Tingling, numbness or burning sensation of the thumb, index, middle and ¾ of ring fingers of the hand
  • Electric shock like radiating pain through the hand into thumb, index, middle and ¾ of ring finger
  • Weakened grip, loss of dexterity and fine movements such as picking up a hair pin, buttoning clothes.
  • Hypersensitivity or in other cases lessened sensation of hand to pressure, heat or cold temperatures
  • Swollen wrist

Let’s take a closer look at the anatomy!

As its name suggests – a group of small bones aka carpal bones form a tunnel like passageway in the wrist (palmar view). This unique architectural design allows for the tendons of the forearm muscles and the all-important median nerve to pass through the narrow tunnel through the wrist and into the hand and fingers, supplying sensation and motor function.

Causes

Common causes and risk factors that increase the likelihood of carpal tunnel syndrome include:

  • Repetitive wrist & hands movements – during work related tasks or leisure activities may irritate the tendons in the wrist, resulting in inflammation that irritates the nerve.
  • Wrist or hand injury – recurring sprains, swelling and reduced wrist movements reduces the space in the carpal tunnel
  • Pregnancy and menopause – hormonal changes can increase fluid retention in body increasing pressure in the carpal tunnel compressing the median nerve
  • Genetic history – petite
  • Medical conditions (rheumatoid arthritis, diabetes, hyperthyroidism)

Interesting facts about carpal tunnel syndrome

  • Women are 3 times more susceptible to develop carpal tunnel syndrome than men. This can be due to hormonal changes during pregnancy or menopause and also because women tend to have smaller carpal tunnels.
  • Not all fingers are affected. Median nerve supplies movement and sensation in the thumb, all fingers except the little finger.
  • Computers/keyboard are not the only reasons to blame – repetitive nature of any work related or leisure word increases risk of developing carpal tunnel syndrome

Diagnosis

Carpal tunnel syndrome is fairly easily diagnosed by your physiotherapy, doctor or a hand therapist.

Your health practitioner will gather information on your general health, history and nature of your symptoms. They will then carefully conduct a thorough clinical assessment to assess the movements of your hand and wrist, strength and use a collection of tests in effort diagnose your symptoms. In some cases, your therapist may examine your neck, shoulders and arms to rule out other potential causes.

You may often hear the physiotherapist or hand therapist mention that they want to conduct a functional assessment – A functional assessment is activity specific, where the therapist will watch you perform the activity that aggravates your symptoms the fastest. For example, if using a keyboard is generally when you feel your symptoms start – the therapist may observe you performing the very task to examine your overall posture.

Referral to scans or nerve conduction tests may be arranged by your doctor or therapist depending on the severity or complexity of your symptoms.

Scans

Referral to scans or nerve conduction tests may be arranged by your doctor or therapist depending on the severity or complexity of your symptoms.

  • Xray – provides key information on bone health, when dealing with a potential injury, or arthritis
  • Ultrasound – can examine potential soft tissue injury or inflammation compressing the median nerve
  • MRI – this advanced imaging provides in depth review of your wrist and hand. Usually arranged by your doctor or a specialist
  • Nerve conduction study – studies the electrical activity of the median nerve. This test will help you doctor examine the severity of your problem.

Treatment

In most cases, carpal tunnel syndrome will progressively worsen overtime. So, the key is early intervention!

Conservative management

Mild symptoms can be easily managed with a conservative approach.

  • Wearing splints or braces – keeps your wrist straight to prevent repetitive use of hands, thus reducing pressure or inflammation in the carpal tunnel.
  • Non-steroidal anti-inflammatory medications – such as celecoxib and ibuprofen as prescribed by your doctor may decompress the median nerve by reducing the inflammation in your body and wrist.
  • Activity modification: your physiotherapist will play an important role in providing you with advice around to modifying your activities to reduce your symptoms. They will also prescribe you with effective stretches and exercises to help manage your symptoms while safely aiding your recovery.
  • Steroid injections: your physiotherapist or doctor may recommend a ‘cortisone’, also known as a ‘corticosteroid’ injection to control your symptoms. It contains an anti-inflammatory substance that is injected into your carpal tunnel. The effects of the steroid injection may be temporary and can vary person to person depending on many factors (cause of symptoms, stage of your condition).

In mild to moderate cases, the effects of injection may last between 3-6months.

Surgical intervention

If non-surgical approaches have failed to relieve your symptoms, surgery may be required.

By this stage you would have consulted an orthopaedic surgeon. Your surgeon will thoroughly examine your overall health, symptoms, results from the scans and the nerve conduction study to help you decide on the best treatment approach.

If you decide to undergo surgery – the surgical procedure your surgeon will perform is called ‘carpal tunnel release’.

Recovery and outcomes

  • After your surgery you may be given a splint or a brace for a period of time specified by your surgeon. While in the splint or brace you will be encouraged to move your fingers to prevent stiffness and swelling.
  • Expect to experience minor pain, stiffness and swelling for a couple of weeks to months after your surgery. Pain medications provided by your surgeon must be taken as prescribed.
  • You may be encouraged to see your physiotherapist, who will work closely with your surgeon to help meet post-operative outcomes.
  • You will have regular 6-8 weekly follow ups with your surgeon as required to assess your healing and discuss gradual return to light activities and return to work.
  • If you have underlying medical conditions such as arthritis, except that your recovery may be slower than otherwise expected. It is important that you follow post-operative protocols your surgeon, doctor and physiotherapist recommend.

Meet Your Body Parts!

Here are definitions of common terms for body parts you may hear your doctor or physio use!


Ligaments

Ligaments are cordlike extensions that serve to connect ends of two bones to form a joint. They are made up of strong, durable, slightly elastic bandlike structures comprised of collagen fibres. The structural make up of ligaments is advantageous providing joint stability by limiting excessive movement.

What are Ligaments? (with pictures)

Tendons

Similar to ligaments, tendons contain densely packed bundles of tough collagen fibres that hold muscles together to the bone. They are located at the ends of every muscle in the human body. Bound together in tight sheaths they are made to withstand tension and transmit forces exerted by the muscle to the bone to cause movement.


10 Facts About Tendons | Physio Direct - Rural Physio at Your Doorstep

Muscles

Human body is made up of over 600 muscles categorised into three different types – cardiac, smooth and skeletal muscle.

  • Cardiac muscle – is only found in the walls of the heart. Its contractions help propel blood through the blood vessels to all part of the body.
  • Smooth muscle – is found mainly in the lining of internal organs (except the heart) including digestive and uninary tract organs, blood vessels. Smooth muscle works to transport substances through the organs by alternately contracting and relaxing.
  • Skeletal muscles – Skeletal muscles are the most abundant type of muscles that form the flesh of the body. They are attached to bones of the skeleton by tendons. They are responsible for voluntary movements of body. Facial expression, mobility, postural control and breathing are some of the movements we observe when skeletal muscles are subjected to voluntary control.


Muscle types — Science Learning Hub

Bones

Skeletal system of the human body is made up of 206 bones. Bones are most involved in providing an architectural framework by providing body shape, support and protection of vital organs and for locomotion. Besides these functions, bone is a reservoir for mineral and fats as a source of stored energy and formation of blood cells. Bones are classified by their shape as long, short, flat and irregular. They are connected by ligaments to form joints.

Let's learn about bones | Science News for Students

Cartilage

There are three different types of cartilage found in the human body – hyaline, elastic and fibrocartilage. Hyaline cartilage is the most common cartilage in the human body. It covers the ends of most bones at movable joints, connects ribs to the breastbone, forms the voice-box and nasal passages. It  consists of high water content that provides resilience to withstand great compressive forces found predominantly in joints.


What Is Cartilage?

We Want You To Understand Your Pain

What is pain?

Pain is the brain giving out a message to protect you . It is part of our bodies natural defense system.

When an event occurs that we need protecting from, our brains response is to increase our pain. Living things detect and respond to stimulus. | Characteristics of living  things, Natural hairstyles for kids, Characteristics

Example: Putting a hand on a hot pan. You feel pain, which is the brain giving you a warning signal to move your hand away.

Pain is all about protection, never about measuring the condition of the tissues in the body.

In this instance we experience a high level of pain to prevent a bigger injury eg. causing a burn.

This is our bodies way of protecting us

So what is happening in our brain?

  • We as human beings are amazingly adaptable. The longer we have pain, the longer our brains learn to produce pain.

  • It hurts in the tissues (back, knee, hand), but the problem is in the nervous system. There is an adaptation within our nervous system.

Long term pain or Chronic pain

Chronic pain is defined as persistent or recurrent pain lasting longer than 3 months

If you have had pain for more than 3 months, your system is now overprotective. Your nervous system and immune systems have learnt.


Movement is medicine: why exercise therapy reduces chronic pain - Hinge  Health


  • With chronic pain the buffer size is increased- therefore pain comes on quicker than before.

  • You get pain when you are not anywhere near being in danger.

Management of chronic pain:

  • Identify why your brain is protecting you – fear, anxiety, quality of movement, posture, injury

  • Reduce the size of your buffer – desensitization, reassurance, progressive load management

  • Understand your pain- know that it may not go completely, but can become more manageable

Medication:

  • Depending on the type of pain you are experiencing, painkillers/NSAID’s may be beneficial in the short term – speak to your GP/pharmacist

  • Note: the research does not show good outcomes for the long-term use of medication to treat chronic pain.

Occupational Therapy:

  • If you have been off work because of your pain – try to return to work asap. An OT can discuss and plan a gradual return to work plan for you

  • They can also assist by providing aids to helps with daily tasks such as getting out of bed, or putting on shoes.

Physiotherapy:

  • There is no quick fix for persistent pain. We can help guide you along your journey to recovery

  • With persistence and hard work you can learn to adapt and cope with your pain

  • Movement is king – it is critical for retraining the system

  • Movement gradually suppresses the pain system.

  • Finding any form of exercise or movement that you enjoy and gradually increasing the volume over time

  • Moving regularly- on your good days and your bad days

Self Help:

  • Meditation or mindfulness – Apps such as Headspace or Calm are easy to use and will guide you through the process

  • The Pain ToolKit