fbpx
Your first step to recovery

EASY STRETCHES DESK STRETCHES

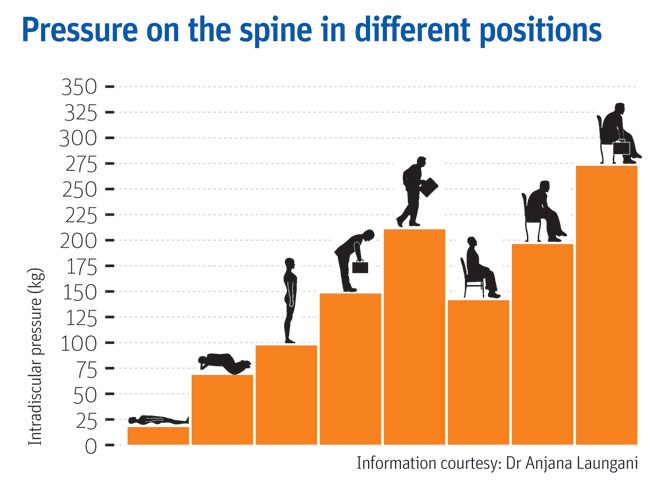
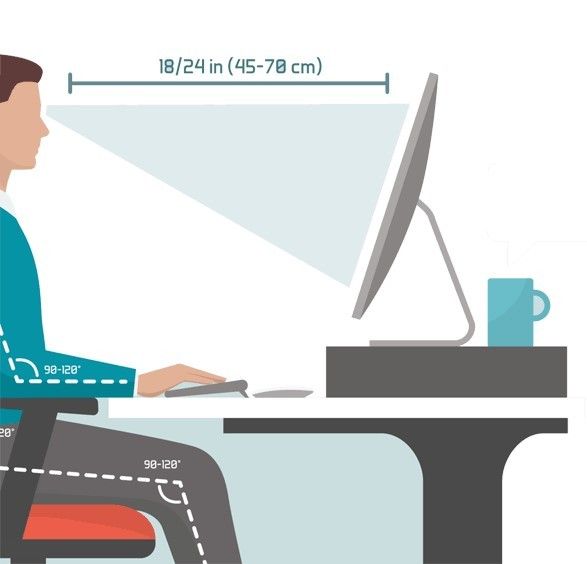
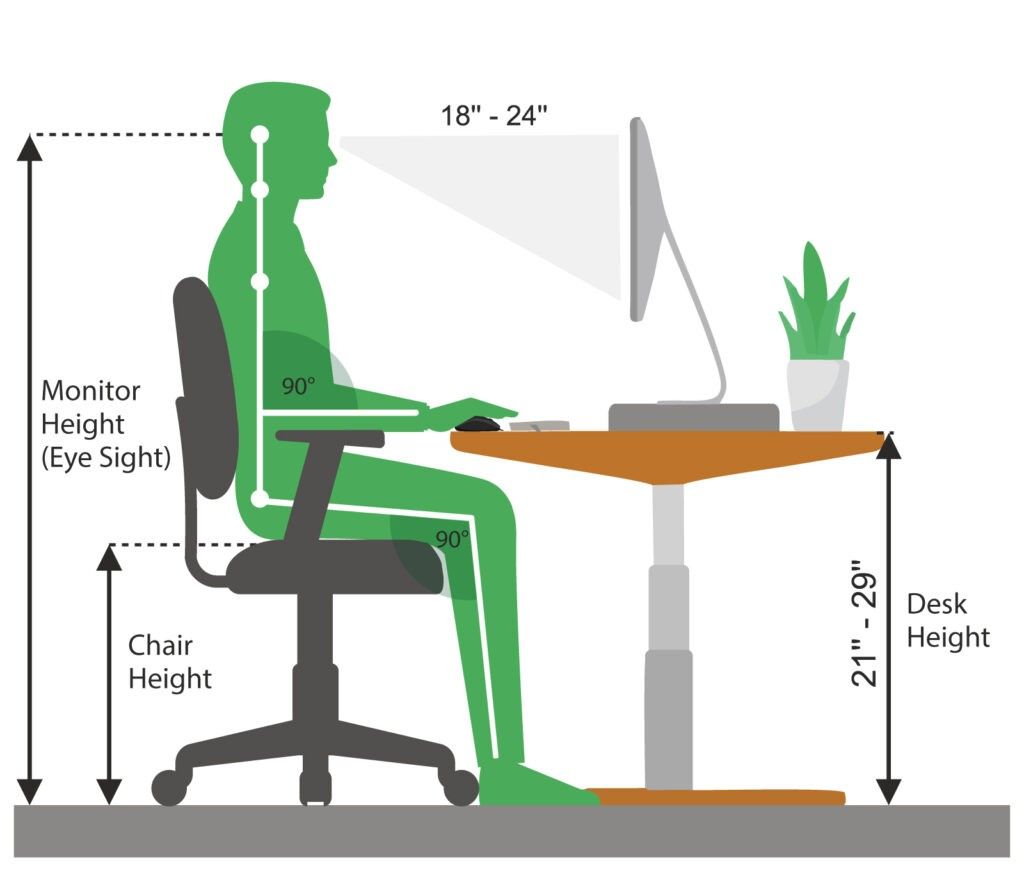
Sitting at a desk working, studying or surfing the net for long hours at a time makes it extremely difficult to maintain proper posture. That’s because our bodies are not designed for hours of idle sitting. So as the clock gets ticking many of us have the tendency lean forward, slouch our shoulders and hunch our backs.

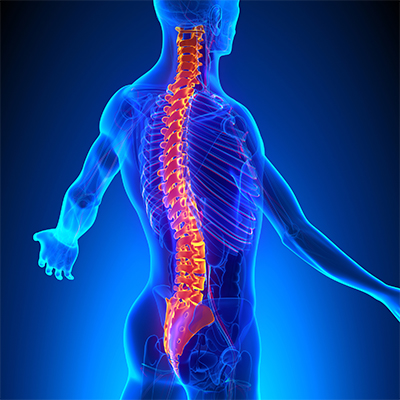
Unfortunately, this increases pressure on multiple areas in your body. This explains why most of us experience pain and stiffness in our neck, shoulders, back and in some cases your tailbone!

So what do I need to do you ask?

The answer is simple, STAND, MOVE AND STRETCH!

It sure does sound easier said than done, especially if you are pressed with time to complete set work tasks. BUT the good news is that stretching or moving is a buildable habit that can be easily implement as you work. It doesn’t take long!

For starters set an alarm to take micro 2–3-minute break for every 20-30 minutes. Use this time to stand up, walk over to a colleague, go for a toilet break, drink water or make yourself tea or a coffee.

Or try out these simple easy stretches while you sit or stand at your desk

So let’s get started!

SPINAL TWIST:

  • Sit up tall, relax your shoulders
  • Cross one leg over the other, then place your opposite elbow on your top thigh.
  • Take a deep breath and as you exhale slowly twist your body (not your neck) and look over your shoulder.
  • Hold for 10 seconds.
  • Slowly return to resting position and repeat on the other side.

BACK ARCHES

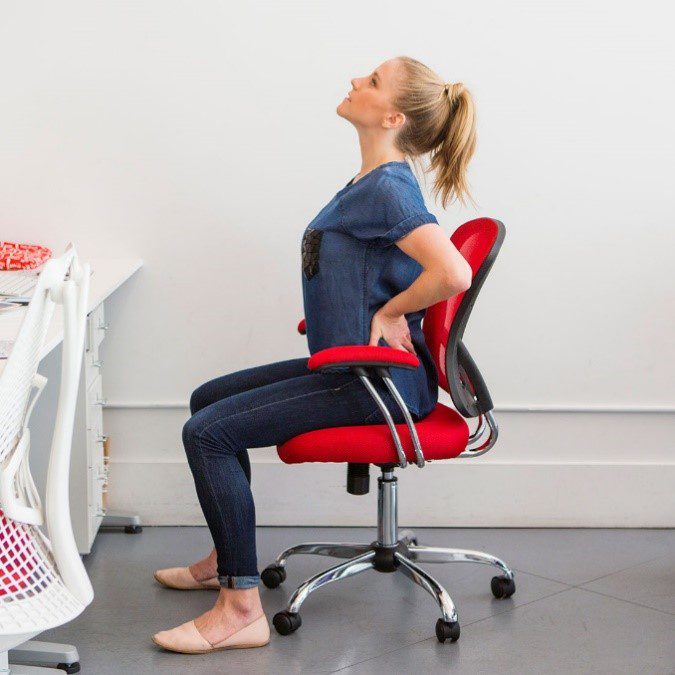
  •  Sit tall, set your feet flat on the ground hip-width apart.
  • Rest your hands behind your hips, then slowly arch your back as you gently tilt your head back.
  • If you experience pain or discomfort in your neck or tingling in your arms – do this stretch without head tilt.
  • Hold for 10 seconds, return to start and repeat

ARM REACHES 

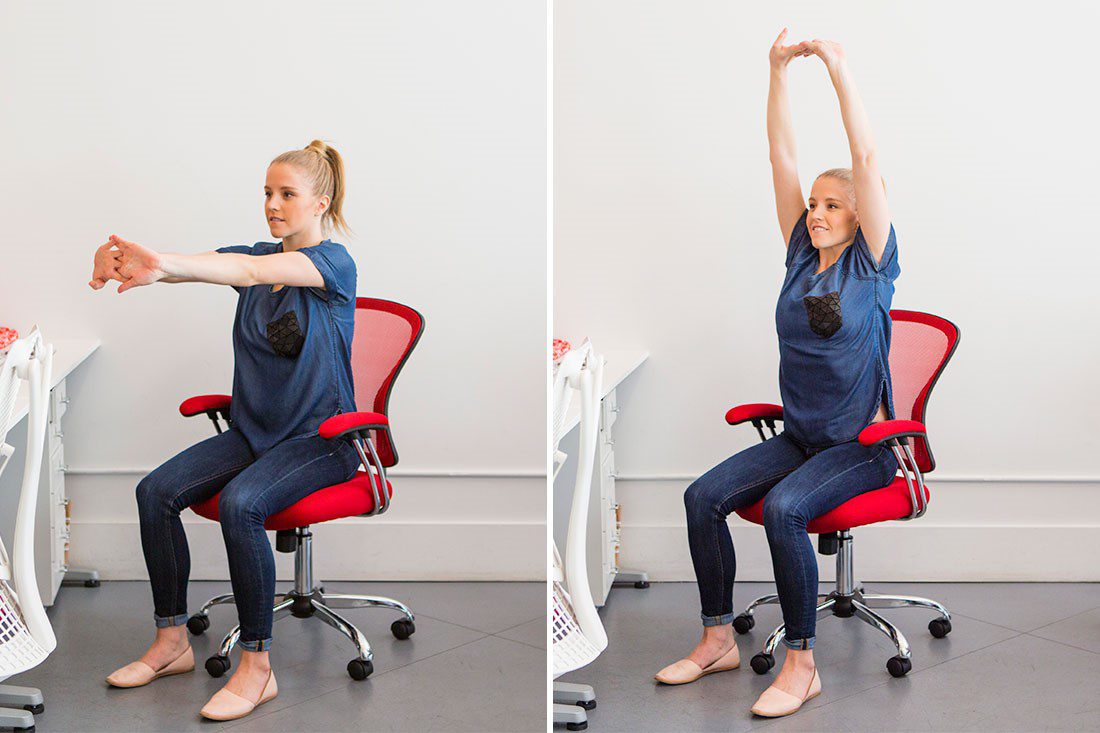
  • Sit up tall with your feet flat on the ground.
  • Interlace your fingers and stretch your arms straight as you turn your palms up to the ceiling.
  • Hold this position for 10 seconds and repeat

SHOULDER CIRCLES

  • Sit or stand up tall, feet hip width apart
  • Relax your arms and shoulder, begin by rolling your shoulder backward in a circular motion.
  • Do this 5 times, repeat forward circles
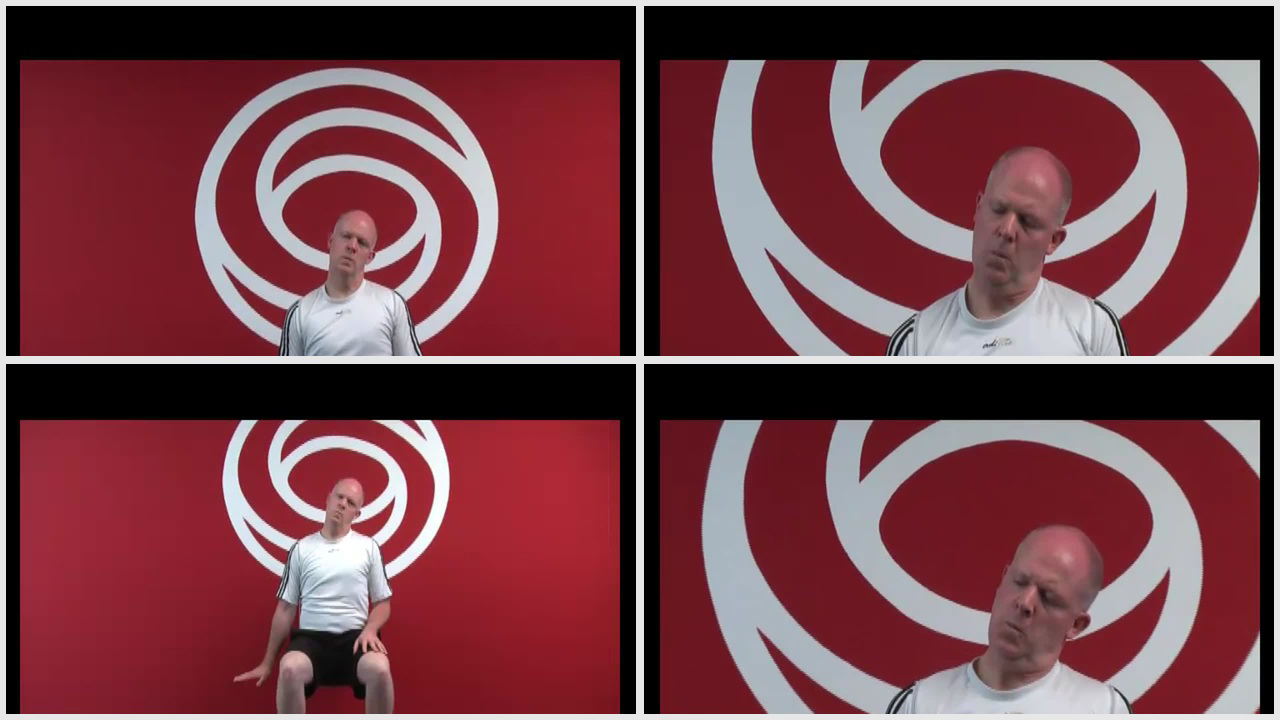
NECK CIRCLES

  • Sit or stand up tall, with feet planted flat on floor
  • Slowly begin to roll your head in a clockwise position
  • Do this 20 seconds, then repeat in a counterclockwise direction
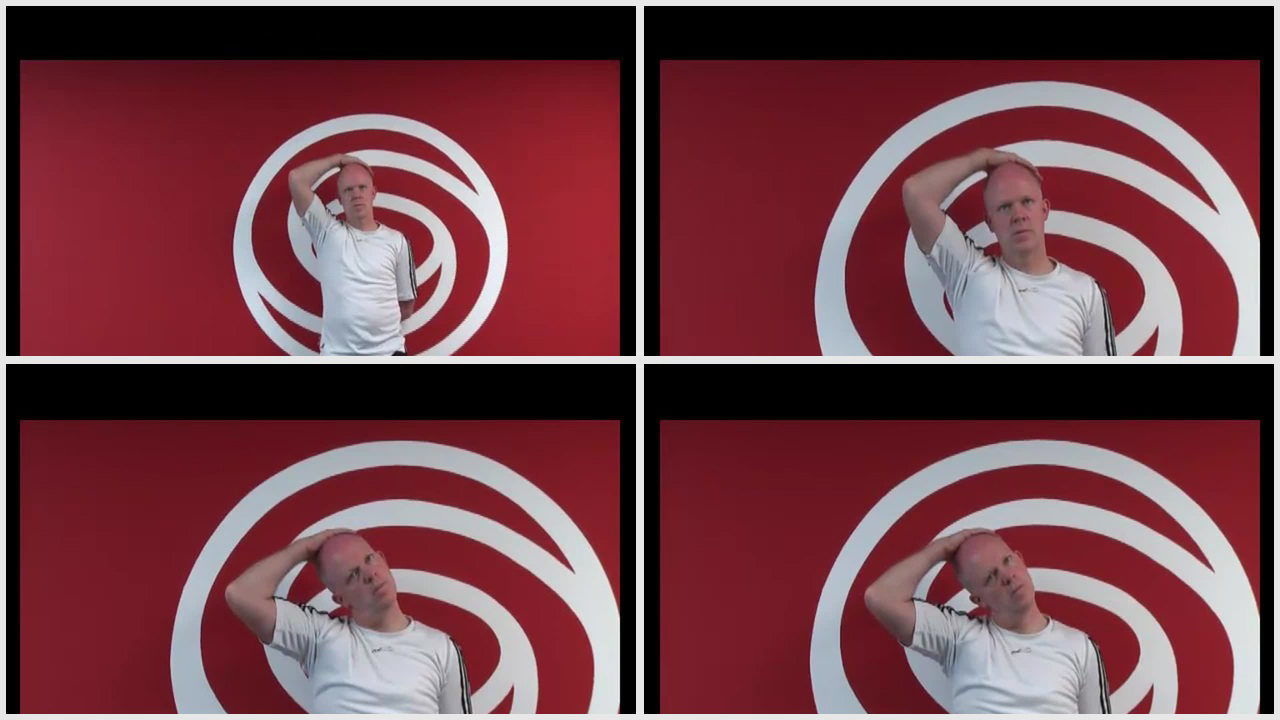
CHEST STRETCH


  • Stand close to wall or a door frame
  • Place your forearm in a 90-degree angle at shoulder height.
  • Take one step forward on the leg closest to the wall and slowly rotate your chest away until you feel a stretch across your chest.
  • Do not hunch or round your shoulders.
  • Hold the stretch for 20 seconds, repeat
  • Do this both for both sides

BACK EXTENSIONS

  • Stand with your legs at hip width apart and straight.
  • Place your hands on your hips.
  • Lean your body backwards, trying to arch in the lower back as much as you can, lifting your chest up towards the ceiling.
  • Try to avoid allowing your hips to swing forwards too far.
  • Hold this position for 10 seconds, return to start position & repeat 5 times.

 FLOOR REACHES

  • Sit on a chair with upright posture
  • Slowly bend forward to plant your hands on the floor.
  • Hold for 10 seconds, return to start

SHOULDER BLADE SQUEEZE

  • Start in an upright position.
  • Practice bringing your shoulder blades back and down.
  • Picture gently drawing your shoulder blades towards the centre of your lower back.
  • This is a subtle movement, ensure you do not over strain your shoulder blades when performing this action.
  • Hold for 10 seconds, repeat 3-5 times

SHOULDER BLADE STRETCH

  • Clasp your hands together and hold them in front of your body.
  • Push your arms as far forward as you can whilst rounding your shoulder blades.
  • Gently drop your chin down to your chest.
  • Hold this position while you feel a stretch between your shoulder blades.

 WRIST STRETCHES

  • Stretch out your arm straight in front of you with your palm facing away
  • Use your opposite hand to gently pull your palm back
  • Hold for 5 seconds, repeat with your palm facing your body

Pressure on the Spine in Different Posture

Did You Know?


Low back pain is a common health problem which affects up to 80% of the population at some stage in their life.


In New Zealand ACC spends in excess of $130 million a year treating back pain related injuries.

Most back pain occurs between the ages of 25 and 60, and most typically in the 40s.


In an era of smart devices, posture has never been more important or harder to achieve. As technology continues to grow, sitting at a desk on a computer or on our phones is becoming more prevalent at work. Having a sedentary desk job can result in sitting for around 8 hours a day. This position actually increases the load on your spine more than standing. Spinal pressure “sits” around 140mm pressure. This pressure usually does not hurt the back right away however, builds up over time and can even change the structure structure of your spine. So, if you slouch then spinal pressure increases to 190mm; add some weight and you’ve put 275 pounds of pressure on your spine.


A compromised spine constricts your blood vessels and nerves, causing problems with your muscles, discs, and joints. And all of these problems can lead to headaches, fatigue, and even breathing problems. Your back is a delicate machine. When one part falls out of alignment, it can affect everything setting off a domino effect and wreak havoc throughout your back and body.


Below is a graph showing different postures and the pressure it exerts on the spine;


But, remember: While you may feel comfortable and supported in your chair and find a perfect sitting posture, staying in the same position for long periods is not healthy for your spine. Varying your postures by occasionally standing and moving around for at least a few minutes each half hour will help keep your spinal joints, muscles, tendons, and ligaments loose and pain free.


Stand Up for Your Spine

If you don’t have a sit-stand desk, you can still combat “sitting disease” and protect your spine. Consider these tips:

  • Do some work standing at a high table or counter.

  • Use a lumbar roll behind your back when sitting to improve seated posture

  • Set a timer on your computer for a stand-and-stretch break every 30 minutes.

  • Exercise to assist in improving body weight to lessen additional load on the spine

  • Strengthen the core to provide additional support

The focus is simple: Reduce your sitting throughout the day. But, remember that varying postures is best for your back and neck, so do not go the opposite extreme and never sit. Alternating sitting, standing and movement throughout your day is the best way you can keep your spine safe and body healthy—at work and beyond


Still having back pain?

Schedule an initial assessment with one of our Physiotherapists so they can determine the root of the problem.  During this assessment your physiotherapist will be able to decide whether your pain is a source of nerve root irritation, discogenic, postural related, or musculoskeletal.  After arriving with the consensus of the problem, we will be able to use many techniques to relieve the back pain.  These include: manual therapy, therapeutic exercise, and postural recommendations.


To find your nearest Physio Fusion clinic and book an appointment call 09 6266186 or visit our website https://physiofusion.co.nz

Do You Have a Healthy Work Station Set Up?

An ergonomically correct workstation has all the best practices to help maintain a healthy posture and improve your health and productivity.

Here are a few helpful tips;

1. Set up your screen

Adjust the monitor height so that the top of the screen is at—or slightly below—eye level. Your eyes should look slightly downward when viewing the middle of the screen. Position the monitor at least 20 inches (51 cm) from your eyes—about an arm’s length distance. If you have a larger screen, add more viewing distance.


2. Set up your chair

  • Height – You should be able to sit with your feet flat on the floor and your thighs roughly parallel to the floor. If you require a taller chair in order to reach the floor you can use a foot rest to ensure you achieve the right angle.

  • Backrest Recline and Tilt – Research has shown that a reclined seat (at least 135 degrees back)  significantly reduces the pressure on your back, and is particularity beneficial for people with back

  • Lumbar support – the shape of the backrest should have a natural curve to support your lower back.

  • Arm rests – Look for armrests that are not just height adjustable and support the entire length of the forearms.


3. Adjust your Desk Height

  • Your legs should fit comfortably under the desk if you are sitting with your feet flat on the floor: you should have enough space to cross your legs.

  • The angle between your forearm and upper arm should be between 90 degrees and 110 degrees while your arms are at rest on the desk.

  • Make your desk organized using storage accessories i.e. Document holders

  • Use an ergonomic mouse pad; to keep your wrists supported.


4. Organizing your Desk space

Organize all the items on the workstation according to their priorities and assign them to the proper ergonomic reach zones.

  • Primary Zone: High use items, easiest access

  • Secondary Zone :Medium use items, comfortable reach

  • Third Zone: Low use items, reduction in efficiency

:sparkles: MOVEMENT IS KEY :sparkles:

Its a simple action step, but mighty! Get up out of your chair and take frequent posture breaks!

When we sit in one position for hours without moving, our performance slowly starts to deteriorate, our body slows down, static loading takes over our muscles and we actually get fatigued even when we aren’t putting in any physical effort. However, when you consciously integrate these microbreaks into your day, you’re giving your body a much-needed refresher and an opportunity to wake up your muscles and replenish blood flow. Research has shown that movement can also help with creativity, or get you ‘unstuck’ so you can approach your work with a different or fresh perspective and energy.

If you think your desk set up could be better, or want us to have a quick look we can do this via a video call. Book in for an appointment www.physiofusion.co.nz or give us a call on (09) 626 6186

Do you experience Cervicogenic Headaches?

What on Earth is a cervicogenic headache??

Headaches happen for lots of reason and can be cause by several sources- both primary and secondary. Once major “red flags” are ruled out, understanding the type of headache is important in order to have it properly addressed.

A cervicogenic headache is a secondary headache arising from a musculoskeletal dysfunction within the cervical spine, and is a disorder that many physiotherapists treat. The main players that are typically involved in generating the pain are the joints, discs, ligaments, nerves and/or muscles found in the upper portion of the neck.

Characteristics of a Cervicogenic Headache:

:sparkles: Pain usually one sided or one side dominant

:sparkles: Pain originates from the back of the neck and radiates along the forehead, orbits around the eye, temple area and ear.

:sparkles: Steady ache or dull, diffuse pain that travels into shoulder region

:sparkles: Limited neck movement especially when turning head

:sparkles: Tenderness to touch at the muscles at the base of the head.

Here are some exercises that would help alleviate your pain:

  1. Cervical side flexion with chin tuck

  • Sit upright in a chair.
    With your shoulders relaxed, relax one arm to your side.
    Drop your opposite ear to your shoulder until a stretch is felt.
    Using your fingers, tuck your chin in, as to resemble a double chin.
    Gently release pressure with your fingers and hold this position.
    Relax and repeat

2. Levator stretch Neck stretch – levator scapula

  • Start in a seated position.
    Place the hand of the side you want to stretch down by your side.
    Tilt your head forwards and to the opposite side at an angle, as if you are trying to
    look at your armpit.
    Keeping your back straight and upright, continue to tilt your head down until you
    feel a stretch from the base of your skull down into your shoulder blade.

3. Neck stretching (Upper trapezius)


  • Stand up straight.
    Take the hand on the symptomatic side and place it behind your back.
    Take your other hand and place it on your head.
    Tilt your ear directly down towards your shoulder and hold this position.
    You should feel a stretch down the side of your neck.

If you believe you experience Cervicogenic Headaches get in touch with us https://physiofusion.co.nz/ for an in-depth assessment and lets knock out those headaches and decrease you dependence on pain meds