In today’s fast-paced world, finding effective and natural remedies for muscle aches and pains is crucial for maintaining a healthy lifestyle. One such solution is Wong To Yick Woodlock Oil, a traditional Chinese medicine with a rich history of providing relief from various physical discomforts. In this blog, we will explore the benefits of Woodlock Oil, its ingredients, how to use it effectively, and why it should be a staple in your wellness routine.
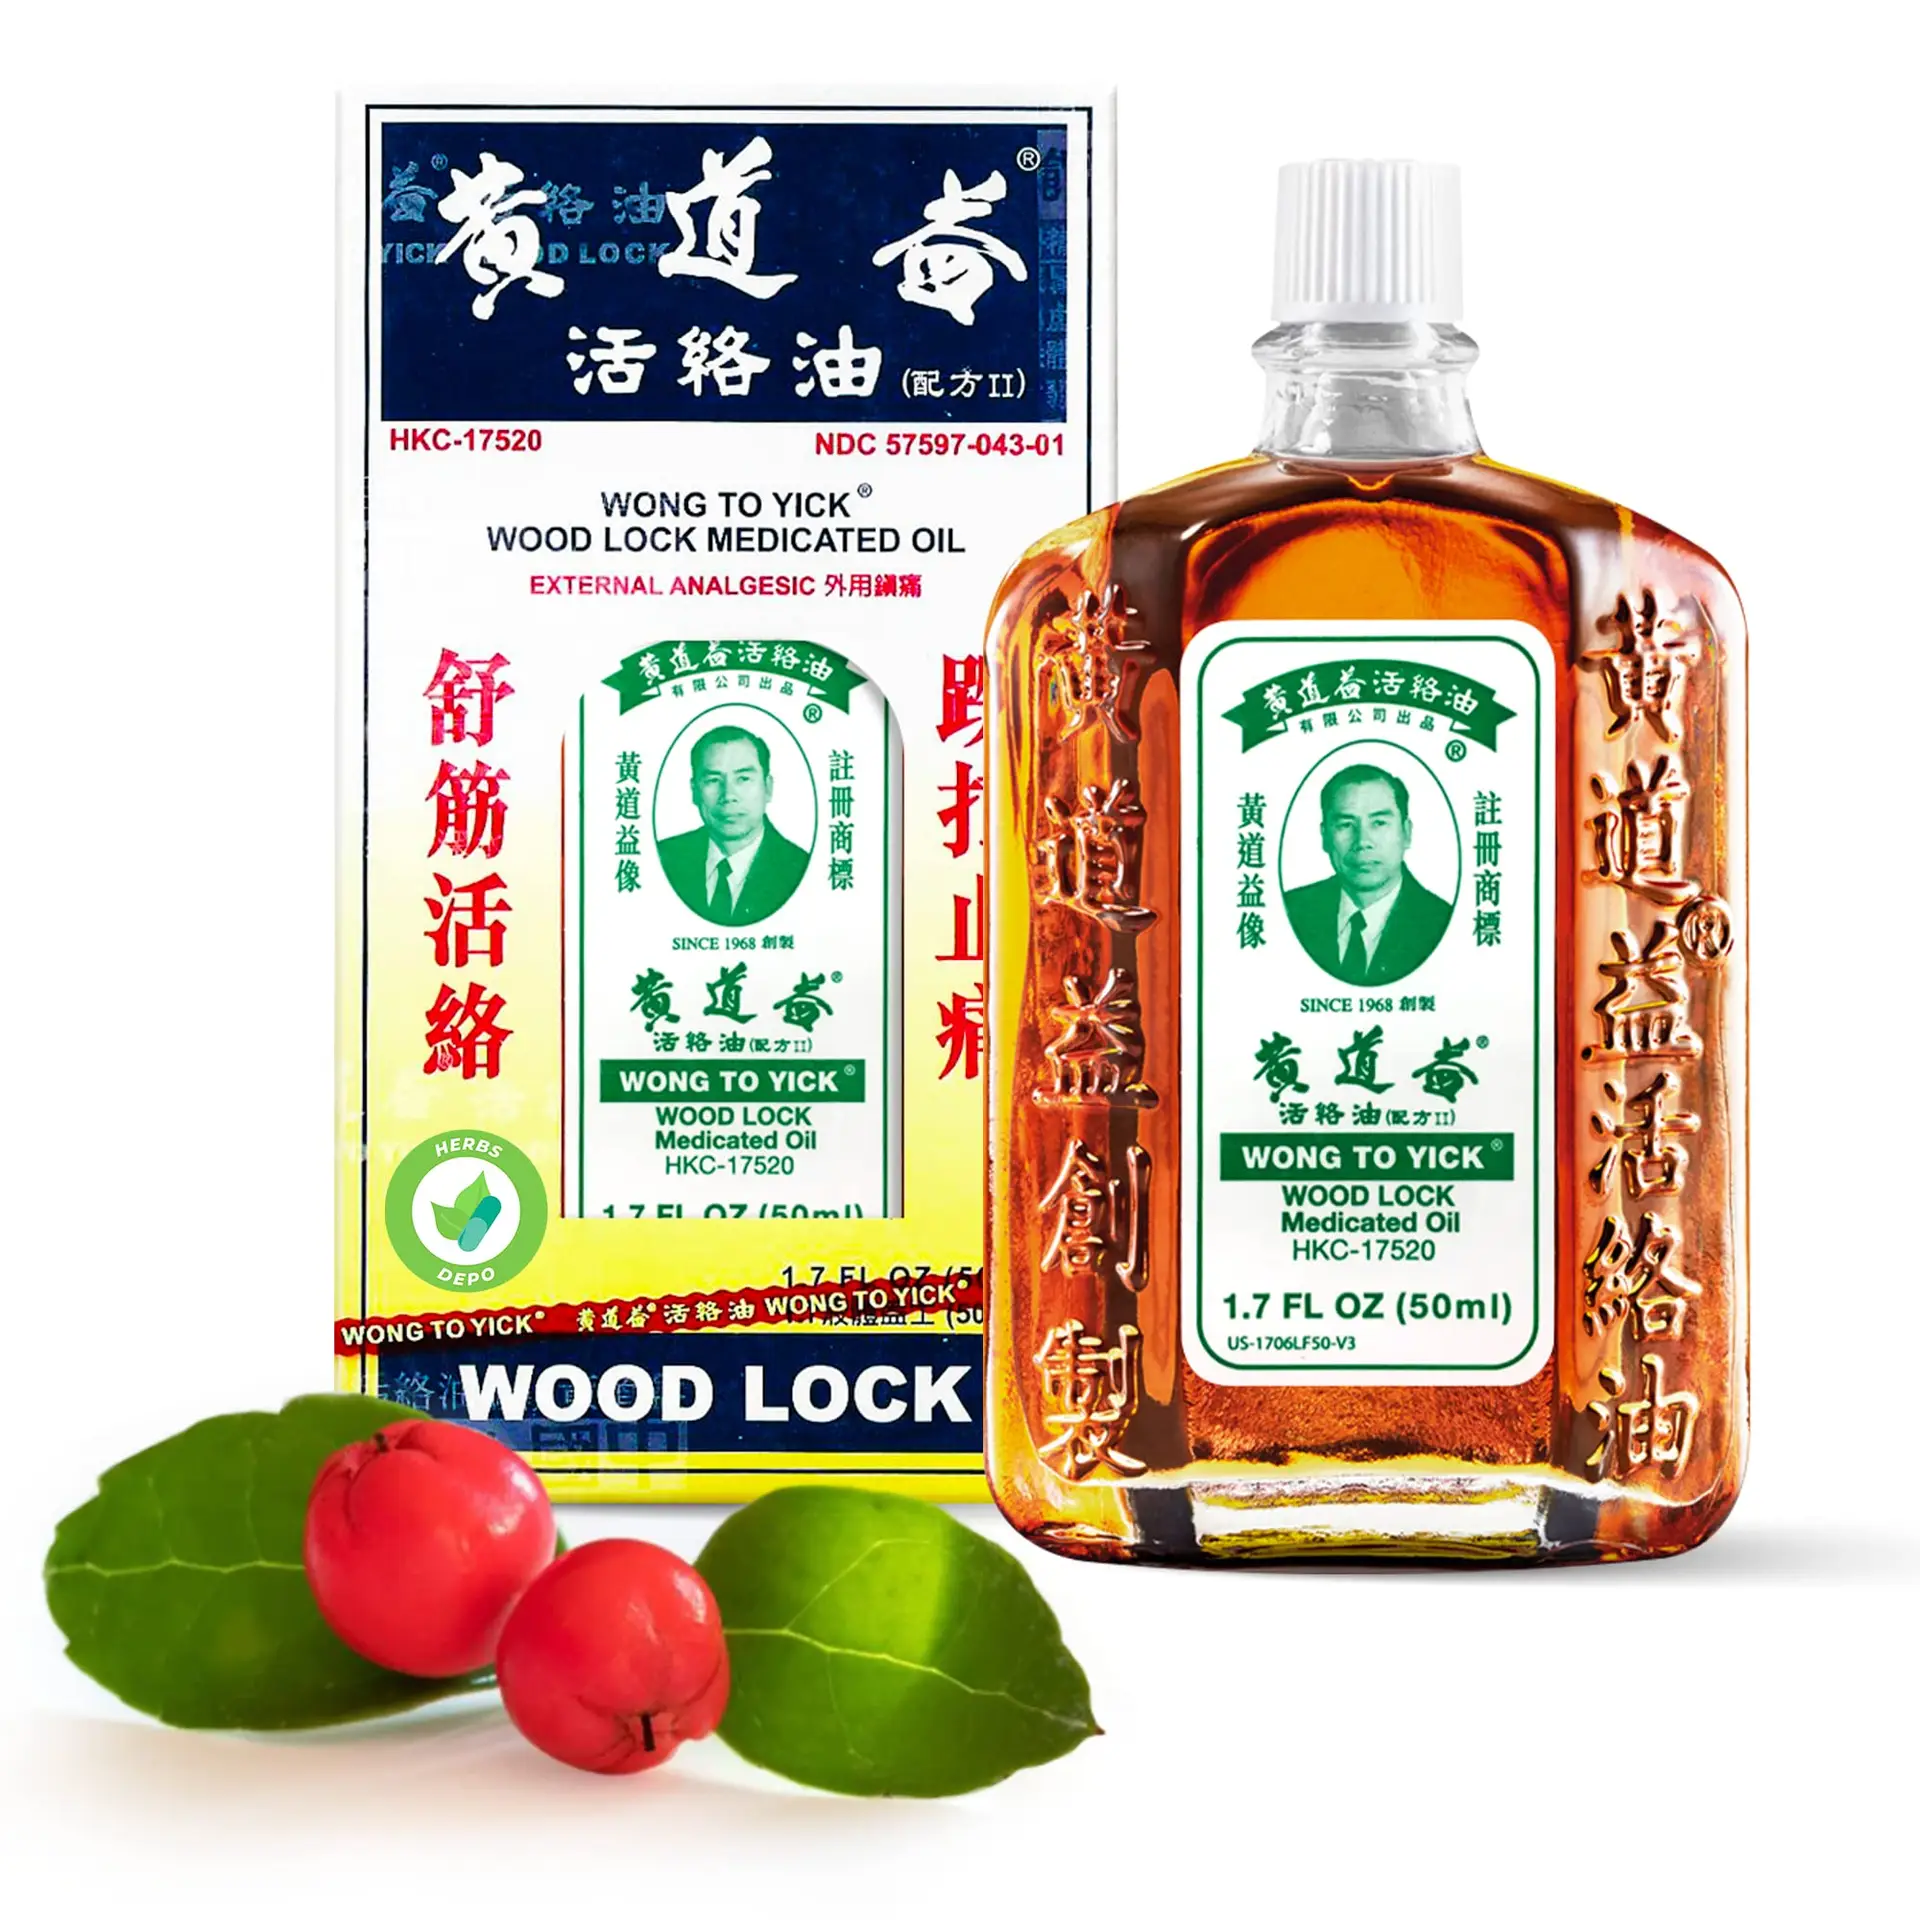
What is Wong To Yick Woodlock Oil?
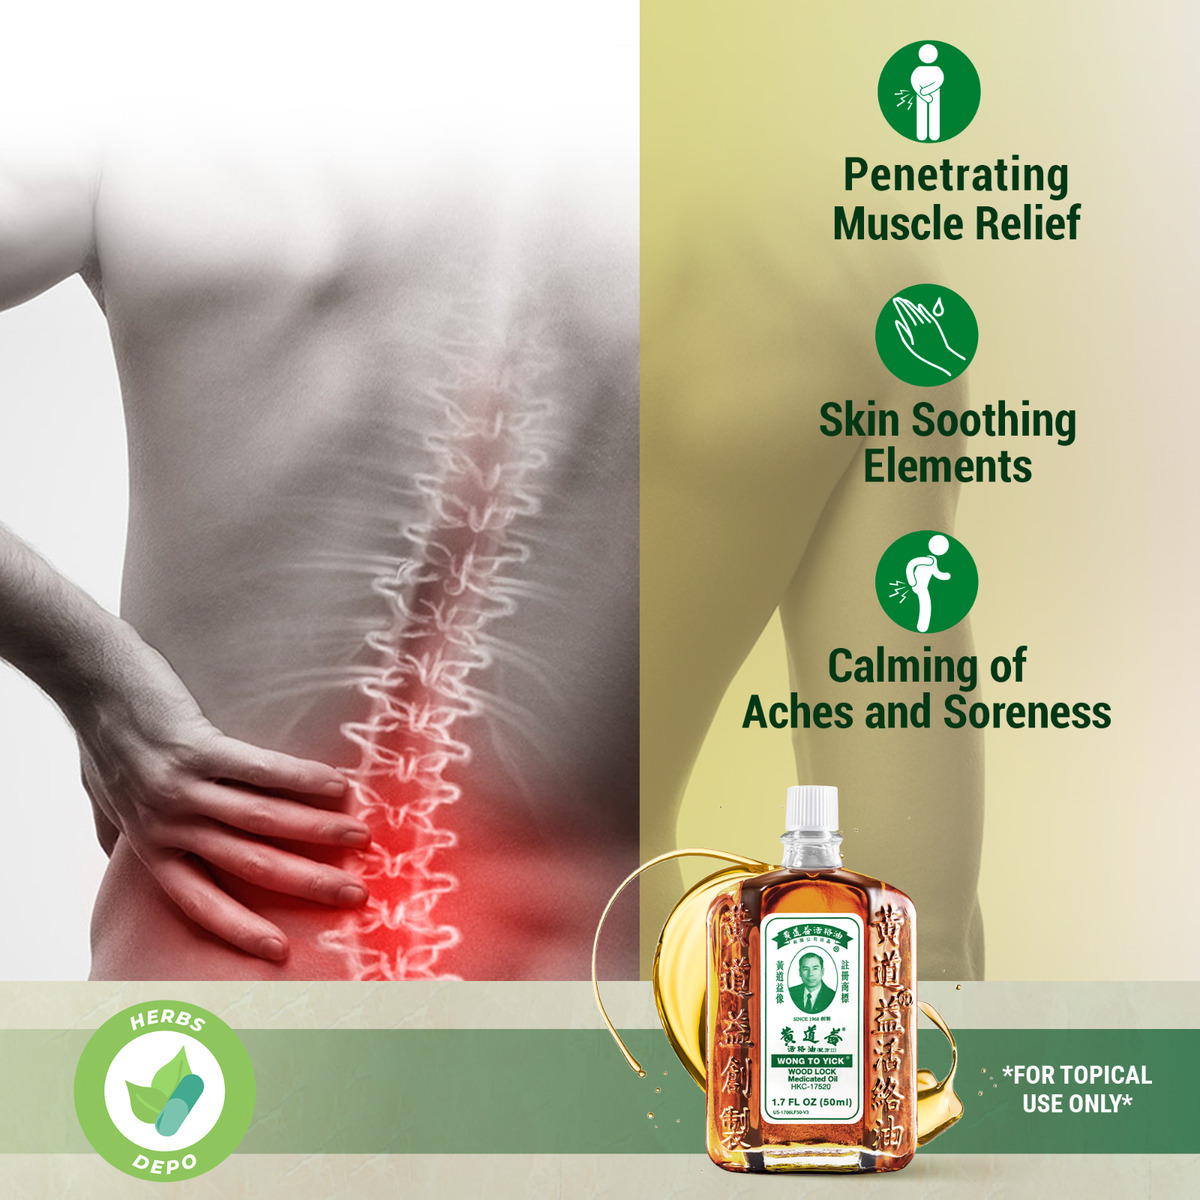
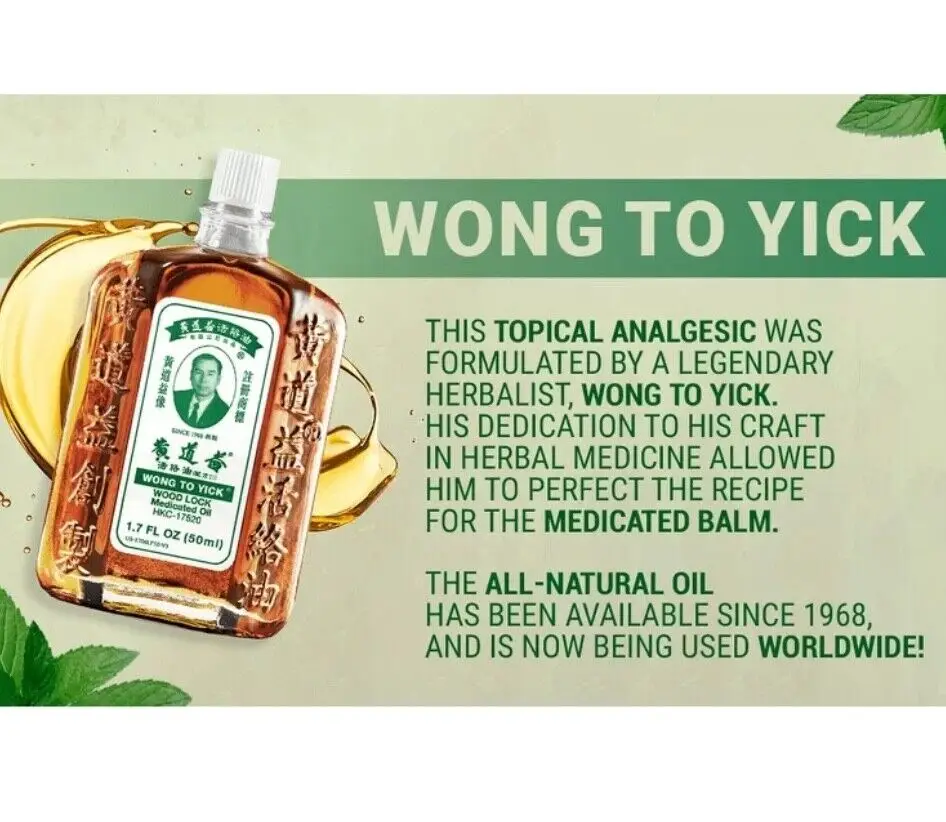
Wong To Yick Woodlock Oil is a medicated oil renowned for its ability to provide soothing relief for muscle aches, joint pains, and other discomforts. Formulated with a blend of natural ingredients, this oil has been used for decades in Chinese medicine to alleviate various physical ailments. It is known for its quick absorption and effectiveness in targeting problem areas.
Key Ingredients and Their Benefits
Woodlock Oil’s unique formulation combines several active ingredients known for their therapeutic properties:
Methyl Salicylate (50%): Known for its anti-inflammatory properties, methyl salicylate helps reduce swelling and relieve pain in muscles and joints. It works by penetrating deep into the tissues and soothing sore areas.
Menthol (16%): Menthol provides a cooling sensation that temporarily relieves minor aches and pains. It also helps improve blood circulation in the affected area, promoting faster recovery.
Camphor (10%): Camphor acts as a counterirritant, stimulating nerve endings to relieve pain and itching. It helps improve blood flow and provides a warming sensation that alleviates discomfort.
How to Use Woodlock Oil
Using Woodlock Oil is simple and convenient. Here’s a step-by-step guide to ensure you get the most out of this powerful remedy:
Identify the Affected Area: Determine the muscle or joint area where you are experiencing discomfort.
Apply a Small Amount: Pour a few drops of Woodlock Oil onto your palm and gently rub your hands together to warm the oil.
Massage Gently: Massage the oil onto the affected area using circular motions. Allow the oil to absorb fully into the skin.
Repeat as Needed: For optimal results, apply the oil up to three or four times daily. Avoid applying to broken skin or sensitive areas.
Benefits of Using Woodlock Oil
Fast-Acting Relief: Woodlock Oil’s quick absorption provides fast relief for muscle aches and joint pains, making it a go-to remedy for athletes and active individuals.
Natural Ingredients: The oil’s natural formulation ensures it is gentle on the skin while delivering powerful therapeutic effects.
Versatile Use: Whether you’re dealing with sprains, strains, or general muscle soreness, Woodlock Oil is versatile enough to address various physical discomforts.
Enhances Blood Circulation: The combination of menthol and camphor helps improve circulation, which can speed up the recovery process.
Trusted Traditional Remedy: With a long history in traditional Chinese medicine, Woodlock Oil is a trusted choice for those seeking natural alternatives to synthetic pain relief products.
Why Choose Woodlock Oil from PhysioFusion?
At PhysioFusion, we are committed to providing high-quality health and wellness products that meet your needs. Our Wong To Yick Woodlock Oil is sourced from reputable manufacturers, ensuring you receive a genuine and effective product. By choosing our Woodlock Oil, you’re opting for a natural remedy backed by decades of tradition and use.
Conclusion
Wong To Yick Woodlock Oil is a versatile and effective solution for managing muscle and joint discomfort. Its natural ingredients and long-standing reputation make it a must-have in your wellness toolkit. Whether you’re an athlete looking for a recovery aid or someone seeking relief from everyday aches, Woodlock Oil offers a powerful solution.
Explore the benefits of Woodlock Oil today and experience the relief you’ve been searching for. Visit our product page to learn more and make your purchase.
Does the front of your shin hurt when you walk or run and worried you might have shin splints? Find out what it is, what treatment is involved and how to avoid it in the future!
What is shin splints?
Shin splints is a generic term that means pain in the front of your shin. In this blog we will be talking about Medial Tibial Stress Syndrome (MTSS), which is one of the most common forms of shin pain and what we generally refer to as shin splints. With shin splints, people often feel pain when they’re running which will increase as they run further. In severe cases, it may also be painful to walk. It’s usually not too painful at rest.
What are the symptoms of shin splints? What does it feel like?
People with shin splints have pain in the bottom third of their shin, which tends to feel like a dull ache like a bruise. It will be become more painful with activities such as running, walking or high impact sports (rugby, soccer, tennis and basketball for example) and will feel better with rest. In the early stages, some people find they are able to push through pain when running only for it to worsen as they continue.
There are a number of other conditions which share symptoms with shin splints; these include stress fractures, chronic exertional compartment syndrome (CECS) or nerve issues, so it’s important to get checked out by a qualified health professional.
Who gets shin splints?
Shin splints is an overload injury – this means that it occurs most commonly when there has been an increase in exercise which is more than the body can handle. This could be someone who has started running and is rapidly increasing their milage, or someone who has been training intensely all season for a sports team. People in the military are also very prone to it due to the high impact that they experience as part of their jobs – up to 35% of military personnel (Moen et al, 2012)! There is also some evidence that people with flat feet or a narrow running stance are more prone to it (Winters et al, 2018).
What is actually happening?
There are two main theories as to what causes shin splints; one thought is that the bone itself gets overloaded, and this is what causes you pain, whilst the other is that the membrane around the bone is inflamed (Winters et al, 2018).
What does treatment involve?
As shin splints is an overload issue, that means we need to stop the things that are making it worse. Everyone is unique with different activity levels so we’ll work with you to identify your particular aggravating factors. For runners, this might be reducing your weekly mileage and replacing it with cycling to keep your fitness levels up. For people playing rugby, we might focus on drills and skills and less on sprints.
You will also implement exercises to help you get stronger. The stronger a muscle is, the more force goes through the muscle and the less through the bone. Working on the muscles in your lower leg can help with absorbing forces from running and avoiding irritating the sore bone.
It is important to not exercise through pain with shin splints. We know from research that ‘toughing it out’ means it takes a lot longer to heal – runners who ran through pain took, on average, over 100 days to return to sport (Moen et al., 2012). We find people recover better when they progress their exercises without increasing their pain.
Is there anything I can do to prevent it?
Absolutely! One of the most important things is slowly building up activities. For running, we normally recommend only increasing milage by about 10% each week. It’s normal to get occasional twinges but if you notice it continuing or getting worse, come and chat with our friendly team of physiotherapists and we can help you get back on track.
Here are three exercises that can help you prevent shin splints. Aim to complete 3 sets of 20+ a week – when they get easier, add some weight for an additional challenge.
Soleus raise – the soleus is one of two calf muscles and is more active when your knee is bent. It is a very important muscle involved in running and is not often trained specifically. This exercise can help target it and make it stronger so that it can keep working for longer.
Tibialis anterior raise – your tibialis anterior is a muscle at the front of the shin and helps absorb force as you run.
Single leg deadlift against a wall – this works the hip muscles that keep your knees in alignment really well. It also has the benefit of strengthening your hamstrings, which are a common running injury
References
Moen M., Holtslag L., Bakker E., Baten C., Weir A. et al, (2012) ‘The treatment of medial tibial stress syndrome in athletes: a randomize clinical trial’ Sports Medicine, Arthroscopy, Rehabilitation, Therapy & Technology: SMARTT 30 (4)
Winters M., Bakker E., Moen M. et al, 2018 ‘Medial tibial stress syndrome can be diagnosed reliably using history and physical examination’ British Journal of Sports Medicine 52(19) pp.1267-1272
Plantar fasciitis is a very common cause of heel pain. It is associated with inflammation of the thick web-like ligament (plantar fascia) which runs across the base of your heel to the front of your foot. The plantar fascia provides support to the arch of your foot and is a shock-absorber, helping you walk. Hence it is obvious that this ligament experiences a considerable amount of wear and tear in your day to life.
Symptoms
Plantar fasciitis is associated with inflammation of plantar fascia triggered by the development of small tears in the plantar fascia which leads to heel pain and other symptoms. This condition mostly develops gradually and worsens over time. You may notice some swelling, redness, and warmth in the affected region. You may experience more pain in the centre of your heel, which may radiate along the sole of your foot. The pain may be achy, sharp, dull, stabbing. It is mostly experienced when initiating movement first thing in the morning or after a period of inactivity, and may ease after a period of mobility. You may have no resting as the plantar fascia is offloaded and relaxed. It generally impacts just one foot, but it may impact both feet.
Causes
The plantar fascia is a thick web-like ligament which supports the arch of your foot and absorbs shock when you walk. Excessive stress and tension on the plantar fascia may cause smalls tears. Repeated stretching and tearing may inflame and irritate the fascia, though the cause remains unclear in many cases of plantar fasciitis.
Key factors which may increase your risk of developing this condition include:
Foot mechanics: Having flat feet or very high arches or adopting abnormal gait patterns may have an impact of the way your weight is dispersed when you are standing/running/walking and lead to excessive stress on the plantar fascia
Obesity: Extra weight increases the tension on the plantar fascia
Exercises: Certain exercises such as long-distance running/walking and dancing may put more stress on your heel and plantar fascia
Age and Gender: Plantar fasciitis is more often noted in women than men, and is most common in the 40-to-60-year age group.
Occupation: which require prolonged periods of walking and standing especially on hard surfaces
Sudden and rapid change in activity levels
Footwear: Wearing high heels and/or poor fitting shoes that do not provide sufficient arch support cushioning
Muscle tightness: particularly of your lower limbs
Diagnosis
The diagnosis of this condition may be determined by your medical and occupational history, the nature, length and severity of your signs and symptoms, and the existence of localized tenderness in your heel. You may be referred on for imaging such as X-rays, ultrasounds or MRIs to aid the diagnosis and to possibly rule out other causes for your symptoms (fractures, arthritis, heel spurs etc).
Management
Initial management of this condition is focused on the reduction of pain and inflammation:
Resting is vital
Ice application
Taking anti-inflammatory medications
Wearing appropriate and supportive footwear with arch supports and shock absorbing orthotics
Getting your foot and ankle taped for sufficient support and alignment
Physiotherapy (involving a graduated rehabilitation program of stretching/strengthening exercises)
If you still do not notice any improvement in your symptoms, your doctor may recommend corticosteroid therapy. Corticosteroid medication is injected into the impacted region with the purpose of treating the inflammation directly hence, relieving your pain. Using a splint at night to avoid the Achilles tendon and plantar fascia from tightening while you sleep may also be recommended at this time. A surgical intervention is seldom recommended and is only usually opted for where the pain is severe and all other treatment has failed. Please discuss your management options with your doctors.
Prevention
Here are some helpful tips to prevent the development of plantar fasciitis and decrease the risk of reaggravating your symptoms:
Ensure you make warm ups and cool downs as part of your exercise regimes
Undertake exercises to strengthen your lower limb muscles
Regularly stretch your Achilles, calf and intrinsic foot muscles to increase their flexibility
Gradually increase your activity and exercise levels
Maintain a healthy body-weight
Wear appropriate and supportive footwear (use orthotics for support if needed)
Take regular rest breaks if standing and or walking for prolonged periods of time at work
Whether you are squatting racks of weights in the gym or squatting down to the floor to play with your children or simply squatting to sit in a chair – you are still squatting.
Truth of the matter is, squatting is more than just an exercise. If you think about it, it is a functional movement we all do many times in the day.
Knee pain from squatting is a common compliant. Although it is common, it doesn’t mean it is normal.
More often than not, the problem doesn’t only lie at the knee joint. We have to understand the complexity of our body in how our knees are directly linked with how your hips and ankles are moving. So, the purpose of this blog is not only to help you understand the basic mechanics involved in the legs when you squat, but also to help you perfect your lifting craft in the gym.
A bit on what is a squat?
Squatting is characterized as a ‘compound movement’ – fancy fitness lingo that simply means, multiple joints and muscles are moving and working in harmony to contribute to the very movement of squatting.
So here is a checklist to help you find the missing links.
Squatting check list
1. Foot arches
Feet are the foundation to our body. From a balance perspective we can go as far to say that steady the feet, steady the rest of the body. So, what happens at our feet is extremely important to consider when we talking about knee pain in general, let alone, knee pain when squatting.
Foot stability can be best explained using the analogy of a ‘tripod’. As tripod has 3 points of contact with the ground, so should our feet ideally.
The three points of a contact, as in a tripod looks like this in our feet.
Ball of the big toe
Ball of the 5th toe
Heel
Keeping this in mind, lets assess the foundation of your body – Your feet with this small exercise.
Take your shoes and socks off. Stand up tall, plant both your feet flat on the ground. Take a look at both sides individually. What do you see?
Either of your feet collapse in?
Are either of your arches diminished?
Take note of it. Next, remain standing and focus on what you feel at sole of your feet.
Think about the 3 points of contact – the tripod.
Do you feel you have evenly distributed pressure?
Take note.
Now stand on one leg – think about the same TWO things the arch and the pressures.
Which way did your foot go?
Which points of contact in the foot had more pressure?
Did your toes 3-5th lose contact from ground?
If your foot caved in and the last 3-5th toes lost ground contact, then your foot pressure is likely to sit between big toe, the base of 2-3rd toes and heel, suggesting you have a narrowed base of support. This will force the knee, hip and the rest of your body to follow in the direction, creating risk of building up unwanted pressures in others areas of your body. Before you know it, unwanted pressure results in inflammation and pain.
It is important that you consider this of high value and practice on pressure control and arch control before your look at the overall picture of squatting.
2. Ankle mobility
Your foot and ankle are closely linked – between them there are 28 bones, many muscles, ligaments and connective tissue. These anatomical structures work together to provide stability and mobility of the joints – considered KEY essentials to squatting.
Too much or too little flexibility in the ankle can be a problem. In most cases, ankle injuries result in stiffness, a hinderance to simple functional movements.
So, let’s take a closer look at your ankle with a simple mobility test.
Kneel down in front of a wall. Signal a thumbs up and measure the width of it from the wall and mark it. Place your foot on the line and drive your knee forward to the wall. Make sure you drive your knee straight forward without caving in or twisting in with your hips.
What do you see?
Can you touch your knee to the wall?
What about the other side?
Consider what you feel.
One side feels almost effortless, the other side doesn’t?
It is not uncommon to notice that the unaffected side may not be as flexible as you thought.
This is point to note – you have just discovered a link and a potential cause of your knee pain.
You need focus on stretching the muscles of your leg in a way that similar to ‘squatting’ – here is a good one!
Box ankle stretch
Use a box or a chair, plant your foot flat and rock forwards until you feel a stretch in the calf and ankle. Remember to make sure your knee doesn’t cave in or your body doesn’t twist. Do this for 20-25 repetitions, 2-3 sets. Re-test yourself.
3. Hips
Your feet are directly tied to your hips. So, the action of your hip and feet should be working together for good purposeful movement.
Here is a quick way to check this yourself:
Stand tall, with your feet planted shoulder width apart. Drive your knees out to the side. You will notice your foot arch lifts.
It might be a very small amount, but worth taking note. Because, this is no different when you are squatting. If your knees collapse in, it may mean that you are not recruiting the key muscles of your hips that prevent the knees collapsing.
So, driving your knees out to match the alignment of your hip-ankle not only lifts the arches but begins the process of recruitment patterns of hip muscles to engage.
The common deficit contributing to your knee pain may be weak gluteal muscles.
Gluteal muscles are powerful muscles of the lower limb. They are a group of three muscles, each with slight different function
Gluteal maximus – hip external rotation, hip extension
Gluteal medius – hip abduction, internal and external rotation, extension
Gluteal minimus – hip abduction and internal rotation
Banded squat
Banded squats are a great way to activate your gluteus. The band not only provide resistance but provides sensory information to help you learn to push into it, therefore avoid knees from collapsing in.
If you have a lighter level resistance band, place this at knee height.
Descend in to a squat position with emphasis on pushing you knee out into the resistance band, until you reach the hip-knee-ankle alignment.
Do this 15 times, 3 sets.
For starters, work at a level that is easy for you.
Build the reps ups as you gain confidence
Weak or inadequately recruited muscles could be a result of stiffness hips.
To check your flexibility, try this next test:
Sit on tall on a chair. Feet planted flat on ground at shoulder width apart. Test one leg at a time. Keeping your thigh in contact with the chair, drive your knee out to the side (internal rotation). Now try going inwards (external rotation).
What do you see?
Can internally rotate higher? External rotation is difficult? Or vice versa?
What do you feel?
Takes more effort going one way than the other?
Unlock the hips with this beginner hip stretch.
Sit upright on a chair. Cross one leg over on the other. You should feel a stretch in the buttock region. If not, progress by leaning forward with an upright posture. Hold for 15-20 seconds. Repeat 3-5 times.
Perfecting your squat
Perfect practice makes perfect. Now bearing the rules of movement in mind, practice your squats.
Some tips to help you better practice:
Do not worry about the depth of your squat
It’s the quality not the quantity. So as you begin to learn and adapt these principles, only squat down to a level where you feel in control of your foot, ankle, knee and hip.
Use a mirror
Visual learning is a great tool! It provides for a greater ability to correct your mistakes and perfect that ‘quality over quantity’ rule.
Start with barefoot
This allows you to connect the sensory receptors in the soles of your feet to the ground, making it much easier to learn the tripod grip.
Still having pain?
Remember, the complexity of our body and the complexity in how we move as whole can be the result of your knee pain. So, if you are still having pain – its time you get it checked.
There can be multiple reasons why your knees sound like popping popcorns or grating stones when you squat.
Generally popping in the knees is attributed to stiffness of the quadriceps muscle and the fascia that surrounds the knee joint. Overtime, stiffness causes pressure to build up under knee cap, which on movement can cause a sudden release causing a ‘popping’ sound. As worrying as it may be, most of the time popping noises in the knee without pain is NORMAL. However, for others the noise can be accompanied with a grinding sensation under the knee cap which is painful. This suggests there is an underlying pathology that needs to be addressed.
This is something we would clinically consider to be Patella Femoral Pain Syndrome aka Runner’s knee – an umbrella term that encompasses the idea of dysfunctional knee cap tracking.
When you straighten and bend your knee, naturally your knee cap tracks up and down between its groove (trochlea groove) – like a train moving up and down a train track.
When the quadricep muscles on the outside (vastus lateralis) and inside (vastus medialis oblique) part of the leg are working in synchronization as they should, your knee cap is able to track up and down properly. However, if the quadriceps muscle (Vastus lateralis) is overly activated and the fascia (Iliotibial band & lateral retinaculum) on the outer part of you knee cap is excessively stiff, the knee cap gets pulled to the outside.
Essentially the train is being pulled and tilted more to the outside. Eventually overtime, repetitive or violent lateral pull of the knee cap increases friction in the knee grating the smooth underside of the knee cap called, chondromalacia. Additionally, the constant pulling and stiffness of the lateral side will cause stretching on the inside of muscles. On top of that, pain and swelling will cause the muscles in the inside of the leg to shut down.
Here are two steps to managing your symptoms.
STEP ONE
Foam roller or tennis ball
Instructions:
Lie on your front and place the foam roller underneath your leg.
Bend the opposite leg and bring it out to the side to help you move back and forth.
Roll the entire length of the thigh muscle, staying off the knee joint.
Make sure you move through the length of the muscle close to the knee cap as you can. You should be looking for stiff spots in the muscles and any sore spots you feel concentrate on it for couple of seconds and work deeper in to the tissue. You should also move in the inside and outside of the quadriceps muscles. Do this with you knee straight and then move into knee flexed position to optimize the release.
For a more concentrated release, use a tennis ball or a lacrosse ball especially at the quadriceps tendon where much of the stiffness is likely present. The reduced surface area of the ball allows you to work on specific spots a lot better to break down deeper areas of stiffness and create more mobility.
Do this mobility routine for 1-2 minutes
Quadricep stretches
Start in a standing position. Use support if required for balance.
Raise one leg behind you grabbing hold of your ankle, or your lower leg.
Lift and hold for 20-30 second, and then repeat for the other leg.
Get into a lunge position with back leg flat on floor
Bend your knee and slowly pull your leg into a stretch
Hold this stretch for 20-30 seconds
For comfort place a rolled face towel under the knee cap
Modified quadricep stretch
For some people if kneeling down is irritating for the knee you can modify the stretch.
Rest your leg on the chair with your foot against the back rest
Make sure your stance leg is far enough in front of the chair
Lunge forward until stretch is felt
Do this for 20-30 seconds.
NOTE: Long duration stretches of over a minute and more can decrease the potential for you to create strength and power in those muscles during your workout. So, prior to your workout focus on short duration stretches.
Functional mobility stretch
Deep squat sits are great to expand the stretch. If your symptoms are not aggravated, try deep squat sits for 30 seconds up to a minute.
Stand with feet shoulder width apart
Point your feet out to about 45 degrees
Sit in to a deep squat keeping the pressure evenly distributed across feet
STEP TWO
Now that you’ve resolved the stiffness in the lateral portion of your knee, next step is to address the muscles imbalances caused by pain and swelling. That is, turning back the firing of the quadriceps muscles.
An effective way to address this, is by doing what we call close chain exercises – these are exercises done where your feet are on the ground, such as squats. Initially you want start slow and high. Mini squats are great because they allow you to strengthen your quadriceps without putting too much compressive forces into your knee. As you get comfortable, advance to a deeper squat and slowly begin to work towards building you strength by adding on weight.
Mini bodyweight squats
Stand behind a chair or table and place your hands onto the back rest.
Keeping your back straight, bend both knees into a semi-squatting position, allowing your hands to slide forwards.
Your hips should travel backwards as you counterbalance by leaning your chest forwards.
Push through your buttock and thigh muscles as you return to standing, and repeat.
Deep bodyweight squats
Hold on to the dumbbell, keeping it close to your chest.
Step your feet wide apart and turn the toes out slightly.
Drop down into a deep squat position, keeping your feet on the floor.
Control the movement back to the start position.
Caution: Avoid deep squats especially if you have ongoing grinding pain. Do not push in to pain, as this will only increase the forces and worsen your symptoms. At this point, it is highly recommended that you come in to see a physiotherapist to examine a potential underlying pathology.
De Quervains tenosynovitis is a painful condition caused by inflammation of two prominent tendons that are located at the wrist and thumb.
The two tendons called the Extensor pollicus brevis and Abductor pollicus longus originate from the middle of the forearm travel down towards and over the wrist to insert into the thumb. Collectively they function to extend the thumb, whilst abductor pollicus longus extends and also abducts the thumb (lifting thumb up to the ceiling).
What causes it?
The most common cause of De Quervains tenosynovitis is the repetitive overuse of thumb and wrist whether it is occupational or hobby related. For example, the repetitive thumb movement whilst using scissors by hair dressers, landscapers using shears or whilst gardening). Trauma to the tendons from injuries to the wrist or the thumb can cause inflammation of the tendons.
In some cases, age related degeneration of the tendon sheath or underlying conditions such as rheumatoid arthritis increases the risk of the developing De Quervains tenosynovitis. Hormonal changes resulting in fluid build up in young mothers can commonly result in De Quervains tenosynovitis.
Symptoms
Commonly your symptoms may include:
Pain located at base of your thumb
Pain elicited by movement of thumb (gripping or making a fist)
Grating or snapping feeling
Tightness in the wrist
Swelling surrounding the base of thumb and wrist
How is De Quervains tenosynovitis diagnosed?
Your doctor or physiotherapist will be able to diagnose the condition based on your symptoms and after doing a thorough movement assessment to rule out any other potential diagnosis.
Finkelstein test is used to elicit symptoms to confirm De Quervains tenosynovitis.
How to test:
Wrap your thumb with your fingers.
Slowly bend your wrist down
A positive test would elicit pain at the site of the two tendons.
Radiological investigations in lights of ultrasound and an x-ray might be recommended for further investigations, particularly to confirm clinical diagnosis or to rule out any other possible causes of De Quervains such as osteoarthritis.
What treatment options are available?
Conservative (non-surgical) management
Conservative management measures are generally recommended as the first line of management for mild to moderate symptoms. This is because up to 60-70% of symptoms are likely to improve over a period of 6-8 weeks of regular physiotherapy intervention. In this period, the following strategies are recommended by your therapist to fast-track your recovery
Rest and application of heat or cold packs
Avoid repetitive use of thumb
Pain medications (anti-inflammatory medications) such as diclofenac or ibuprofen
Splints or braces
Steroid injection
Surgical management
In more severe cases when conservative management has failed, surgery may be recommended by an orthopaedic specialist or surgeon.
Prior to your surgery you will have the opportunity to thoroughly discuss with your surgeon the details of the surgical procedure and about the post operative rehabilitation process.
Surgical procedure
Surgery may be performed under general or local anaesthesia. A small incision is made at the wrist and thumb region. The covering of the tendons (sheath) is then separated and expanded to provide the tendon space to allow the tendon to move smoothly within the sheath. After this the, the incision in then sutured with a firm dressing applied over the suture site.
While you recover from the surgery, an information sheet with post operative guidelines will be provided to you by your surgical team. It is important that you must follow the guidelines recommended by your surgeon for optimal recovery.
In most cases your will have a follow up with your surgeon few weeks after your surgery to check your wound healing and your progress. You are often times referred to physiotherapy for strength and conditioning of your wrist and hand movements to facilitate your recovery.
RSI is typically defined as an overuse disorder- a gradual build-up of overload to nerves, tendons, and muscles arising from repetitive movements or activities. Repetitive use of the same motions leads to inflammation and damage to these soft tissues. This disorder mostly affects the upper limb- particularly the elbows, hands and wrists.
Causes
Possible causes of RSI include but are not limited to:
Undertaking the same and repetitive movements and stressing the same muscle groups
Working in cold environments
Assuming a sustained and/or awkward posture for prolonged periods of time
Undertaking a particular activity for prolonged periods of time with no rest-breaks
Frequent and prolonged use of vibrating equipment
Adopting poor postures from working at inappropriately designed workstations
Undertaking a motion which involves carrying and/or lifting heavy items
Symptoms
RSI leads to a gradual development of a broad variety of symptoms, which range from mild to severe in severity. RSI particularly affects the muscles and joints of your wrists, hands, elbows, forearms, shoulders, neck. Having said this, RSI can affect other areas of the body as well.
Common symptoms may include:
Pain
Tingling
Cramping
Increased sensitivity to heat and cold
Tenderness
Fatigue
Loss of strength
Throbbing
Soreness
Achiness
Stiffness
Struggling with typical activities of daily living, such as gripping and twisting motions, carrying light weights, writing, kitchen prepping, dressing, personal cares etc
You may develop these symptoms when you undertake a task repetitively for a period of time, and can settle when you stop. Symptoms may settle over a few hours or over the course of a few days. However, if left untreated or is poorly managed, a minor RSI may gradually progress to a nasty chronic injury.
Diagnosis
If you experience mild discomfort whilst completing particular activities at home or at your job, it is a good idea to see your GP or physiotherapist to talk about RSI. But an RSI is not always simple to diagnose as there is no particular clinical test for it. Your GP will enquire about your medical history, occupation and work environment, and other activities to attempt to identify any repetitive motions you undertake that may be the cause of your symptoms. A physical examination will be undertaken, where they will assess your movement, check for pain, inflammation, sensation, tenderness, strength and reflexes in the impacted body part. RSI may be triggered by specific health disorders like bursitis, carpal tunnel, tigger finger, ganglion cyst, or tendonitis (inflammation in your tendons). Your GP can refer you on further diagnostic tests such as X-rays, Ultrasounds, blood tests, MRIs, nerve conduction tests etc, to determine if these underlying disorders may be the cause of your symptoms. You may be also be referred onto a physiotherapist and acupuncturist for conservative treatment and management for mild-moderate issues. If symptoms persist, you will then be referred onto a specialist.
Management
Initial treatment options for the management of RSI symptoms is conservative. This includes:
Rest, Ice, Compression, and Elevation (RICE principles)
Taking regular breaks between tasks and looking after your posture
Undertaking your activities and movements with appropriate form and posture
Intake of Nonsteroidal anti-inflammatory drugs (NSAIDs), both oral and topical as prescribed by the GP
Use of cold and heat to the impacted area
Administration of steroid injections into inflamed joints and tendons
Tailored exercise prescription from physiotherapists to correct posture and strengthen and stretch affected muscles
Acupuncture
Stress reduction and relaxation training
Use of splints and braces to help protect and rest the affected muscles and tendons
Ergonomically appropriate adjustments to your workstation and work environment may be recommended by your physio and GP- for example resetting your desk and chair if you’re working at computer, and alterations to your equipment and activities/motions to lessen the strain and stress on your muscles and joints. Surgery may be necessary in some cases.
Prevention
Minimizing repetitive actions particularly if they involve the use of heavy machinery or vibration. Improving your working posture and work-environment as well a taking regular breaks. Employers often undertake risk-assessments when you join a company to determine that the work area is ergonomically fit, comfortable and appropriate for you. You may be able to request for an assessment if you have not had one or are having issues with your work environment
Osteoporosis is a condition which results in weak and brittle bones- to such degree that a fall or even mild stresses like coughing or bending over may result in a fracture. Bones are living tissues which are continually being broken down and replaced. However, your bones become osteoporotic when the formation of new bone does not keep up with the loss of old bone. This condition typically develops over time without any pain or other major symptoms, and is generally not diagnosed until you have sustained a fracture. The hip, pelvis, upper arm, spine and wrists are the most common structures affected by osteoporosis- related fractures.
How do you know if you have Osteoporosis?
Because there are no obvious early warning signs and symptoms, it is difficult to pre-diagnose osteoporosis. You may be unaware that you have this condition perhaps till you have one of the following:
Sustained a fracture from an incident more easily than you should have- like a simple fall or a bump
A decrease in the height of your spinal vertebrae over time
Change in posture – stooping or bending forwards
Back pain, due to a fractured or collapsed vertebra
Please see your doctor if you experience the following:
If you are over the age of 50 and have sustained a fracture
Sustained a spine, wrist, or hip for the first time
Sustained a fracture more easily than you should have (a simple fall or after a slight bump)
Risk factors
Key factors which may increase your risk of developing osteoporosis include:
Females- particularly post-menopausal Caucasian and Asian women
Over the age of 50
Excessive consumption of caffeine or alcohol
Smoking
Having a smaller or petite body frame
Poor physical activity levels and leading a very sedentary lifestyle
Family history of osteoporosis
Having low levels of vitamin D and poor dietary calcium intake
Decreasing levels of testosterone with ageing in men
Estrogen deficiency in women (irregular periods, early (before turning 40) or post-menopausal, surgical removal of the ovaries)
Use of long-term medication such as thyroid and epilepsy medications, corticosteroids
Having medical conditions such as gastrointestinal diseases; endocrine diseases; rheumatoid arthritis; cancer; and blood disorders
How will you be diagnosed?
Your doctor will review your signs and symptoms, family and medical history. You may be referred on for a specialized X-ray or CT scan to evaluate the bone density to help diagnose osteoporosis. Your bone density will be classified by comparing it to the typical bone density for a person of equivalent gender, size, and age.
How is Osteoporosis treated?
The treatment pathway chosen for the management of this condition is dependent on results of your bone density scan, gender, age, medical history and severity of the condition. Potential treatments for osteoporosis may include exercise, making positive lifestyle changes, vitamin and mineral supplements, and medications. Please consult your doctor for appropriate advice and treatment options.
How can Physiotherapy help?
Your physiotherapist will help you strengthen your bones and your muscles through a personalized and graduated rehabilitation program. Components of this rehabilitation program may include weightbearing aerobic exercises, resistance training using free weights/resistance bands/bodyweight resistance, and exercises to enhance posture, balance and body strength. Your physiotherapist will work with you to find activities that suit your needs and as per your physical activity level.
Sitting at a desk working, studying or surfing the net for long hours at a time makes it extremely difficult to maintain proper posture. That’s because our bodies are not designed for hours of idle sitting. So as the clock gets ticking many of us have the tendency lean forward, slouch our shoulders and hunch our backs.
Unfortunately, this increases pressure on multiple areas in your body. This explains why most of us experience pain and stiffness in our neck, shoulders, back and in some cases your tailbone!
So what do I need to do you ask?
The answer is simple, STAND, MOVE AND STRETCH!
It sure does sound easier said than done, especially if you are pressed with time to complete set work tasks. BUT the good news is that stretching or moving is a buildable habit that can be easily implement as you work. It doesn’t take long!
For starters set an alarm to take micro 2–3-minute break for every 20-30 minutes. Use this time to stand up, walk over to a colleague, go for a toilet break, drink water or make yourself tea or a coffee.
Or try out these simple easy stretches while you sit or stand at your desk
So let’s get started!
SPINAL TWIST:
Sit up tall, relax your shoulders
Cross one leg over the other, then place your opposite elbow on your top thigh.
Take a deep breath and as you exhale slowly twist your body (not your neck) and look over your shoulder.
Hold for 10 seconds.
Slowly return to resting position and repeat on the other side.
BACK ARCHES
Sit tall, set your feet flat on the ground hip-width apart.
Rest your hands behind your hips, then slowly arch your back as you gently tilt your head back.
If you experience pain or discomfort in your neck or tingling in your arms – do this stretch without head tilt.
Hold for 10 seconds, return to start and repeat
ARM REACHES
Sit up tall with your feet flat on the ground.
Interlace your fingers and stretch your arms straight as you turn your palms up to the ceiling.
Hold this position for 10 seconds and repeat
SHOULDER CIRCLES
Sit or stand up tall, feet hip width apart
Relax your arms and shoulder, begin by rolling your shoulder backward in a circular motion.
Do this 5 times, repeat forward circles
NECK CIRCLES
Sit or stand up tall, with feet planted flat on floor
Slowly begin to roll your head in a clockwise position
Do this 20 seconds, then repeat in a counterclockwise direction
CHEST STRETCH
Stand close to wall or a door frame
Place your forearm in a 90-degree angle at shoulder height.
Take one step forward on the leg closest to the wall and slowly rotate your chest away until you feel a stretch across your chest.
Do not hunch or round your shoulders.
Hold the stretch for 20 seconds, repeat
Do this both for both sides
BACK EXTENSIONS
Stand with your legs at hip width apart and straight.
Place your hands on your hips.
Lean your body backwards, trying to arch in the lower back as much as you can, lifting your chest up towards the ceiling.
Try to avoid allowing your hips to swing forwards too far.
Hold this position for 10 seconds, return to start position & repeat 5 times.
FLOOR REACHES
Sit on a chair with upright posture
Slowly bend forward to plant your hands on the floor.
Hold for 10 seconds, return to start
SHOULDER BLADE SQUEEZE
Start in an upright position.
Practice bringing your shoulder blades back and down.
Picture gently drawing your shoulder blades towards the centre of your lower back.
This is a subtle movement, ensure you do not over strain your shoulder blades when performing this action.
Hold for 10 seconds, repeat 3-5 times
SHOULDER BLADE STRETCH
Clasp your hands together and hold them in front of your body.
Push your arms as far forward as you can whilst rounding your shoulder blades.
Gently drop your chin down to your chest.
Hold this position while you feel a stretch between your shoulder blades.
WRIST STRETCHES
Stretch out your arm straight in front of you with your palm facing away
Use your opposite hand to gently pull your palm back
Hold for 5 seconds, repeat with your palm facing your body
Sciatica is not a diagnosis, it is a term that describes symptoms of pain, pins and needles, numbness and in some cases weakness that radiates along path of the sciatic nerve from the lower back to buttocks and leg.
Causes of Sciatica?
Disc derangement / herniation Disc injuries are most common cause of sciatica. Discs are cushion like pads located between each spinal segments that act as shock absorbers. The core interior of the discs is made up a gel like substance called the nucleus pulposus surrounded by thick fibrous outer ring called the annulus. Sudden forces applied to the disc can result in the the core interior to push through the outer ring resulting in a disc bulge or in severe cases can rupture the outer ring resulting in disc herniation which can compress the nerve root.
Disc degeneration / Arthritis / stenosis
Age related degenerative changes in the spine can result thinning of the disc and narrowing of the spinal joints. Overtime the narrowing results in bony growths that can compress the nerve roots resulting in sciatica.
Soft tissue injury resulting in inflammation
Thick ligaments and connective tissue envelope the spinal segments to optimize stability. Injury to any of the structures will result in inflammation and swelling which can affect the sciatic nerve directly resulting in sciatic symptoms.
Piriformis syndrome
Piriformis muscle is a located deep in the buttock region. It originates from the sacrum and inserts into the upper part of the hip. The sciatic nerve travels adjacent to the piriformis muscles. Injury to the muscle resulting in tightness or spasm directly affects the sciatic nerve resulting in symptoms.
Other possible causes:
Sacroiliac Joint Dysfunction
Hip joint injury or arthritis
Spinal fractures
Tumors
Anatomy of the Sciatic nerve
Sciatic nerve is the largest nerve in the human body. It originates in the lower back from five branches of nerves that extend from the spinal cord. The branches exit the spine at nerve roots L4, L5, S1, S2, S3 connect together to form the sciatic nerve.
The large sciatic nerve then travels deep in gluteal region and descends vertically down to the back of the thigh. It supplies motor function and sensation to the skin and all muscles in the posterior compartment of thigh.
At the knee joint the sciatic nerve then divides into two branches the tibial nerve and common fibular nerve.
What exactly does it feel like?
Symptoms of Sciatica are often characterized by one or more of the following features:
Unilateral. Sciatica is typically affects one leg.
Pain. Nature of pain is often constant with heaviness or dull ache. You may experience sharp, shooting, electric shocks intermittently with postural movements.
Neural irritation. pins and needles with occasional postural numbness is common. Postural numbness can occur when you sit or stand for a period of time, but should resolve with movement. However, if numbness is constant you must be reviewed by your general practitioner or your physiotherapist.
Location of pain: symptoms of sciatica are felt along the path of the large sciatic nerve. The following picture shows the potential pathways you may feel your symptoms radiate to depending on the origin of nerve irritation or entrapment. Most commonly the areas affected included the lower back, lateral thigh extending to the calf and foot.
If symptoms are presented on both sides with additional symptoms outlined below – this could warrant an urgent medical review.
Red flags
Signs and symptoms that require prompt medical assessment include:
Age >50 years
History of trauma
Severe unrelenting pain that does not resolve with rest or pain control
Partial or complete loss of bowel and bladder function or control
Numbness in private regions and the affected side of leg or both
Discoloration of skin in comparison to unaffected side
Recent or current infection with fever chills and night sweats
Sudden unplanned weight-loss
History of cancer, kidney dysfunction
Diagnosis
It is important to correctly identify the cause your sciatica is essential in order to formulate an effective treatment plan to manage your symptoms and improve function.
Your GP or a physiotherapist will conduct a thorough diagnostic assessment. Your consultation with your clinician will begin with a comprehensive conversion that allows your clinician to formulate an understanding around potential causes of your symptoms. This includes questions specific to your presenting concerns, general health, history of injuries contributing and medication history and your symptoms management strategies. A physical examination is then followed where by your clinician will assess the range of movement of your lower back and lower extremities, reflexes, strength and sensation assessment to test the integrity of the nerve.
Radiographic examination
Further diagnostic examination in forms of radiographic imaging may be recommended by your clinician to assess the quality of your joints, alignment and check for the presence of any potential lesions contributing to your symptoms.
XRAY – commonly used in initial stages to review underlying joint pathology such as wear and tear of joints, fractures or in some cases to view lesions or tumors
MRI – high standard imaging that is able to examine in very refined detail possible soft tissues such as muscles, ligaments and internal organs as well as the bony architecture and possible disc injuries.
Discogram – A discogram test may be helpful in determining abnormalities in an intervertebral disc. A contrast dye injected into the tissues may allow abnormalities in the disc, such as bulging or herniation to be seen on a medical imaging scan (such as computed tomography scan).
Treatment
It is advisable to treat sciatica as early as possible in order to avoid the progression of symptoms. Treatments for sciatica may include both non-surgical and surgical approaches.
Typically, non-surgical management is recommended first. Surgery may be required if non-surgical methods have failed to manage your symptoms or the underlying cause is causing deterioration of symptoms. However, in a few severe cases where red flags are presented, surgery may be considered as the first option
Non-surgical approach is the first step to management. This includes intake of pain medications as prescribed by your doctors and referral to physiotherapy.
Pain medications
Your doctor will prescribe pain medications best suited for your symptoms. These may include
Non-steroidal anti-inflammatory medications such as ibuprofen, celecoxib
Neuropathic medications such as gabapentin, amitriptyline
Analgesics such as codeine, tramadol or oxycodone.
Muscle relaxants such as norflex
Physiotherapy
Physiotherapy will incorporate a combination of gentle strengthening, stretching, and the use of manual therapy to facilitate therapeutic gains.
The goals of physiotherapy for sciatic symptom management includes:
Strengthen muscles of the spine, core and lower extremities.
Improve flexibility of any tight muscles
Improve mobilization of the sciatic nerve
Facilitate optimal circulation through slight conditioning exercise (walking, swimming)
Education around activity modifications (especially for work-related participation)
Alternative therapies such as acupuncture may be recommended in combination to physiotherapy to facilitate management of your symptoms.
Acute mild sciatica usually improves with 4 to 6 weeks with regular conservative treatment. However, for moderate to severe cases of sciatica especially with a chronic underlying pathology pain may last over 8 weeks and, treatment time may take longer.
Steroid Injections
Steroid injections are slightly an invasive method used for pain management. Your specialist or an orthopedic surgeon may recommend and administer the injection. In addition to this, injections are also used as a diagnostic method to identify the target nerves or nerve roots affected. The common types of injections for sciatic pain relief include epidural injections.
Surgical approach
In cases where pain and or weakness persists for more than 6-8 weeks or if your symptoms are affecting everyday activities – Surgery may be considered. Your physiotherapist or doctor will arrange the referral for you to meet with an orthopedic back surgeon. Depending on the cause of your sciatica, your surgeon will discuss with you in detail the intended surgical approach, risks involved, post operative management and possible adverse reactions you may have after surgery.