fbpx
Your first step to recovery

Concussion recovery

Managing Headaches After Concussion/Mild Traumatic Brain Injury | BrainLine

What is a concussion?

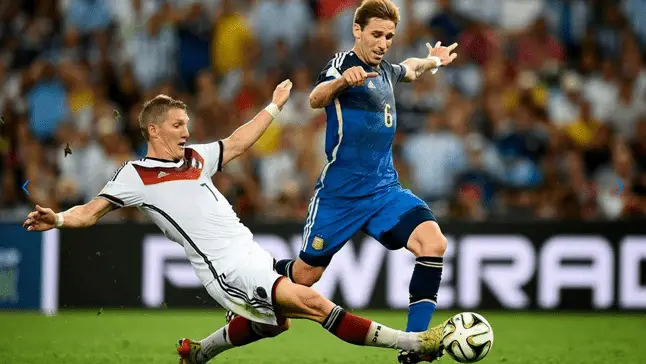
A concussion is a type of traumatic brain injury caused by a bump, blow, or jolt to the head or by a hit to the body that causes the head and brain to move rapidly back and forth. Rapid movement causes brain tissue to change shape, which can stretch and damage brain cells. This damage also causes chemical and metabolic changes within the brain cells, making it more difficult for cells to function and communicate (concussionfoundation, 2020).

Have you or someone you know had a fall or blow to the head ? If so it’s important to get medically assessed! It is strongly advised that you discontinue any sporting activities, school or work until a trained medical professional has seen you and given you the green light.

Symptoms

The most common signs and symptoms of concussion are:

  • Feeling stunned or dazed
  • Confusion, e.g. a delay in answering questions
  • Headache
  • Nausea
  • Ringing in the ears
  • Dizziness
  • Tiredness
  • Balance disturbance – Gait, unsteadiness.
  • Vision disturbances (double or blurred vision or ‘seeing stars’)
  • Memory loss (amnesia) that improves within a few hours.

Medical care should be sought if symptoms worsen or if there are more serious symptoms such as:

  • Loss of consciousness, however brief
  • Repeated vomiting
  • Slurred speech
  • Confusion or disorientation
  • Convulsions or seizures
  • Memory loss, e.g. being unable to remember what happened before or after the concussion
  • Changes in mood or behavior, e.g. unusual irritability
  • Drowsiness or difficulty staying awake
  • A headache that gets worse and does not go away
  • Weakness, numbness, or lack of physical co-ordination.

Recovery times:

Recovery from concussion can take up to 6 months. For the majority, symptoms will improve most rapidly within the first 1-3 months. If symptoms are still present after 6 months, these will most likely resolve after one year (SouthernCross, 2018).

Did you know?

Every year, there are 35,000 head injuries in New Zealand (Feigin et al., 2013). Although head concussion is normally associated with sporting injury, almost 80% occur outside of sporting activity (Theadon, 2014).

Brainstorm Conference 2019

Is Physiotherapy routine or advised post head concussion?

A study conducted by Van der walt, 2019 extracted clinical service data from a concussion service provider in Dunedin; this was to determine how often their subjects received or were recommended medical input, including physiotherapy. Results show that of the 147 subjects, 80 subjects (54%) received or were advised neck physiotherapy management and 106 cases (72%) received or were advised vestibulo-ocular physiotherapy management. In 59 cases (40%) both neck and vestibulo-ocular physiotherapy were received or recommended.

The findings suggest that recovery post concussion very often requires specific physiotherapy as part of multidisciplinary care. The evidence for the effectiveness of cervico-vestibular rehabilitation post-concussion is very favorable (Schneider et al., 2014).

Vestibular Physiotherapy | The Independent Physiotherapy Service

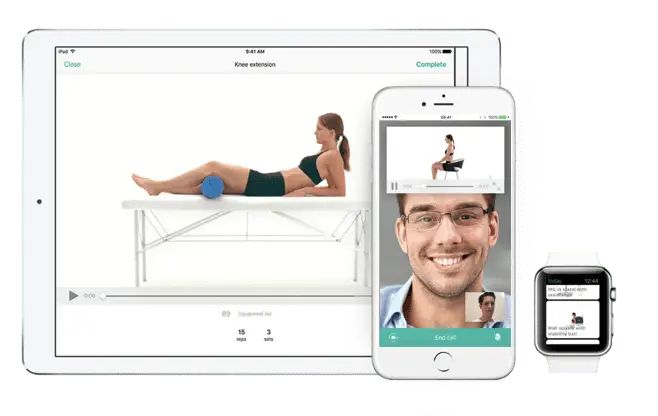
To help get you back on track, your physiotherapist will complete a detailed history of your current complaint/s and medical history. Treatment provided may involve:

  • Cervical spine assessment and treatment, including: mobilizations, soft tissue treatment
  • Balance assessment and treatment
  • Home exercise plan
  • Acupuncture

References

concussionfoundation(2020).WHAT IS A CONCUSSION?. Available at: https://concussionfoundation.org/concussion-resources/what-is-concussion. Last accessed 27/08/2020

Southerncross(2018). Concussion – causes, symptoms, treatment. Available: https://www.southerncross.co.nz/group/medical-library/concussion-causes-symptoms-treatment. Last accessed 27/08/2020.

Feigin V, Theadom A, Barker-Collo S et al. Incidence of traumatic brain injury in New Zealand: A population-based study. The Lancet Neurology. 2013;12(1):53-64.​

Theadom, A., Parag, V., Dowell, T., McPherson, K., Starkey, N., Barker-Collo, S., and BIONIC Research Group. (2016). Persistent problems 1 year after mild traumatic brain injury: a longitudinal population study in New Zealand. Br J Gen Pract, 66(642), e16-e23.

Van der Walta ,K, Tyson,A, Kennedy, E. (2019). How often is neck and vestibulo-ocular physiotherapy treatment recommended in people with persistent post-concussion symptoms? A retrospective analysis. Musculoskeletal Science and Practice . 39 (130-135), 1-5.

Sport-related concussion: optimizing treatment through evidence-informed practice.J. Orthop. Sports Phys. Ther. 2016; 46: 613-616

Rehab After Surgery- Let’s get you moving!

Sometimes surgery may be necessary to enhance your health and it can be stressful, both physically and emotionally. Our highly skilled physiotherapists will endeavor to actively work with your surgeon and yourself to make sure you are getting the best possible treatment towards regaining optimal function, movement, and strength both before and/or after surgery.


Elective Pre-Surgery Physiotherapy

Research has clearly illustrated the advantages of physiotherapy before elective orthopedic surgeries. We recommend pre-surgery physiotherapy to enable an enhanced healing and recovery process. Following a comprehensive assessment, you will be given a pre-surgery exercise program to keep up your strength, movement, and function, in addition to preparing you for your post-surgery programme.


Post-Surgery Physiotherapy

Physiotherapy after orthopedic surgery is essential for optimal recovery. Our skilled physiotherapists are experts at providing rehabilitation for patients after surgery and will undertake a comprehensive assessment after your surgery, which will involve ongoing evaluation of your function, mobility, and strength. As per the different stages of healing, your goals and progress, your physiotherapist will prescribe a personalized rehabilitation program. We will continue to keep close contact with your specialist as needed for the duration of your treatment.


Common surgeries requiring post-operative physio

Many surgeries, particularly those resulting from sporting injury, require physiotherapy treatment during the recovery phase.

These include, but are not limited to:

  • Knee reconstructions
  • Hip replacements
  • Shoulder surgery
  • Ankle, wrist, elbow operations
  • Spine, neck and back surgery

CONNECTING WITH OUR CLIENTS THROUGH TELEHEALTH

What is Telehealth?

 The Health Resources Services Administration defines telehealth as “the use of electronic information and telecommunications technologies to support long-distance clinical health care, patient and professional health-related education, public health and health administration. Technologies include videoconferencing, the internet, store-and-forward imaging, streaming media, and terrestrial and wireless communications”.

Here at Physio Fusion, we will be conducting video consultations for existing and new clients. You will see the same, experienced staff as you would on site at either our Henderson or New Windsor Branch. With the exception of the hands on aspects, we strive to continue to provide you with the same level of education, advice and exercise progression as you would receive in person.

Telehealth Benefits for Patients:

  • Better access to services for residents/ workers in remote areas (Al-Shorbaji 2013, Bourne et al 2017, Cooper & Allen 2017, Nelson et al 2017) found that this can improve access to care services for clients in isolated areas and virtual consults can address access barriers for patients living in rural locales.
  • More convenient access to services (people avoid the travel and scheduling challenges of attending face-to-face appointments and can access some services after-hours).
  • The ability for patients to ask quick questions without having to book a full consultation
  • Access to high-quality online resources, including videos and digital tools

Telehealth benefits for Physiotherapists:

  • Access to an untapped pool of clinical resources: (Hunt et al 2014): Virtual health programmes offer benefits to clinicians who are looking for increased flexibility in their working life (e.g. semi-retired clinicians or those seeking an improved work/life balance). If offered, this may enable healthcare providers to attract and retain a high-quality workforce, improve staff satisfaction, and access highly specialized resources to improve quality of care.

What is Physitrack and how does it work?

Physitrack is an exercise prescription platform that lets you prescribe home exercises to our clients. It is a program that you as a customer can download for free on your smartphone, tablet or open it with your computer. The videos show how you can perform an exercise correctly and clearly. There are also more than 90 standard exercise protocols and videos with clear explanations about specific complaints or conditions.


How does it work?

Together we determine which exercises are most suitable for you and add these to your program. You will then receive an email with the link to download the Physitrack / app and the link to the program online. Your personal login code is also stated in the same email. If you have downloaded the Physitrack or clicked on the link and enter your password, you can enter your preferences in the program, such as setting reminders. Then you can start with the exercises in a correct and clear manner and contribute to your own recovery!

The attached document is designed to help you prepare for your Telehealth call. PhysiApp_Telehealth_call

What will happen once my appointment is booked?

  • Your Physiotherapist will send an email with more details on how the consultation will take place.
  • Before your appointment you will receive another email from Physitrack with a link to where the consultation will take place.
  • Make sure that you have a working camera and microphone.
  • Make sure you’re using a modern browser, such as Chrome, Firefox, Safari or Microsoft Edge.
  • If you are using a mobile device for your consultation, you will be prompted to download Physitrack app Please do this and then click join as a guest.
  • We ask that you get online 10 minutes before your appointment and click on a link to join the consultation.
  • If you are using a computer, make sure your camera and microphone are available and enabled.
  • Please ensure that you have enough space in case you are required too perform exercises.

What happens if internet is interrupted or my technology fails during the consultation?

If we can call you, we will attempt to continue and complete the consultation via face time.

Here’s how to book your first Telehealth Consultation with us

Save time and book your appointments online with Physio Fusion 24 hours a day, 7 days a week. You can book your appointments via phone or online

THE MYTH ABOUT FOOT PRONATION (FLAT FOOT)

Myth: Foot pronation(flat foot) is the enemy.

In the foot, pronation should occur naturally when we are fully weightbearing on the front leg. Pronation will appear as the foot rolling inward and the arch flattening.

What are the benefits?

  • Dissipates the force that the foot receives from the ground.
  • Allows the foot to become a stable and mobile adaptor to enhance movement opportunity throughout the body.
  • Loads the muscles of the extensor chain (calf, quads, glutes) to convert ground reaction forces into forward momentum so we can move efficiently and without compensation.

So why have I been told this is bad?

So as you are now aware, pronation is very normal and a critical movement to ensure we move and propel ourselves forward efficiently.

What you may have heard someone say to you is that you ‘overpronate’?

Firstly, overpronation is subjective and not as black and white as it is sometimes made out to be. Overpronation has been defined as: ‘a foot that rolls inward towards the medial (inner) arch excessively’.

What we must understand is that a pronation can only happen when the foot has a stable tripod on the ground. This means that the calcaneus (heel bone), 1st metatarsal (big toe knuckle) and 5th metatarsal (little toe knuckle) must all remain in contact with the ground when the foot rolls inwards and the arch flattens.

So, If you have been told you are ‘overpronated’ , it is most likely that your whole foot is ‘everting’ NOT ‘overpronating’.

What is Eversion?

Eversion can be defined as: ‘the process of turning inside-out’.

In pronation your heel must naturally ‘evert’ (sole of the heel will move away from the midline of the body) NOT your whole foot.

If your ‘whole foot’ everts (turns out) you will no longer have a stable foot tripod as the 5th metatarsal (little toe) will lose contact with the ground.

The key to ensuring this does not happen is to provide an environment for the bones of the midfoot (middle of the foot) and forefoot (toes) to experience the opposite motion to that of the heel. This will mean that the foot has an opportunity to truly pronate with a three points of contact on the ground.

So how can you help me do that?

  • At Physio fusion we can help guide you to bring your own body into alignment and create an environment in which the healing can begin.
  • Foot strengthening exercises.
  • Footwear advice.
  • Referral to other healthcare specialists for further assistance (e.g. podiatrists).

Ankle injuries – Your first step to recovery

Common? Oh Yes!

The ankle is the most commonly injured joint in sport. This does not exclude other people such as active hikers, beach goers and even your average Sunday stroller. Good news though – your ankle injury is highly likely to be uncomplicated.
It is still vital that your ankle is examined, evaluated and treated early. This will ensure a swift return to activity and prevent further complications.

The road to recovery

Your clinician will ask you some questions related to how you injured your ankle, pain, instability and any past episodes of injury. The earlier you get your ankle checked, the sooner your recovery will begin.
Keeping a mental note of things like initial pain, swelling, ability to walk and balance will go a long way in assisting your clinician to making an accurate diagnosis.

Investigations


In some cases, initial X – rays are done to rule out broken bones.

Ultrasounds can be used to diagnose some ligament and tendon damage.

MRI is the best form of imaging but this does come at a higher cost and higher exposure to radiation. These are usually done after failed conservative treatment or in instances where pain remains high for longer periods.

A CT scan is helpful with complicated foot and ankle fractures. It will normally be ordered by a specialist surgeon who is planning for an operation.


What to look out for

Ankle sprains:

This is normally a twisting injury that causes a stretch or tear of ligaments surrounding the ankle. Your health care professional will provide you with all the information and tools you need for recovery.

These heal relatively quickly when the outside border of the foot is affected and a little slower when the inside border of the ankle is affected.

You will normally feel pain on certain ankle movements, stiffness in the ankle and experience some swelling and bruising.


Ankle Fractures:

These normally present with swelling, bruising and pain initially – although not always. In some cases, it is too painful to put weight on the ankle.

They are usually best confirmed with X – ray and specialist referral.

Management may be surgical or non-surgical depending on the severity and site of the fracture.

Fractures generally take longer to recover compared to sprains.


What treatment to expect

Acute phase:

Your healthcare professional will normally initiate techniques to minimise your pain and swelling with rest, ice, compression and elevation.

Analgesia and anti – inflammatory medication may also be used.

Strapping may be used for stability at this stage and can be done by your physiotherapist.

You will also be encouraged to increase movement and begin strengthening.

Rehabilitation phase:

Balance and proprioceptive exercises will be given to you by your physiotherapist.

Strengthening will continue and running will start soon.

Once running in a linear motion pain free, you will progress to sport specific exercises.

Finally, you will return to sport or previous function such as trekking with a graded program.

Strapping may continue for up to 12 months after your injury in order to prevent re – injury.


What can you do on the day of the injury?

Rest by reducing time spent walking or standing. This will help the ankle to heal.

Ice the ankle for up to 20 minutes every couple of hours.

Compress the ankle with a firm bandage during the day and remove the bandage at night.

Elevate the leg.

Attempt circulatory exercises such as ankle circles and foot pumps (About 10 – 30 repetitions every couple of hours).

Contact your health professional or physiotherapist in order to make appointment for assessment.

If you are unable to stand on your leg or have excruciating pain in the ankle, head on to the local emergency department for immediate investigation.


Remember, your injury will heal and you will recover

Medial Elbow Pain Explained

Medial elbow pain is also known as medial epicondylitis or golfer’s elbow. It is typically associated with pain on the inside (medial side) of your elbow and can spread into your forearm and wrist. This pain is the result of overloading and damage to the tendons that flex your wrist towards your palm.


Causes

This condition is triggered by damage to tendons and muscles which control your fingers and wrist. This damage is associated with excessive or repeated stresses- particularly repetitive and forceful finger and wrist movements, incorrect lifting, hitting and throwing techniques, lack of warmups and/or poor muscle conditioning.

Key risk factors for developing medial elbow pain may include smoking, obesity, being of in age bracket of 40 years old and over and undertaking repetitive activity with your arms for at least two hours daily. High risk occupations may include chefs, office desk workers, plumbers, construction workers, painters, butchers and assembly line workers. Those who partake in sports such as golf, racket sports, rowing, weight lifting and baseball are also at a higher risk.


Symptoms

Symptoms may be triggered suddenly due to a traumatic incident or may gradually develop over time and include but are not limited to:

  • Tenderness and pain is typically felt on the inner side of your elbow (particularly on the bony knob), and may refer along the inner side of your forearm and down to your wrist and fingers. It often worsens with certain movements. For example, bending your wrist towards your palm against resistance, or when squeezing a rubber ball.
  • You may feel stiffness in your elbow, and making a fist may hurt
  • You may experience weakness in your forearm, wrist and hand
  • You may experience tingling and numbness that can radiate into one or more fingers — typically to your ring and little fingers.

Diagnosis

This condition is typically diagnosed based on your medical and occupation history and a physical exam by your doctor or physiotherapist. To evaluate stiffness, strength and pain, your clinician may apply pressure to the impacted region and get you to move your elbow, wrist and fingers in various ways. You may also be referred on for imaging such as X-rays and Ultrasounds to aid diagnosis.

Management

A mix of non-surgical treatment options are effective for the majority of medial elbow pain cases, and self-resolves over time. You should rest your elbow and painful activities should be avoided. But it is very vital to maintain gentle movements of the forearm, elbow, and wrist through its range of motion.

Potential treatment options include:

  • Ice
  • Rest
  • Physiotherapy and acupuncture
  • Anti-inflammatory medications as recommended by your doctor or pharmacist
  • The use of a wrist and forearm brace or splint to support and rest your forearm

As your initial elbow pain lessens, your muscles around the elbow, forearm and wrist should be safely strengthened and stretched under guidance of a physiotherapist. Your physiotherapist will advise you on particular exercises, give you appropriate symptom management advice and take you through a personalised graduated rehabilitation program. If you continue to experience pain after 6-8 weeks of treatment, your physiotherapist can refer you back to your doctors, to consider administration of a cortisone injection into the elbow to help reduce pain and inflammation, and further referral onto see a specialist to seek guidance on other treatment options.

Prevention

Having a good comprehension of risk of injury and being conscious of your everyday activities may aid in the prevention of medial elbow pain. You should:

  • Adopt appropriate technique and form when undertaking repetitive activities or sporting motions
  • Keep up with adequate wrist, forearm, and shoulder muscle strength
  • Undertake gentle wrist and forearm stretches pre and post activities
  • Adopt appropriate posture and body mechanics when lifting heavy objects to reduce joint strain- especially if doing so repetitively

Knee pain from squats explained

Whether you are squatting racks of weights in the gym or squatting down to the floor to play with your children or simply squatting to sit in a chair – you are still squatting.

Truth of the matter is, squatting is more than just an exercise. If you think about it, it is a functional movement we all do many times in the day.

Knee pain from squatting is a common compliant. Although it is common, it doesn’t mean it is normal.

More often than not, the problem doesn’t only lie at the knee joint. We have to understand the complexity of our body in how our knees are directly linked with how your hips and ankles are moving. So, the purpose of this blog is not only to help you understand the basic mechanics involved in the legs when you squat, but also to help you perfect your lifting craft in the gym.

A bit on what is a squat?

Squatting is characterized as a ‘compound movement’ – fancy fitness lingo that simply means, multiple joints and muscles are moving and working in harmony to contribute to the very movement of squatting.

So here is a checklist to help you find the missing links.

Squatting check list

1.      Foot arches

Feet are the foundation to our body. From a balance perspective we can go as far to say that steady the feet, steady the rest of the body. So, what happens at our feet is extremely important to consider when we talking about knee pain in general, let alone, knee pain when squatting.

Foot stability can be best explained using the analogy of a ‘tripod’. As tripod has 3 points of contact with the ground, so should our feet ideally.

The three points of a contact, as in a tripod looks like this in our feet.

  • Ball of the big toe
  • Ball of the 5th toe
  • Heel

Keeping this in mind, lets assess the foundation of your body – Your feet with this small exercise.

Take your shoes and socks off. Stand up tall, plant both your feet flat on the ground. Take a look at both sides individually. What do you see?

  • Either of your feet collapse in?
  • Are either of your arches diminished?

Take note of it. Next, remain standing and focus on what you feel at sole of your feet.

Think about the 3 points of contact – the tripod.

  • Do you feel you have evenly distributed pressure?

Take note.

Now stand on one leg – think about the same TWO things the arch and the pressures.

  • Which way did your foot go?
  • Which points of contact in the foot had more pressure?
  • Did your toes 3-5th lose contact from ground?

If your foot caved in and the last 3-5th toes lost ground contact, then your foot pressure is likely to sit between big toe, the base of 2-3rd toes and heel, suggesting you have a narrowed base of support. This will force the knee, hip and the rest of your body to follow in the direction, creating risk of building up unwanted pressures in others areas of your body. Before you know it, unwanted pressure results in inflammation and pain.

It is important that you consider this of high value and practice on pressure control and arch control before your look at the overall picture of squatting.

2.      Ankle mobility

Your foot and ankle are closely linked – between them there are 28 bones, many muscles, ligaments and connective tissue. These anatomical structures work together to provide stability and mobility of the joints – considered KEY essentials to squatting.

Too much or too little flexibility in the ankle can be a problem. In most cases, ankle injuries result in stiffness, a hinderance to simple functional movements.

So, let’s take a closer look at your ankle with a simple mobility test.

Kneel down in front of a wall. Signal a thumbs up and measure the width of it from the wall and mark it. Place your foot on the line and drive your knee forward to the wall. Make sure you drive your knee straight forward without caving in or twisting in with your hips.

What do you see?

  • Can you touch your knee to the wall?
  • What about the other side?

Consider what you feel.

  • One side feels almost effortless, the other side doesn’t?

It is not uncommon to notice that the unaffected side may not be as flexible as you thought.

This is point to note – you have just discovered a link and a potential cause of your knee pain.

You need focus on stretching the muscles of your leg in a way that similar to ‘squatting’ – here is a good one!

  • Box ankle stretch

Use a box or a chair, plant your foot flat and rock forwards until you feel a stretch in the calf and ankle. Remember to make sure your knee doesn’t cave in or your body doesn’t twist. Do this for 20-25 repetitions, 2-3 sets. Re-test yourself.

3.      Hips

Your feet are directly tied to your hips. So, the action of your hip and feet should be working together for good purposeful movement.

Here is a quick way to check this yourself:

Stand tall, with your feet planted shoulder width apart. Drive your knees out to the side. You will notice your foot arch lifts.

It might be a very small amount, but worth taking note. Because, this is no different when you are squatting. If your knees collapse in, it may mean that you are not recruiting the key muscles of your hips that prevent the knees collapsing.

So, driving your knees out to match the alignment of your hip-ankle not only lifts the arches but begins the process of recruitment patterns of hip muscles to engage.

The common deficit contributing to your knee pain may be weak gluteal muscles.

Gluteal muscles are powerful muscles of the lower limb. They are a group of three muscles, each with slight different function

  • Gluteal maximus – hip external rotation, hip extension
  • Gluteal medius – hip abduction, internal and external rotation, extension
  • Gluteal minimus – hip abduction and internal rotation

Banded squat

Banded squats are a great way to activate your gluteus. The band not only provide resistance but provides sensory information to help you learn to push into it, therefore avoid knees from collapsing in.

If you have a lighter level resistance band, place this at knee height.

Descend in to a squat position with emphasis on pushing you knee out into the resistance band, until you reach the hip-knee-ankle alignment.

Do this 15 times, 3 sets.

For starters, work at a level that is easy for you.

Build the reps ups as you gain confidence

  • Weak or inadequately recruited muscles could be a result of stiffness hips.

To check your flexibility, try this next test:

Sit on tall on a chair. Feet planted flat on ground at shoulder width apart. Test one leg at a time. Keeping your thigh in contact with the chair, drive your knee out to the side (internal rotation). Now try going inwards (external rotation).

What do you see?

  • Can internally rotate higher? External rotation is difficult? Or vice versa?

What do you feel?

  • Takes more effort going one way than the other?

Unlock the hips with this beginner hip stretch.

Sit upright on a chair. Cross one leg over on the other. You should feel a stretch in the buttock region. If not, progress by leaning forward with an upright posture. Hold for 15-20 seconds. Repeat 3-5 times.

Perfecting your squat

Perfect practice makes perfect. Now bearing the rules of movement in mind, practice your squats.

Some tips to help you better practice:

  • Do not worry about the depth of your squat

It’s the quality not the quantity. So as you begin to learn and adapt these principles, only squat down to a level where you feel in control of your foot, ankle, knee and hip.

  • Use a mirror

Visual learning is a great tool! It provides for a greater ability to correct your mistakes and perfect that ‘quality over quantity’ rule.

  • Start with barefoot

This allows you to connect the sensory receptors in the soles of your feet to the ground, making it much easier to learn the tripod grip.

Still having pain?

Remember, the complexity of our body and the complexity in how we move as whole can be the result of your knee pain. So, if you are still having pain – its time you get it checked.

Book yourself in for an appointment today.

Fix the grinding in your knees when you squat

There can be multiple reasons why your knees sound like popping popcorns or grating stones when you squat.

Generally popping in the knees is attributed to stiffness of the quadriceps muscle and the fascia that surrounds the knee joint. Overtime, stiffness causes pressure to build up under knee cap, which on movement can cause a sudden release causing a ‘popping’ sound. As worrying as it may be, most of the time popping noises in the knee without pain is NORMAL. However, for others the noise can be accompanied with a grinding sensation under the knee cap which is painful. This suggests there is an underlying pathology that needs to be addressed.

This is something we would clinically consider to be Patella Femoral Pain Syndrome aka Runner’s knee – an umbrella term that encompasses the idea of dysfunctional knee cap tracking.

When you straighten and bend your knee, naturally your knee cap tracks up and down between its groove (trochlea groove) – like a train moving up and down a train track.

When the quadricep muscles on the outside (vastus lateralis) and inside (vastus medialis oblique) part of the leg are working in synchronization as they should, your knee cap is able to track up and down properly. However, if the quadriceps muscle (Vastus lateralis) is overly activated and the fascia (Iliotibial band & lateral retinaculum) on the outer part of you knee cap is excessively stiff, the knee cap gets pulled to the outside.

Essentially the train is being pulled and tilted more to the outside. Eventually overtime, repetitive or violent lateral pull of the knee cap increases friction in the knee grating the smooth underside of the knee cap called, chondromalacia. Additionally, the constant pulling and stiffness of the lateral side will cause stretching on the inside of muscles. On top of that, pain and swelling will cause the muscles in the inside of the leg to shut down.

Here are two steps to managing your symptoms.


STEP ONE

  1. Foam roller or tennis ball

Instructions:

  • Lie on your front and place the foam roller underneath your leg.
  • Bend the opposite leg and bring it out to the side to help you move back and forth.
  • Roll the entire length of the thigh muscle, staying off the knee joint.

Make sure you move through the length of the muscle close to the knee cap as you can. You should be looking for stiff spots in the muscles and any sore spots you feel concentrate on it for couple of seconds and work deeper in to the tissue. You should also move in the inside and outside of the quadriceps muscles. Do this with you knee straight and then move into knee flexed position to optimize the release.

For a more concentrated release, use a tennis ball or a lacrosse ball especially at the quadriceps tendon where much of the stiffness is likely present. The reduced surface area of the ball allows you to work on specific spots a lot better to break down deeper areas of stiffness and create more mobility.

Do this mobility routine for 1-2 minutes


  1. Quadricep stretches

  • Start in a standing position. Use support if required for balance.
  • Raise one leg behind you grabbing hold of your ankle, or your lower leg.
  • Lift and hold for 20-30 second, and then repeat for the other leg.
  • Get into a lunge position with back leg flat on floor
  • Bend your knee and slowly pull your leg into a stretch
  • Hold this stretch for 20-30 seconds
  • For comfort place a rolled face towel under the knee cap

Modified quadricep stretch

For some people if kneeling down is irritating for the knee you can modify the stretch.

  • Rest your leg on the chair with your foot against the back rest
  • Make sure your stance leg is far enough in front of the chair
  • Lunge forward until stretch is felt
  • Do this for 20-30 seconds.

NOTE: Long duration stretches of over a minute and more can decrease the potential for you to create strength and power in those muscles during your workout. So, prior to your workout focus on short duration stretches.


  1. Functional mobility stretch

Deep squat sits are great to expand the stretch. If your symptoms are not aggravated, try deep squat sits for 30 seconds up to a minute.

  • Stand with feet shoulder width apart
  • Point your feet out to about 45 degrees
  • Sit in to a deep squat keeping the pressure evenly distributed across feet

STEP TWO

Now that you’ve resolved the stiffness in the lateral portion of your knee, next step is to address the muscles imbalances caused by pain and swelling. That is, turning back the firing of the quadriceps muscles.

An effective way to address this, is by doing what we call close chain exercises – these are exercises done where your feet are on the ground, such as squats. Initially you want start slow and high. Mini squats are great because they allow you to strengthen your quadriceps without putting too much compressive forces into your knee. As you get comfortable, advance to a deeper squat and slowly begin to work towards building you strength by adding on weight.

Mini bodyweight squats

  • Stand behind a chair or table and place your hands onto the back rest.
  • Keeping your back straight, bend both knees into a semi-squatting position, allowing your hands to slide forwards.
  • Your hips should travel backwards as you counterbalance by leaning your chest forwards.
  • Push through your buttock and thigh muscles as you return to standing, and repeat.

Deep bodyweight squats

  1. Hold on to the dumbbell, keeping it close to your chest.
  2. Step your feet wide apart and turn the toes out slightly.
  3. Drop down into a deep squat position, keeping your feet on the floor.
  4. Control the movement back to the start position.

Caution: Avoid deep squats especially if you have ongoing grinding pain. Do not push in to pain, as this will only increase the forces and worsen your symptoms. At this point, it is highly recommended that you come in to see a physiotherapist to examine a potential underlying pathology.

Wrist pain: De Quervains tenosynovitis

De Quervains tenosynovitis is a painful condition caused by inflammation of two prominent tendons that are located at the wrist and thumb.

The two tendons called the Extensor pollicus brevis  and Abductor pollicus longus originate from the middle of the forearm travel down towards and over the wrist to insert into the thumb. Collectively they function to extend the thumb, whilst abductor pollicus longus extends and also abducts the thumb (lifting thumb up to the ceiling).

What causes it?

The most common cause of De Quervains tenosynovitis is the repetitive overuse of thumb and wrist whether it is occupational or hobby related. For example, the repetitive thumb movement whilst using scissors by hair dressers, landscapers using shears or whilst gardening). Trauma to the tendons from injuries to the wrist or the thumb can cause inflammation of the tendons.

In some cases, age related degeneration of the tendon sheath or underlying conditions such as rheumatoid arthritis increases the risk of the developing De Quervains tenosynovitis. Hormonal changes resulting in fluid build up in young mothers can commonly result in De Quervains tenosynovitis.

Symptoms

Commonly your symptoms may include:

  • Pain located at base of your thumb
  • Pain elicited by movement of thumb (gripping or making a fist)
  • Grating or snapping feeling
  • Tightness in the wrist
  • Swelling surrounding the base of thumb and wrist

How is De Quervains tenosynovitis diagnosed?

Your doctor or physiotherapist will be able to diagnose the condition based on your symptoms and after doing a thorough movement assessment to rule out any other potential diagnosis.

  • Finkelstein test is used to elicit symptoms to confirm De Quervains tenosynovitis.

How to test:

  1. Wrap your thumb with your fingers.
  2. Slowly bend your wrist down

A positive test would elicit pain at the site of the two tendons.

Radiological investigations in lights of ultrasound and an x-ray might be recommended for further investigations, particularly to confirm clinical diagnosis or to rule out any other possible causes of De Quervains such as osteoarthritis.

What treatment options are available?

Conservative (non-surgical) management

Conservative management measures are generally recommended as the first line of management for mild to moderate symptoms. This is because up to 60-70% of symptoms are likely to improve over a period of 6-8 weeks of regular physiotherapy intervention. In this period, the following strategies are recommended by your therapist to fast-track your recovery

  • Rest and application of heat or cold packs
  • Avoid repetitive use of thumb
  • Pain medications (anti-inflammatory medications) such as diclofenac or ibuprofen
  • Splints or braces
  • Steroid injection

Surgical management

In more severe cases when conservative management has failed, surgery may be recommended by an orthopaedic specialist or surgeon.

Prior to your surgery you will have the opportunity to thoroughly discuss with your surgeon the details of the surgical procedure and about the post operative rehabilitation process.

  • Surgical procedure

Surgery may be performed under general or local anaesthesia. A small incision is made at the wrist and thumb region. The covering of the tendons (sheath) is then separated and expanded to provide the tendon space to allow the tendon to move smoothly within the sheath. After this the, the incision in then sutured with a firm dressing applied over the suture site.

  • While you recover from the surgery, an information sheet with post operative guidelines will be provided to you by your surgical team. It is important that you must follow the guidelines recommended by your surgeon for optimal recovery.
  • In most cases your will have a follow up with your surgeon few weeks after your surgery to check your wound healing and your progress. You are often times referred to physiotherapy for strength and conditioning of your wrist and hand movements to facilitate your recovery.