Rotator cuff injury
Rotator cuff injuries are the most common source of shoulder problems. They can range from minor sprains causing impingement type symptoms, to massive tears resulting in severe loss of function and pain. They commonly occur as a result of acute injuries (sports, falls), chronic overuse (repetitive loading) or due to gradual aging.
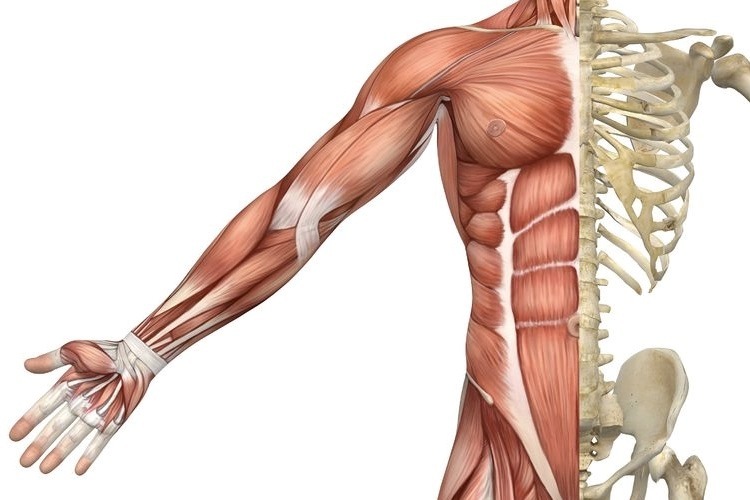
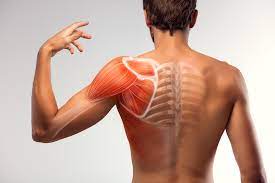
Anatomy of shoulder
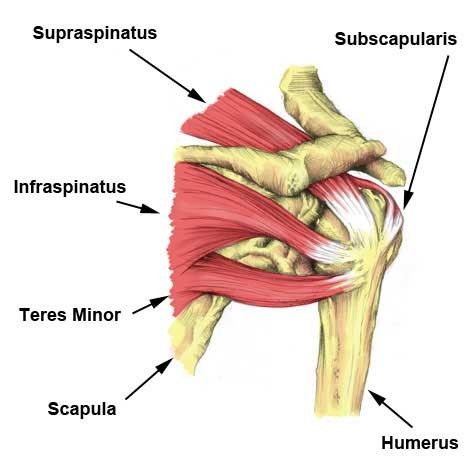
The shoulder joint (glenohumeral joint) is the most mobile joint in the human body. It comprises of the humeral head (top portion of upper arm bone) which fits in the glenoid cavity of the scapula (shoulder blade) to create a ball and socket configuration. This anatomical configuration results in limited bony contact between the humeral head and the glenoid fossa, which reduces the stability of the joint.
Several passive and active structures stabilize and maintain proper biomechanics of the shoulder joint.
-
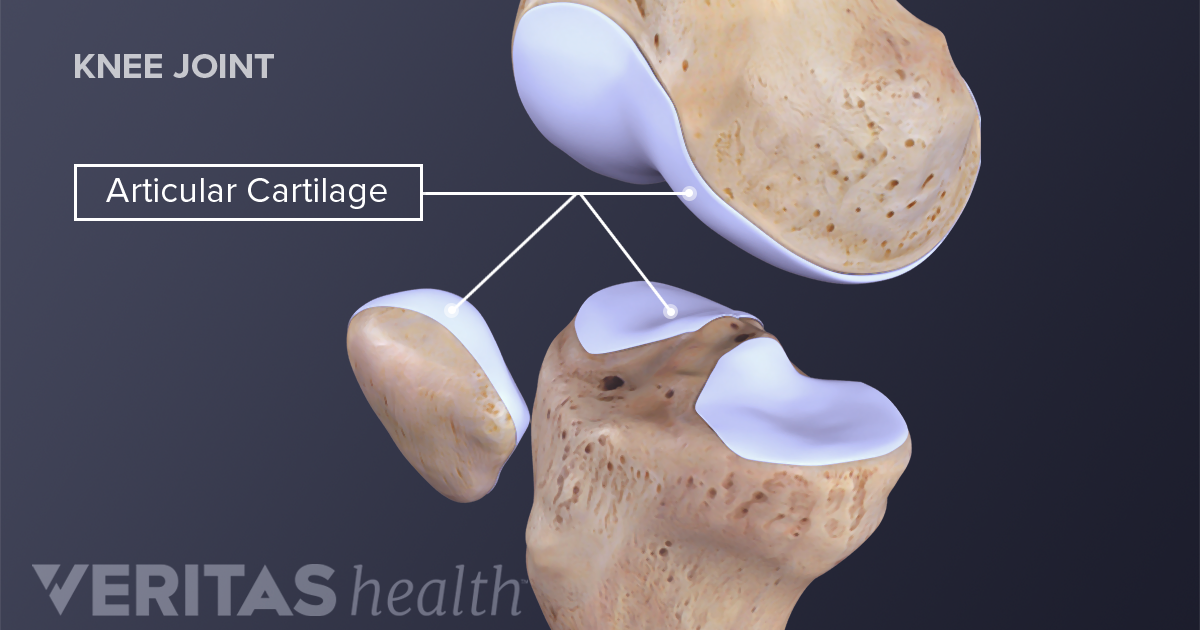
Passive stabilizers include the ligaments, joint capsule, cartilage and the bony concavity of glenoid fossa. Thick cartilage known as labrum lines the glenoid fossa to further deepen the groove by about 50% which is advantageous in stabilizing the shoulder joint during the articulation.
-
Dynamic stabilizers of the glenohumeral joint is gained from the coordination of rotator cuff muscles that compress the passive structures providing stability and mobility as whole.
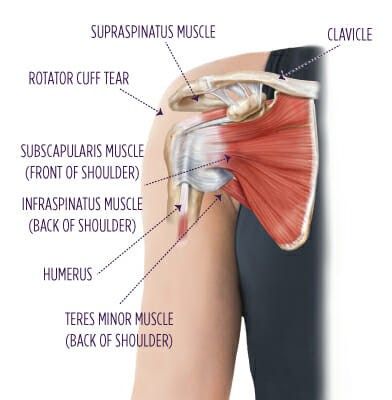
The rotator cuff muscles include:
-
supraspinatus
-
infraspinatus
-
subscapularis
-
teres minor
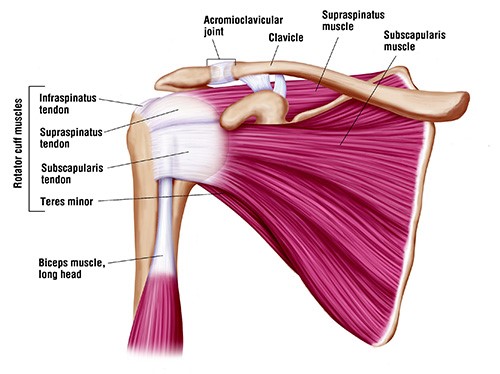
Injury to any or all these four muscles, including the tendons that attach the muscles to bone can result movement dysfunction and severe pain.
Other important joints of the shoulder complex include:
-
sternoclavicular joint
-
arcomioclavicular joint
-
scapulothoracic joints
Types of rotator cuff pathology
Tendinitis and Tendinosis
More often than not the term tendinitis and tendinosis are interchangeably used to describe a similar tendon pathology. However, the factor that differentiates the two is the time of injury (acute or chronic).
Tendinitis results from acute injury to the tendon which sets off an inflammatory process characterized by pain, swelling, and redness. On the other hand, tendinosis is a chronic pathology that does not involve an inflammatory process. It is characterized by degeneration of collagen fibers in response to persistent micro-trauma, vascular compromise and aging.
Acute rotator cuff tear
-
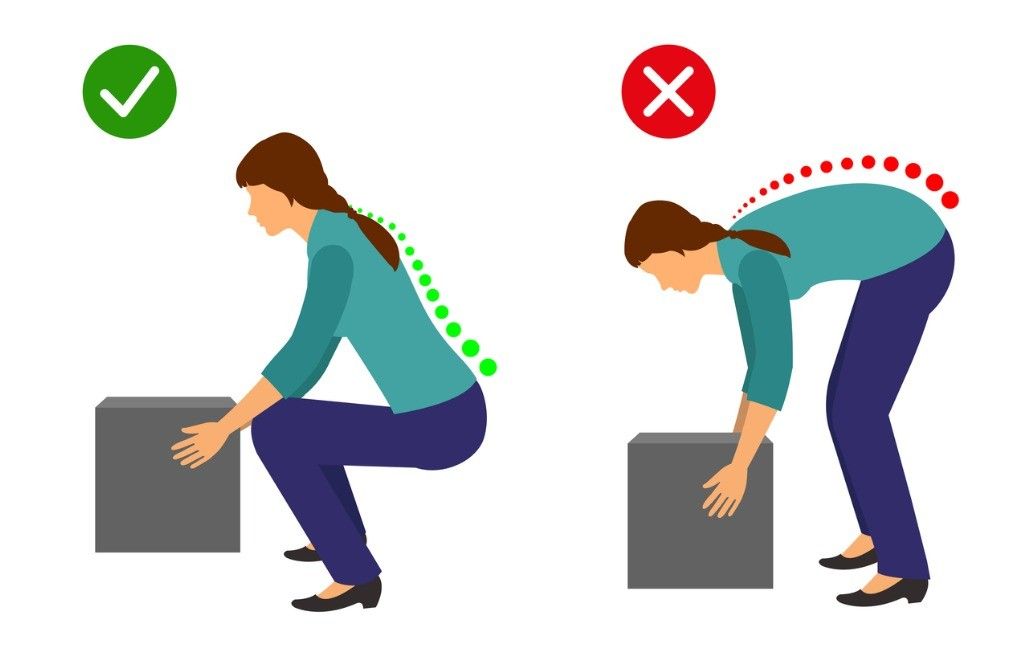
Acute tears result from sudden forceful lifting of the arm against resistance or in an attempt to cushion a fall (for example, heavy lifting or a fall on the shoulder).
Chronic injuries
-
Most commonly resulting from occupational or sports requiring excessive repetitive overhead activity.
Signs and symptoms
Symptoms of a rotator cuff injury are due to the inflammation that accompanies the strain. Swelling that forms within the small space of the joint prevents the normal mechanics of the shoulder, resulting in the clinical picture of pain and decreased range of motion.
-
Acute rotator cuff tears
Tearing sensation
Immediate severe localised pain
Reduced strength
Symptomatic clicking
Reduced and worsening pain with movements
Affects daily activities (personal care, lifting, reaching etc) -
Chronic rotator cuff tears
Generalized deep dull ache, sharp onset of pain with movements
Global shoulder weakness
Reduced movements and daily activities (especially moving to the side, reaching behind back)
When to seek medical treatment
See your doctor or a physiotherapist if you experience any of the following symptoms in the shoulder:
-
Pain, especially pain that does not improve with rest
-
Swelling, redness or tenderness around the joint
-
Shoulder weakness
-
Reduced shoulder movement
For more severe rotator cuff injuries, you may require immediate medical attention.
Seek immediate medical attention if you experience the following symptoms:
-
Sudden, severe pain
-
Visible joint deformity
-
Inability to move or use your shoulder joint
-
Sudden swelling, discoloration
Diagnosis
To diagnoses an injured rotator cuff, your physiotherapist will begin with a thorough subjective and physical examination of your shoulder.
-
Subjective assessment
Your physiotherapist will begin with a thorough subjective assessment inquiring about your signs and symptoms of an acute injury as well as any symptoms that may suggest a more long-term problem.
-
Physical assessment
The physical examination often involves observation to look for muscle wasting, deformities, and/or changes in appearance of the injured shoulder to the unaffected side. Your physiotherapist will also palpate different areas of the shoulder complex to find the area of pain or tenderness. Further examination will involve assessment of movement and strength to establish injury to muscles or tendons.
-
Radiology
In addition, your physiotherapist may refer you for imaging tests to diagnosis the cause of your symptoms:
-
Ultrasound: examines soft-tissue structures (muscles, tendons, bursa)
-
X-rays: examines bone health, calcification
-
MRI: provides detailed imaging of areas injured (referred by doctors, specialists or surgeons)
Treatment
Early diagnosis and treatment of a rotator cuff tear may prevent symptoms such as loss of strength and loss of motion from setting in.
Initial treatment of rotator cuff tendinitis involves managing pain and swelling to promote healing. This can be done by:
-
avoiding activities that cause pain
-
applying cold packs to your shoulder three to four times per day
-
taking anti-inflammatory medications like ibuprofen and naproxen
Rehabilitation plays a critical role in both the nonsurgical and surgical treatment of a rotator cuff tear.
When a tear occurs, there is frequently atrophy of the muscles around the arm and loss of motion of the shoulder. An individualized physiotherapy program is necessary to regain strength and improve function in the shoulder.
Physical therapy
Physiotherapy will initially consist of passive exercises to help restore range of motion and ease pain.
Once the pain is under control, your physiotherapist will prescribe exercises to help regain strength in your arm and shoulder.
Steroid injection
If you have persisting symptoms, your physiotherapist may recommend a steroid injection. This is injected into the tendon to reduce inflammation, which reduces pain.
Surgery
Surgery is recommended if you have persistent pain or weakness in your shoulder that does not improve with nonsurgical treatment. In which case, your physiotherapist will refer you to surgeon for an opinion of surgical intervention.
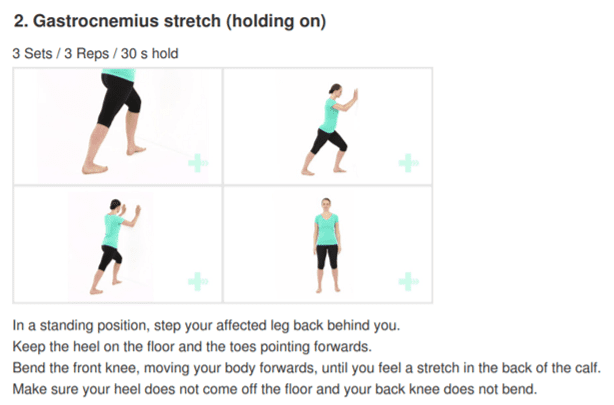
Exercises
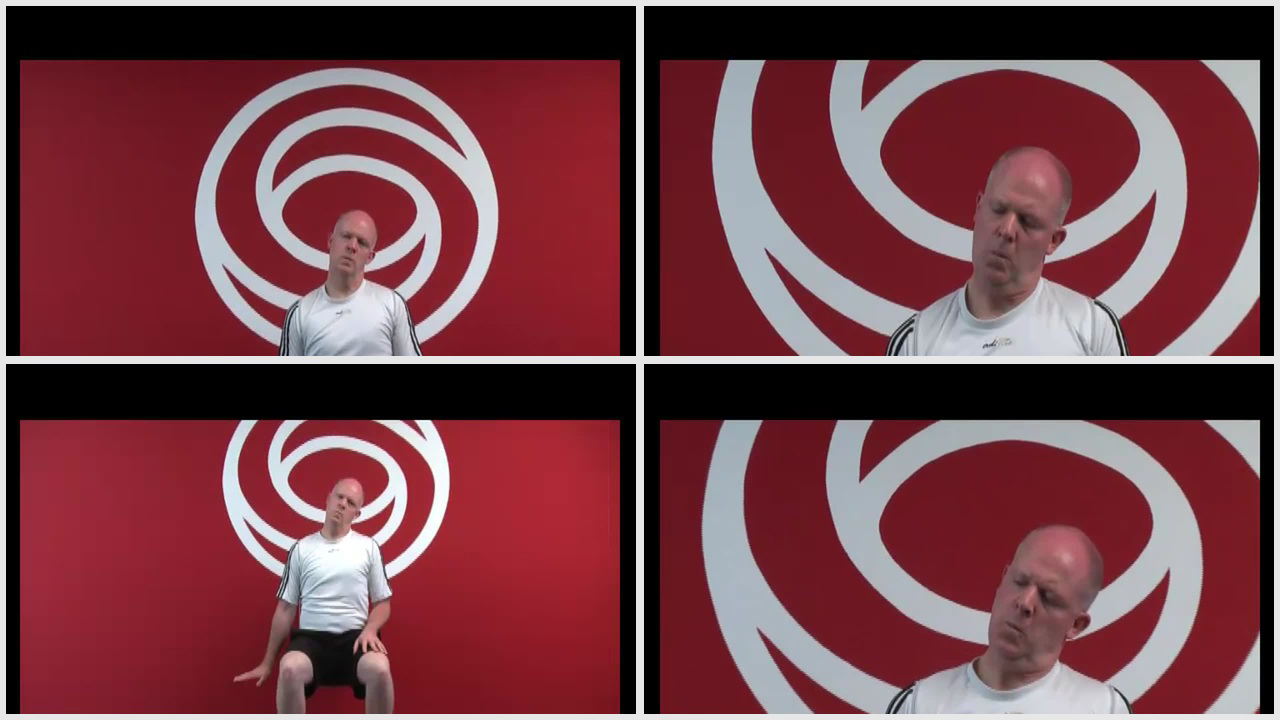
Range of movement exercise
Pendulums
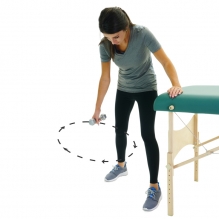
-
Lean forward with one arm hanging freely. Use your unaffected arm to brace against a chair for support.
-
With your affected side, gently swing the hanging arm from side to side, forward and back, and in a circular motion for 15-20 seconds each direction.
-
Slowly return to a standing position.
-
Repeat 4-5 times a day
Shoulder pulley (Flexion)
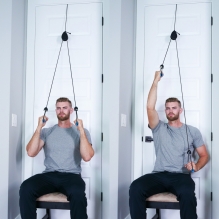
-
Put a chair against the door and sit so you are facing away from the door.
-
Grasp the door pulley handles with both hands.
-
Pull down on the pulley with your unaffected arm. This will lift your injured arm up over your head. Pull it as high as you can.
-
DO NOT FORCE THE MOVEMENT. Your affected arm should be relaxed. The unaffected arm does the work.
Hold for 5 seconds. Relax and repeat 10-15 times, 3 sets.
Three times a day.
Shoulder pulley (Abduction)
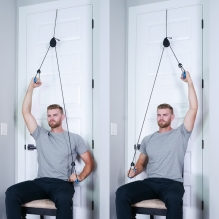
-
Put a chair against the door and sit so you are facing away from the door.
-
Using door pulleys slowly pull down with your unaffected arm so that your affected arm raises up and to the side without effort.
-
Your affected arm should be relaxed. The unaffected arm does the work.
Hold for 5 seconds. Relax and repeat 10-15 times, 3 sets.
Three times a day.
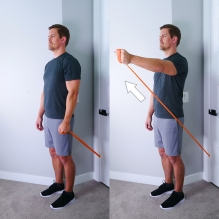
Wand flexion
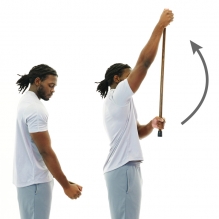
-
Stand upright and hold a stick in both hands
-
Cup the top end of stick with affected hand
-
Using your unaffected arm hold the stick midway and drive the affected arm forward and up.
-
Ensure your elbow is straight throughout
-
Hold for 5 seconds and return to the starting position.
-
Repeat 10 times.
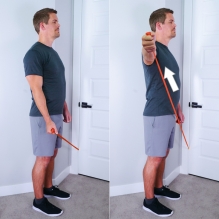
Wand Abduction
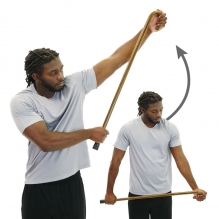
-
Stand upright and hold a stick in both hands
-
Cup the top end of stick with affected hand
-
Using your unaffected arm hold the stick midway and drive the affected to the side as high as able.
-
Ensure your elbow is straight throughout.
-
Hold for 5 seconds and return to the starting position.
-
Repeat 10 times.
Strengthening exercises with band
Flexion
-
Stand on one end of the band while holding the other end with your affected side.
-
Whilst keeping your elbow straight, lift the band up to 90 degrees to shoulder level.
-
Hold at the top for 1-2 seconds then lower slowly to starting position.
-
Repeat 10-15 repetitions, rest 20-25 seconds, complete 3 sets.
Abduction
-
Stand on the band while holding the band with affected hand.
-
Keep your elbow straight, lift the band up to 90 degrees to shoulder level.
-
Hold at the top for 1-2 seconds then lower slowly to starting position.
-
Repeat 10-15 repetitions, rest 20-25 seconds, complete 3 sets.
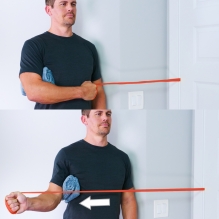
External Rotation
-
Attach the resistance band to a secure anchor at belly button height.
-
Stand with unaffected arm perpendicular to the anchor.
-
Place a towel between your elbow and your torso to stabilize your elbow
-
Grab the band using your affected side and then slow pull the band away from your body by squeezing your shoulder blade in towards the middle of your back.
-
Slowly return to starting position.
-
Repeat 10-15 repetitions, rest 20-25 seconds, complete 3 sets.
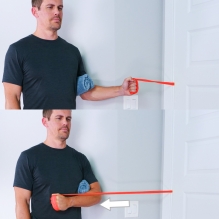
Internal Rotation
-
Attach the resistance band to a secure anchor at belly button height.
-
Stand with affected arm perpendicular to the anchor.
-
Place a towel between your elbow and your torso to stabilize your elbow
-
Grab the band using your affected side and then slow pull in to your body
-
Slowly return to starting position.
-
Repeat 10-15 repetitions, rest 20-25 seconds, complete 3 sets.