Knee pain from squats explained
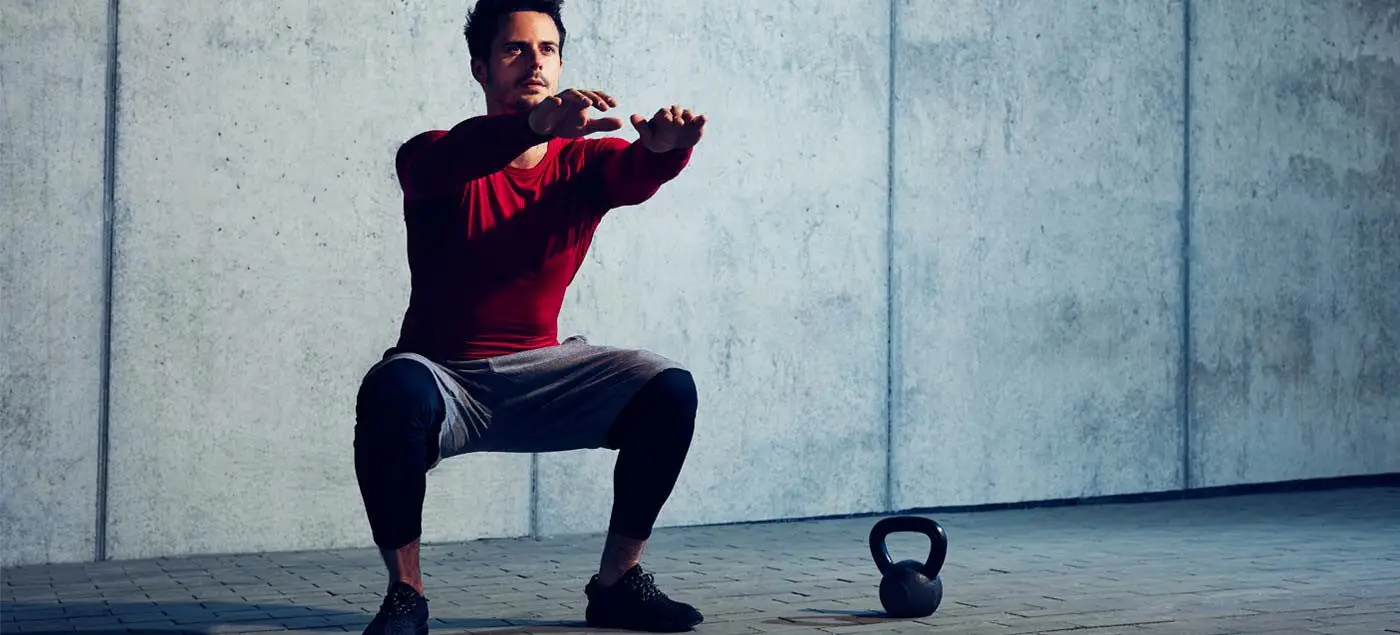
Whether you are squatting racks of weights in the gym or squatting down to the floor to play with your children or simply squatting to sit in a chair – you are still squatting.
Truth of the matter is, squatting is more than just an exercise. If you think about it, it is a functional movement we all do many times in the day.
Knee pain from squatting is a common compliant. Although it is common, it doesn’t mean it is normal.
More often than not, the problem doesn’t only lie at the knee joint. We have to understand the complexity of our body in how our knees are directly linked with how your hips and ankles are moving. So, the purpose of this blog is not only to help you understand the basic mechanics involved in the legs when you squat, but also to help you perfect your lifting craft in the gym.
A bit on what is a squat?
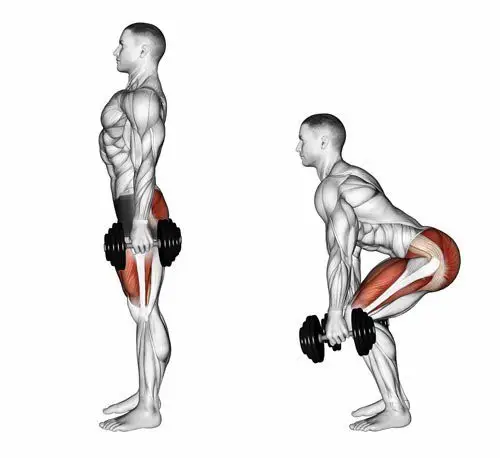
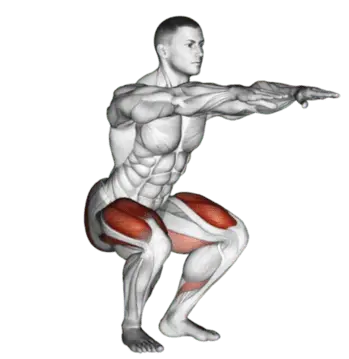
Squatting is characterized as a ‘compound movement’ – fancy fitness lingo that simply means, multiple joints and muscles are moving and working in harmony to contribute to the very movement of squatting.
So here is a checklist to help you find the missing links.
Squatting check list
1. Foot arches
Feet are the foundation to our body. From a balance perspective we can go as far to say that steady the feet, steady the rest of the body. So, what happens at our feet is extremely important to consider when we talking about knee pain in general, let alone, knee pain when squatting.
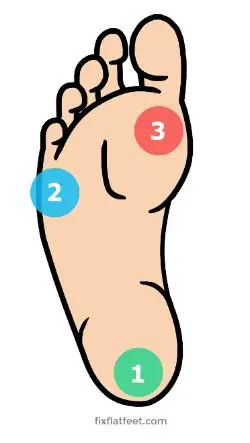
Foot stability can be best explained using the analogy of a ‘tripod’. As tripod has 3 points of contact with the ground, so should our feet ideally.
The three points of a contact, as in a tripod looks like this in our feet.
Keeping this in mind, lets assess the foundation of your body – Your feet with this small exercise.
Take your shoes and socks off. Stand up tall, plant both your feet flat on the ground. Take a look at both sides individually. What do you see?
- Either of your feet collapse in?
- Are either of your arches diminished?
Take note of it. Next, remain standing and focus on what you feel at sole of your feet.
Think about the 3 points of contact – the tripod.
- Do you feel you have evenly distributed pressure?
Take note.
Now stand on one leg – think about the same TWO things the arch and the pressures.
- Which way did your foot go?
- Which points of contact in the foot had more pressure?
- Did your toes 3-5th lose contact from ground?
If your foot caved in and the last 3-5th toes lost ground contact, then your foot pressure is likely to sit between big toe, the base of 2-3rd toes and heel, suggesting you have a narrowed base of support. This will force the knee, hip and the rest of your body to follow in the direction, creating risk of building up unwanted pressures in others areas of your body. Before you know it, unwanted pressure results in inflammation and pain.
It is important that you consider this of high value and practice on pressure control and arch control before your look at the overall picture of squatting.
2. Ankle mobility
Your foot and ankle are closely linked – between them there are 28 bones, many muscles, ligaments and connective tissue. These anatomical structures work together to provide stability and mobility of the joints – considered KEY essentials to squatting.
Too much or too little flexibility in the ankle can be a problem. In most cases, ankle injuries result in stiffness, a hinderance to simple functional movements.
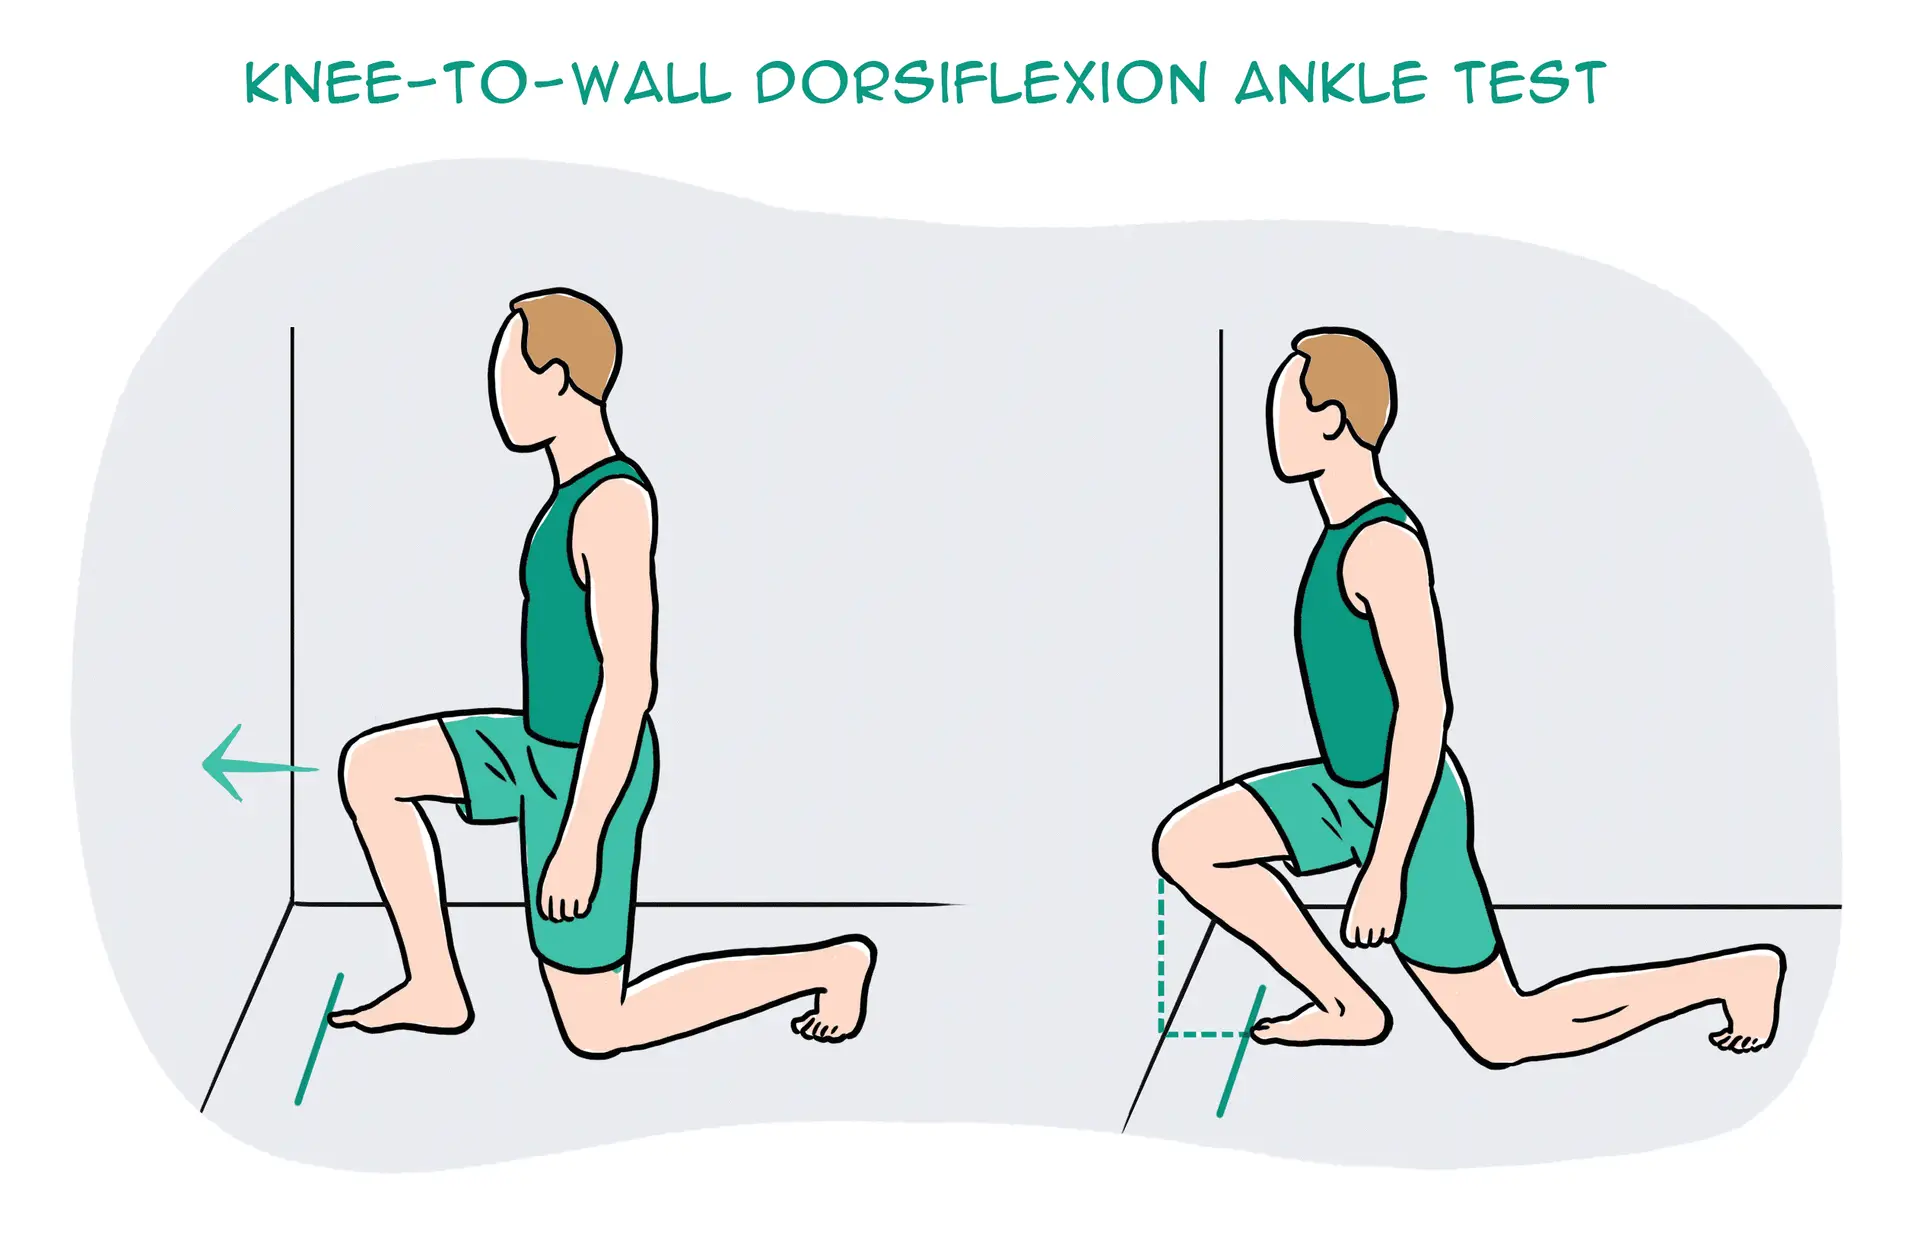
So, let’s take a closer look at your ankle with a simple mobility test.
Kneel down in front of a wall. Signal a thumbs up and measure the width of it from the wall and mark it. Place your foot on the line and drive your knee forward to the wall. Make sure you drive your knee straight forward without caving in or twisting in with your hips.
What do you see?
- Can you touch your knee to the wall?
- What about the other side?
Consider what you feel.
- One side feels almost effortless, the other side doesn’t?
It is not uncommon to notice that the unaffected side may not be as flexible as you thought.
This is point to note – you have just discovered a link and a potential cause of your knee pain.
You need focus on stretching the muscles of your leg in a way that similar to ‘squatting’ – here is a good one!
- Box ankle stretch
Use a box or a chair, plant your foot flat and rock forwards until you feel a stretch in the calf and ankle. Remember to make sure your knee doesn’t cave in or your body doesn’t twist. Do this for 20-25 repetitions, 2-3 sets. Re-test yourself.
3. Hips
Your feet are directly tied to your hips. So, the action of your hip and feet should be working together for good purposeful movement.
Here is a quick way to check this yourself:
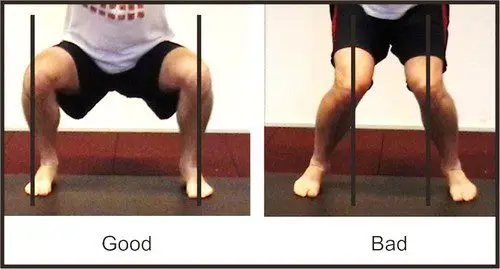
Stand tall, with your feet planted shoulder width apart. Drive your knees out to the side. You will notice your foot arch lifts.
It might be a very small amount, but worth taking note. Because, this is no different when you are squatting. If your knees collapse in, it may mean that you are not recruiting the key muscles of your hips that prevent the knees collapsing.
So, driving your knees out to match the alignment of your hip-ankle not only lifts the arches but begins the process of recruitment patterns of hip muscles to engage.
The common deficit contributing to your knee pain may be weak gluteal muscles.
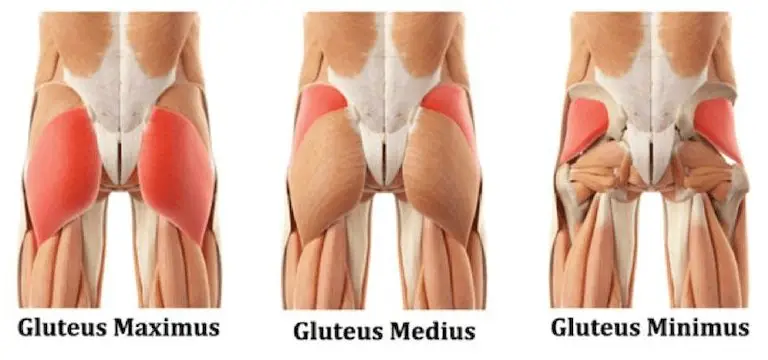
Gluteal muscles are powerful muscles of the lower limb. They are a group of three muscles, each with slight different function
- Gluteal maximus – hip external rotation, hip extension
- Gluteal medius – hip abduction, internal and external rotation, extension
- Gluteal minimus – hip abduction and internal rotation
Banded squat
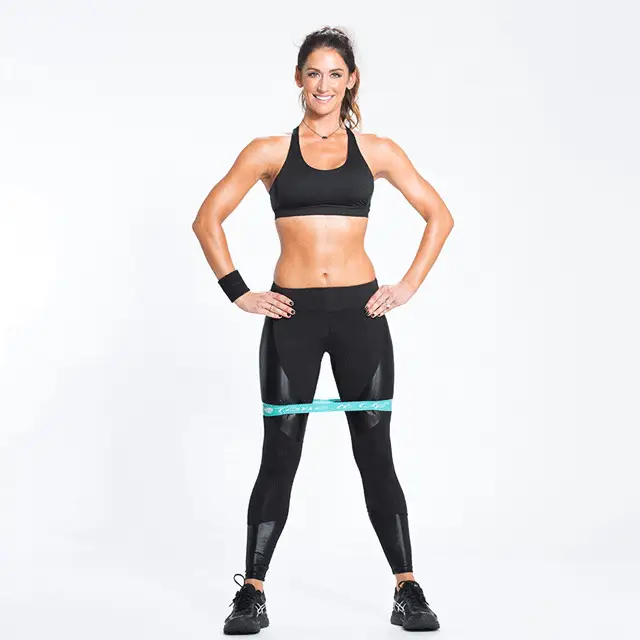
Banded squats are a great way to activate your gluteus. The band not only provide resistance but provides sensory information to help you learn to push into it, therefore avoid knees from collapsing in.
If you have a lighter level resistance band, place this at knee height.
Descend in to a squat position with emphasis on pushing you knee out into the resistance band, until you reach the hip-knee-ankle alignment.
Do this 15 times, 3 sets.
For starters, work at a level that is easy for you.
Build the reps ups as you gain confidence
- Weak or inadequately recruited muscles could be a result of stiffness hips.
To check your flexibility, try this next test:
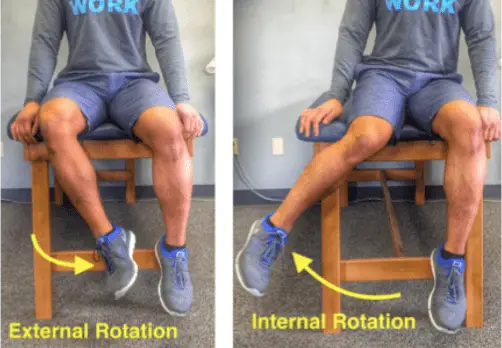
Sit on tall on a chair. Feet planted flat on ground at shoulder width apart. Test one leg at a time. Keeping your thigh in contact with the chair, drive your knee out to the side (internal rotation). Now try going inwards (external rotation).
What do you see?
- Can internally rotate higher? External rotation is difficult? Or vice versa?
What do you feel?
- Takes more effort going one way than the other?
Unlock the hips with this beginner hip stretch.
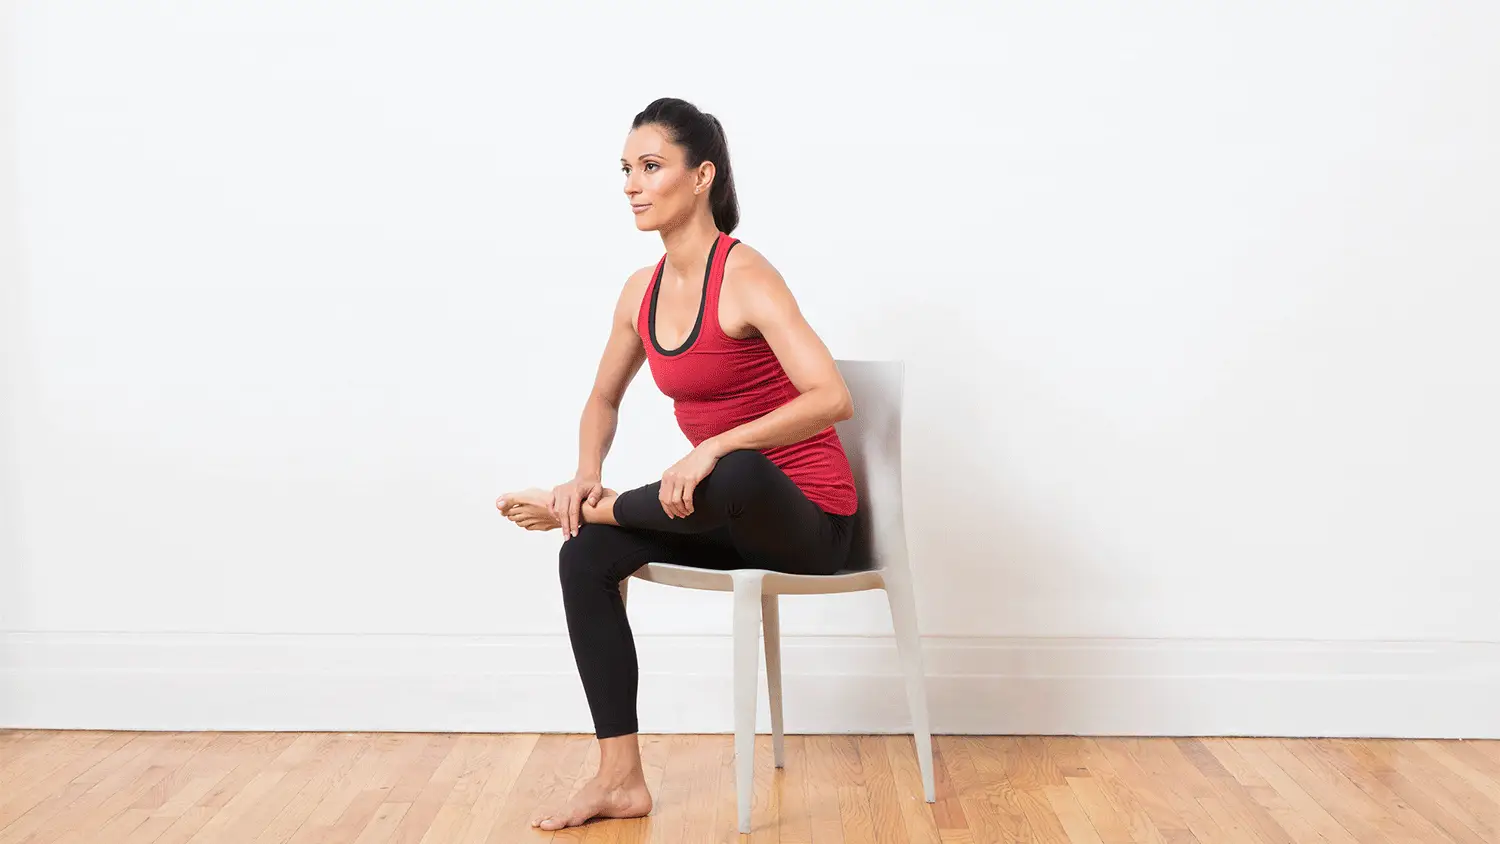
Sit upright on a chair. Cross one leg over on the other. You should feel a stretch in the buttock region. If not, progress by leaning forward with an upright posture. Hold for 15-20 seconds. Repeat 3-5 times.
Perfecting your squat
Perfect practice makes perfect. Now bearing the rules of movement in mind, practice your squats.
Some tips to help you better practice:
- Do not worry about the depth of your squat
It’s the quality not the quantity. So as you begin to learn and adapt these principles, only squat down to a level where you feel in control of your foot, ankle, knee and hip.
- Use a mirror
Visual learning is a great tool! It provides for a greater ability to correct your mistakes and perfect that ‘quality over quantity’ rule.
- Start with barefoot
This allows you to connect the sensory receptors in the soles of your feet to the ground, making it much easier to learn the tripod grip.
Still having pain?
Remember, the complexity of our body and the complexity in how we move as whole can be the result of your knee pain. So, if you are still having pain – its time you get it checked.
Book yourself in for an appointment today.

