fbpx
Your first step to recovery

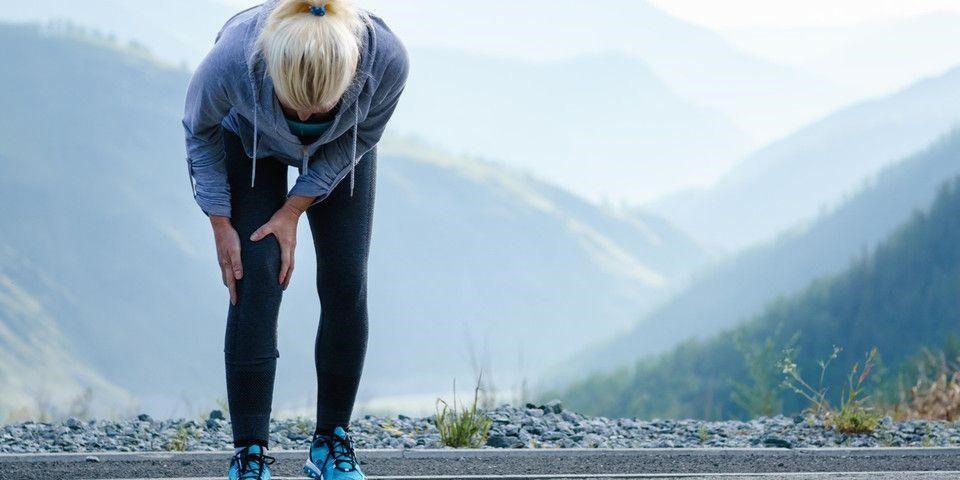
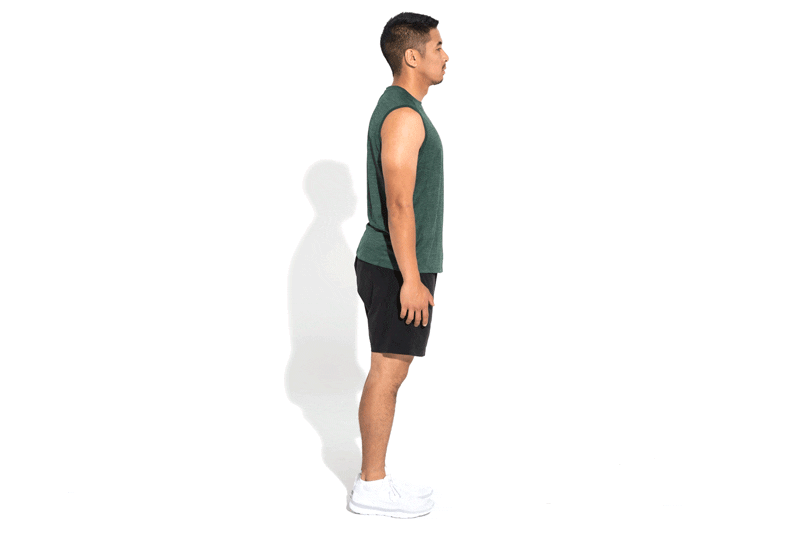
Knee pain from squats explained

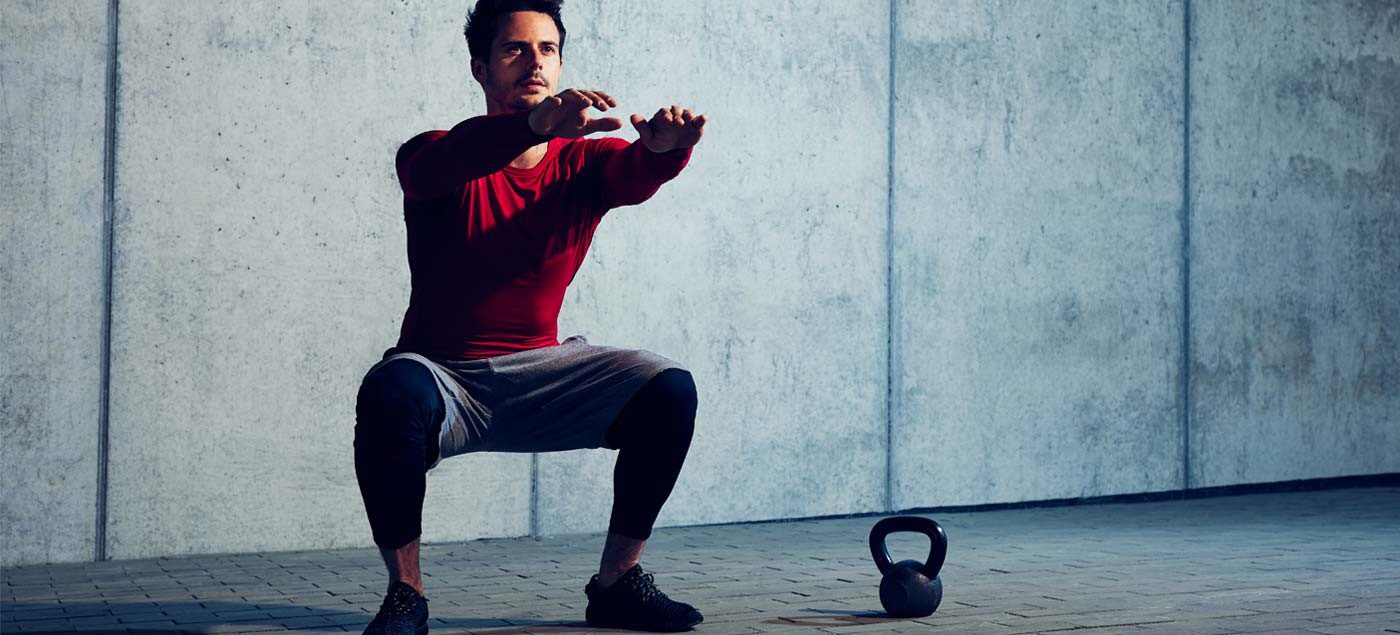
Whether you are squatting racks of weights in the gym or squatting down to the floor to play with your children or simply squatting to sit in a chair – you are still squatting.

Truth of the matter is, squatting is more than just an exercise. If you think about it, it is a functional movement we all do many times in the day.

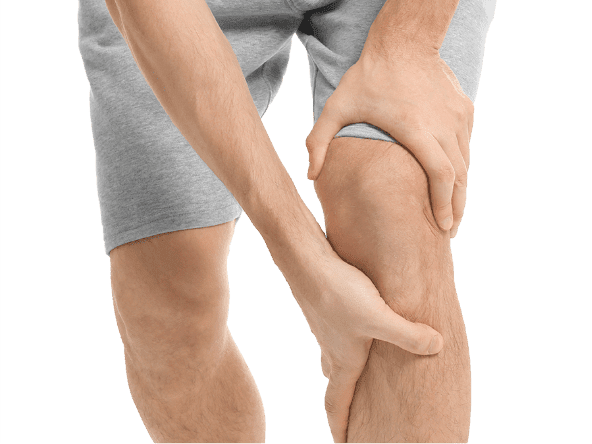
Knee pain from squatting is a common compliant. Although it is common, it doesn’t mean it is normal.

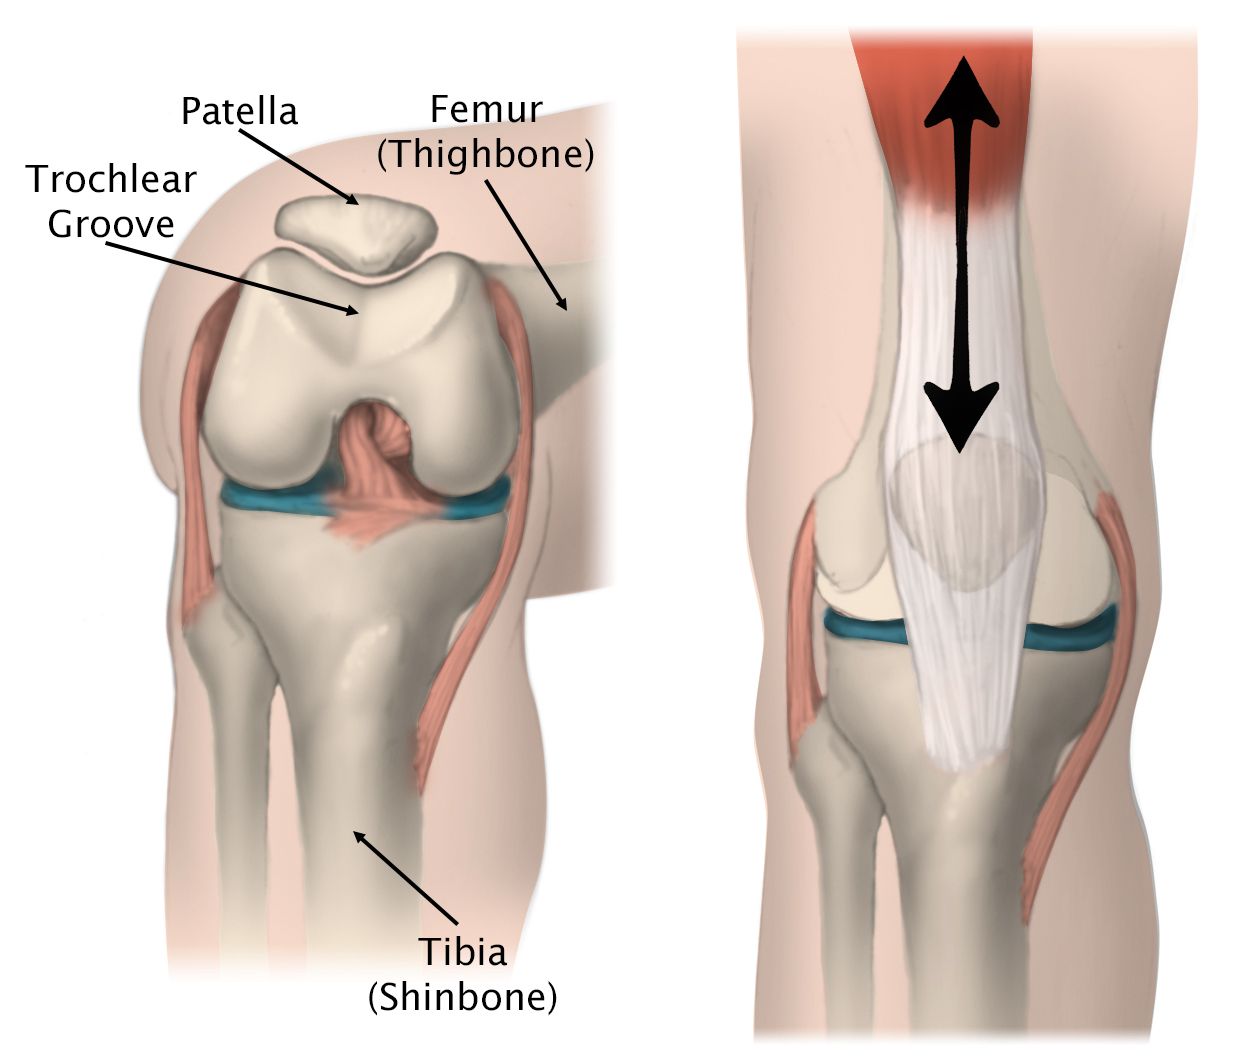
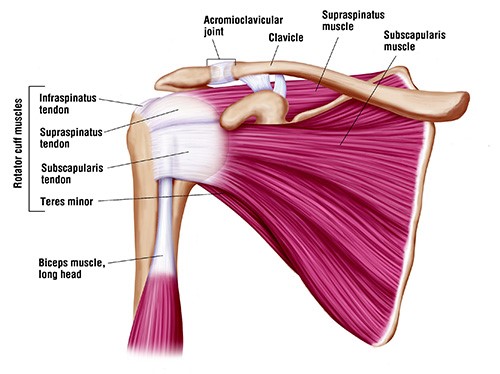
More often than not, the problem doesn’t only lie at the knee joint. We have to understand the complexity of our body in how our knees are directly linked with how your hips and ankles are moving. So, the purpose of this blog is not only to help you understand the basic mechanics involved in the legs when you squat, but also to help you perfect your lifting craft in the gym.

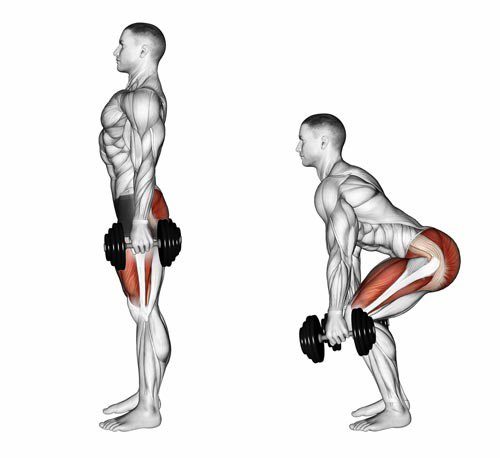
A bit on what is a squat?

Squatting is characterized as a ‘compound movement’ – fancy fitness lingo that simply means, multiple joints and muscles are moving and working in harmony to contribute to the very movement of squatting.

So here is a checklist to help you find the missing links.

Squatting check list

1.      Foot arches

Feet are the foundation to our body. From a balance perspective we can go as far to say that steady the feet, steady the rest of the body. So, what happens at our feet is extremely important to consider when we talking about knee pain in general, let alone, knee pain when squatting.

Foot stability can be best explained using the analogy of a ‘tripod’. As tripod has 3 points of contact with the ground, so should our feet ideally.

The three points of a contact, as in a tripod looks like this in our feet.

  • Ball of the big toe
  • Ball of the 5th toe
  • Heel

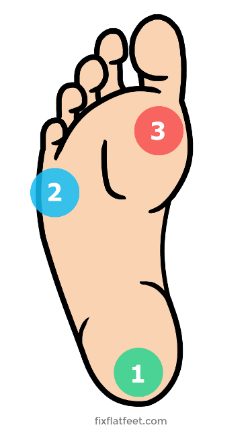
Keeping this in mind, lets assess the foundation of your body – Your feet with this small exercise.

Take your shoes and socks off. Stand up tall, plant both your feet flat on the ground. Take a look at both sides individually. What do you see?

  • Either of your feet collapse in?
  • Are either of your arches diminished?

Take note of it. Next, remain standing and focus on what you feel at sole of your feet.

Think about the 3 points of contact – the tripod.

  • Do you feel you have evenly distributed pressure?

Take note.

Now stand on one leg – think about the same TWO things the arch and the pressures.

  • Which way did your foot go?
  • Which points of contact in the foot had more pressure?
  • Did your toes 3-5th lose contact from ground?

If your foot caved in and the last 3-5th toes lost ground contact, then your foot pressure is likely to sit between big toe, the base of 2-3rd toes and heel, suggesting you have a narrowed base of support. This will force the knee, hip and the rest of your body to follow in the direction, creating risk of building up unwanted pressures in others areas of your body. Before you know it, unwanted pressure results in inflammation and pain.

It is important that you consider this of high value and practice on pressure control and arch control before your look at the overall picture of squatting.
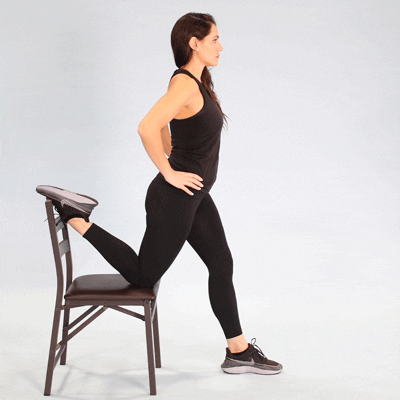
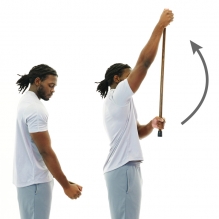
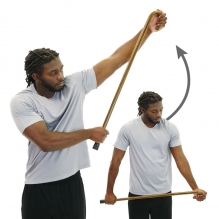
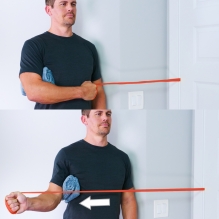
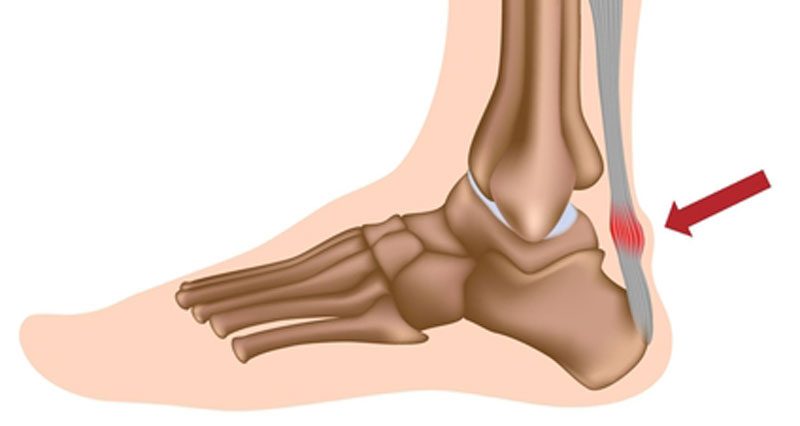
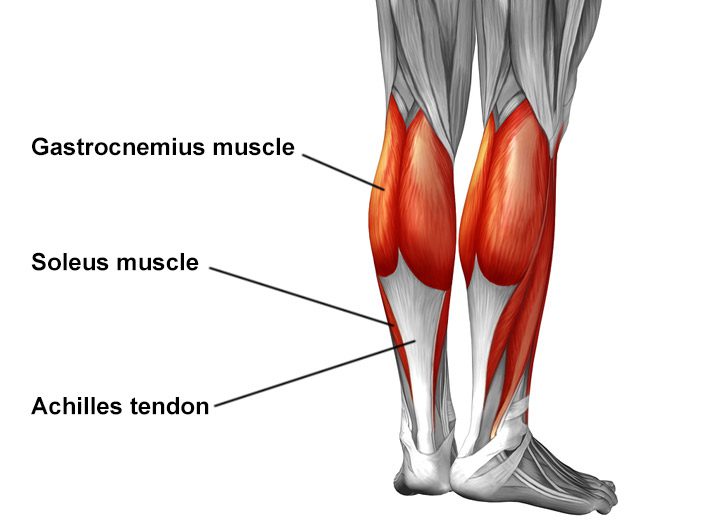
2.      Ankle mobility

Your foot and ankle are closely linked – between them there are 28 bones, many muscles, ligaments and connective tissue. These anatomical structures work together to provide stability and mobility of the joints – considered KEY essentials to squatting.

Too much or too little flexibility in the ankle can be a problem. In most cases, ankle injuries result in stiffness, a hinderance to simple functional movements.

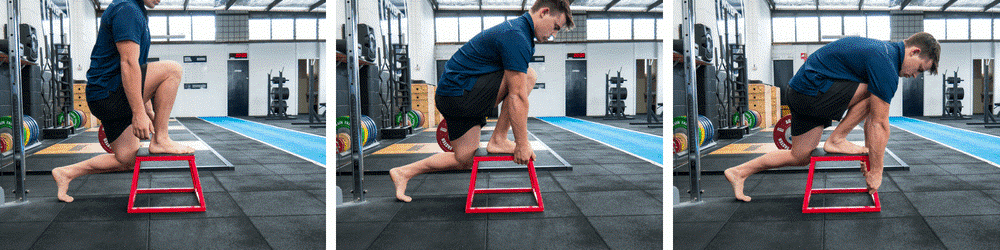
So, let’s take a closer look at your ankle with a simple mobility test.

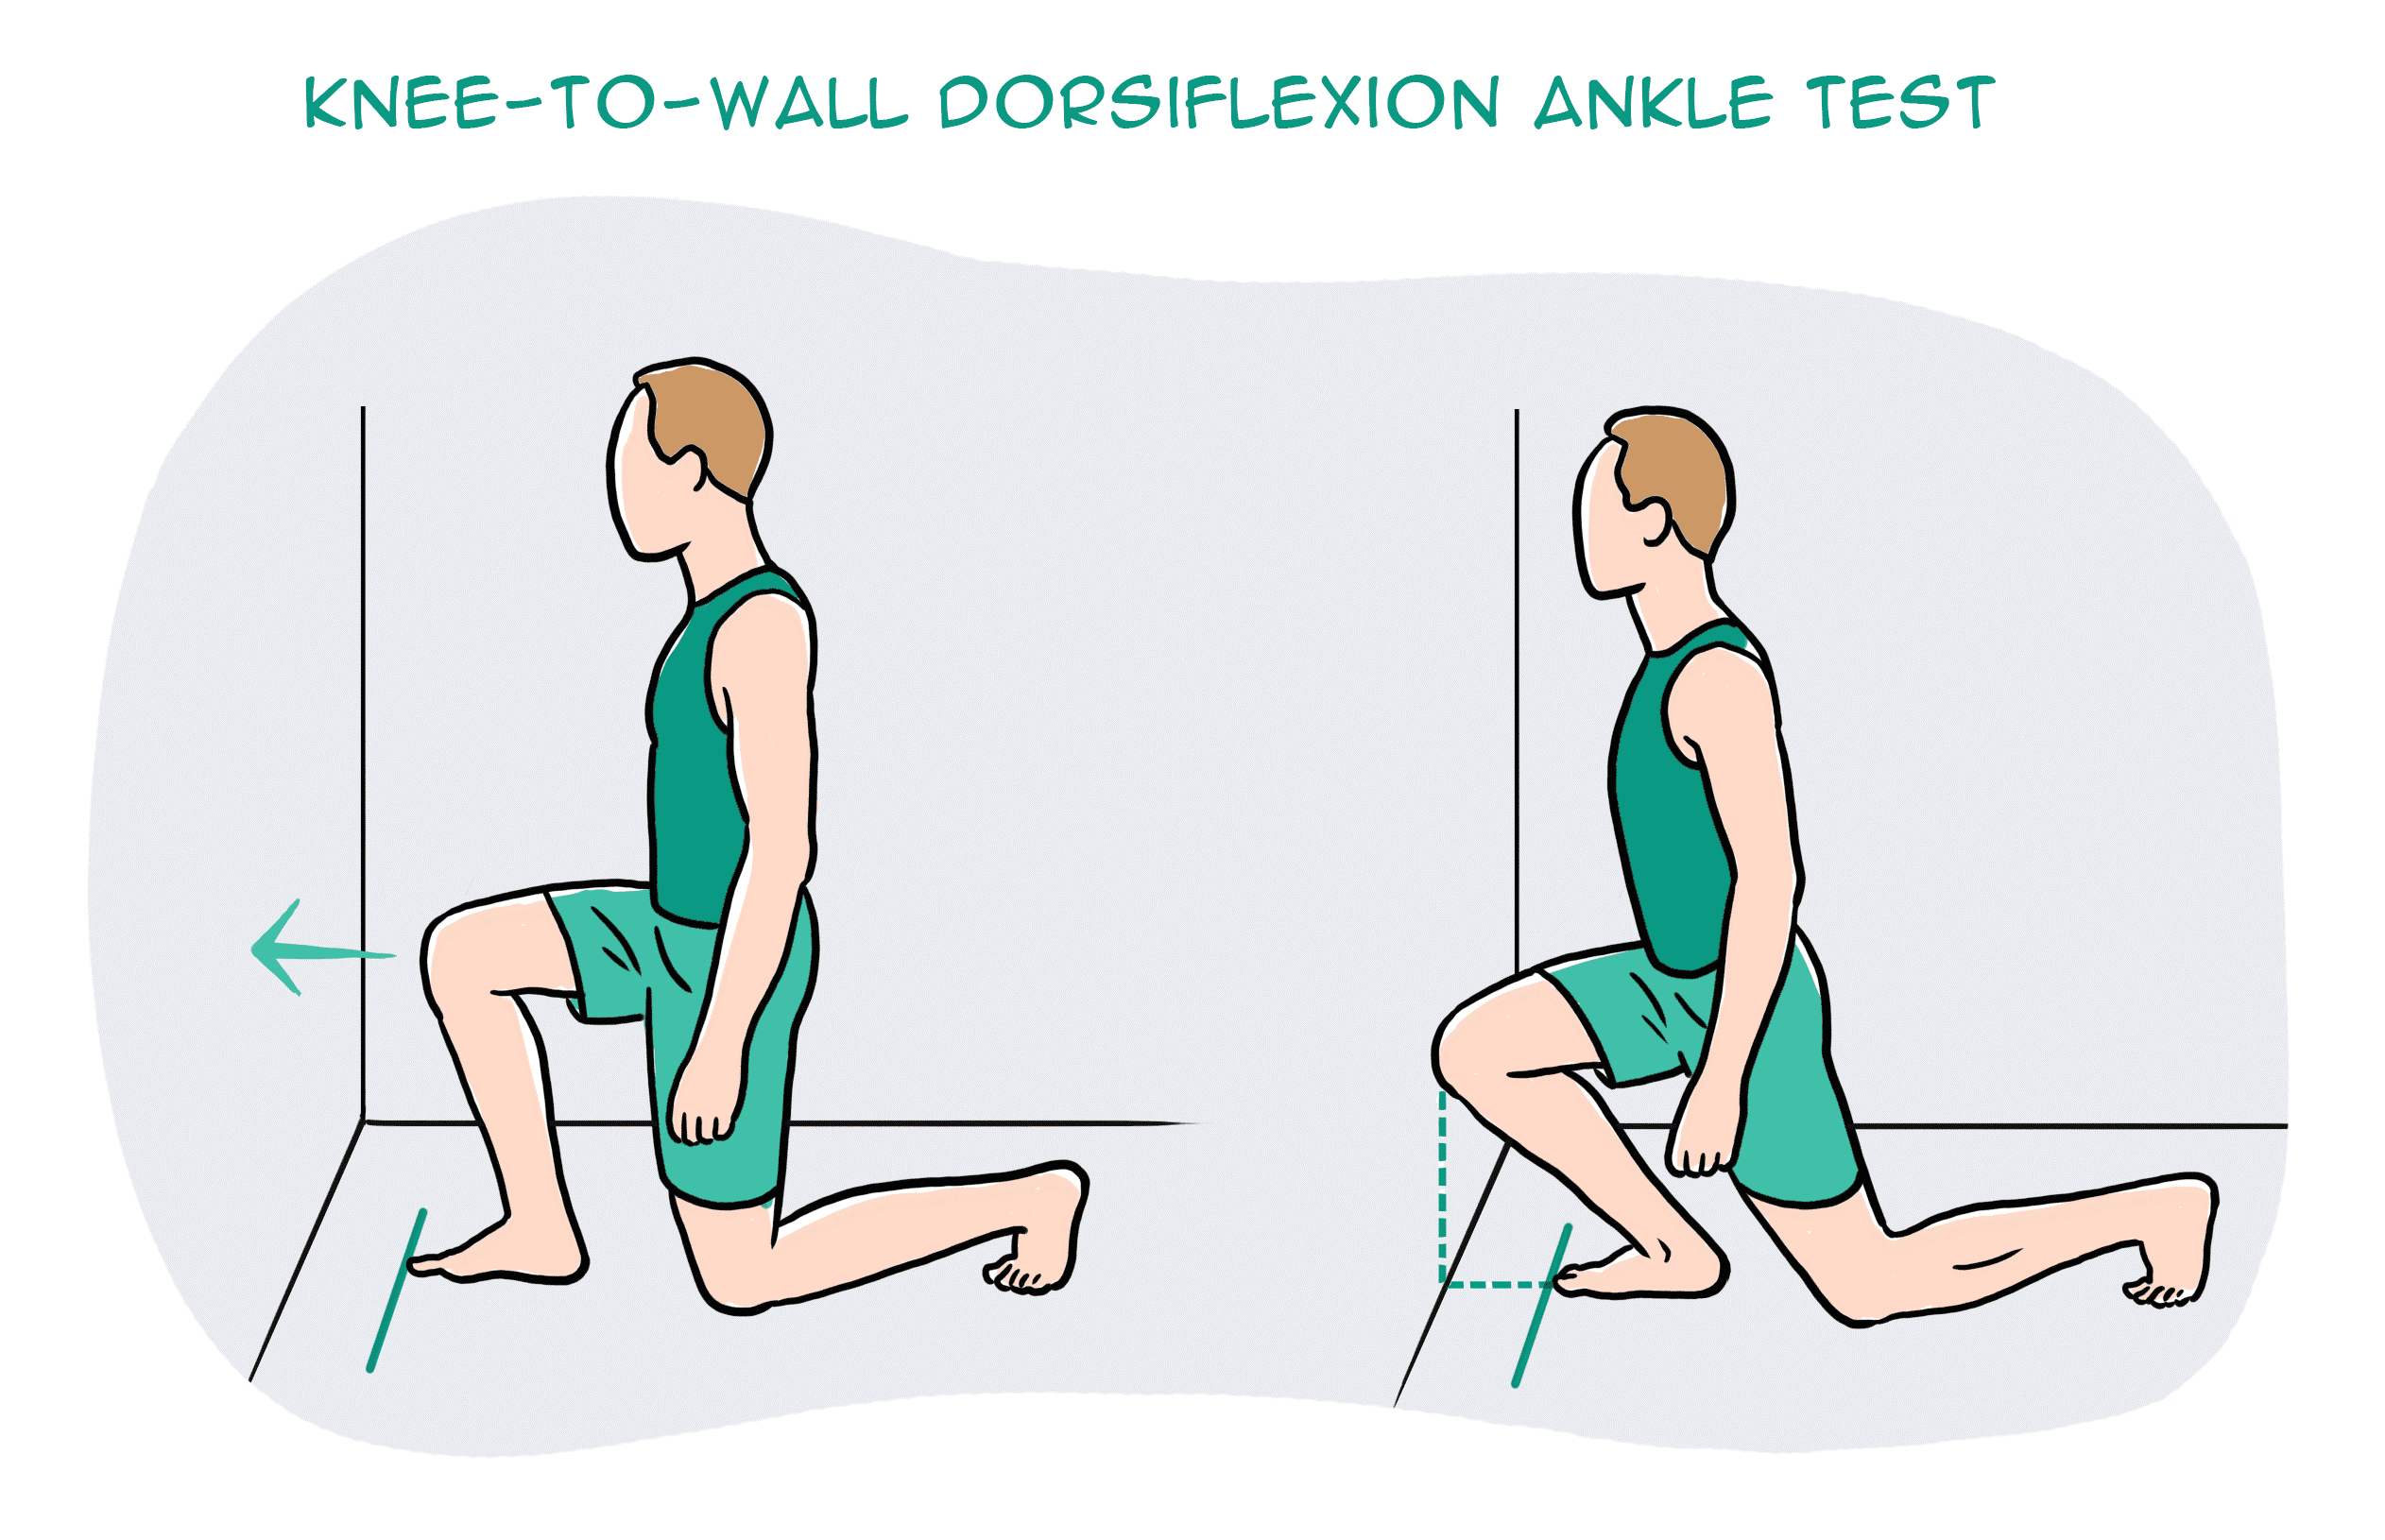
Kneel down in front of a wall. Signal a thumbs up and measure the width of it from the wall and mark it. Place your foot on the line and drive your knee forward to the wall. Make sure you drive your knee straight forward without caving in or twisting in with your hips.

What do you see?

  • Can you touch your knee to the wall?
  • What about the other side?

Consider what you feel.

  • One side feels almost effortless, the other side doesn’t?

It is not uncommon to notice that the unaffected side may not be as flexible as you thought.

This is point to note – you have just discovered a link and a potential cause of your knee pain.

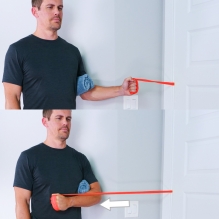
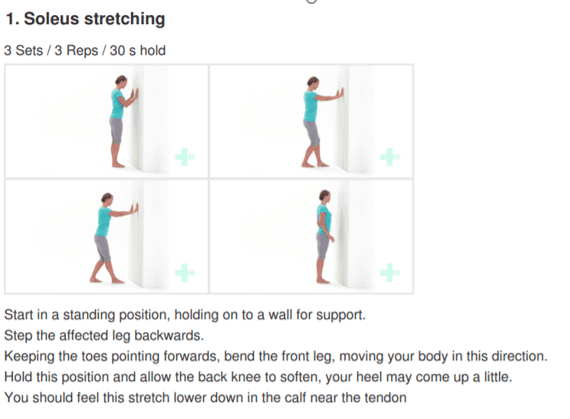
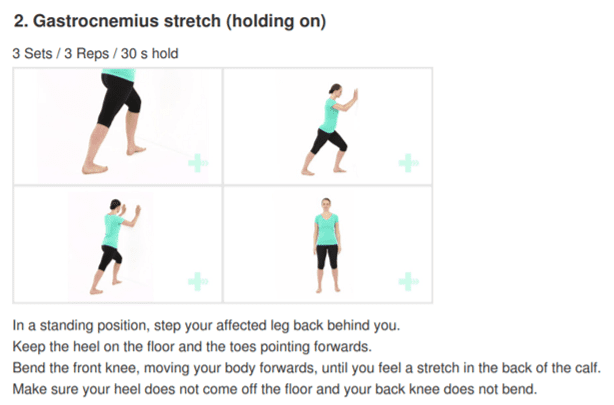
You need focus on stretching the muscles of your leg in a way that similar to ‘squatting’ – here is a good one!

  • Box ankle stretch

Use a box or a chair, plant your foot flat and rock forwards until you feel a stretch in the calf and ankle. Remember to make sure your knee doesn’t cave in or your body doesn’t twist. Do this for 20-25 repetitions, 2-3 sets. Re-test yourself.
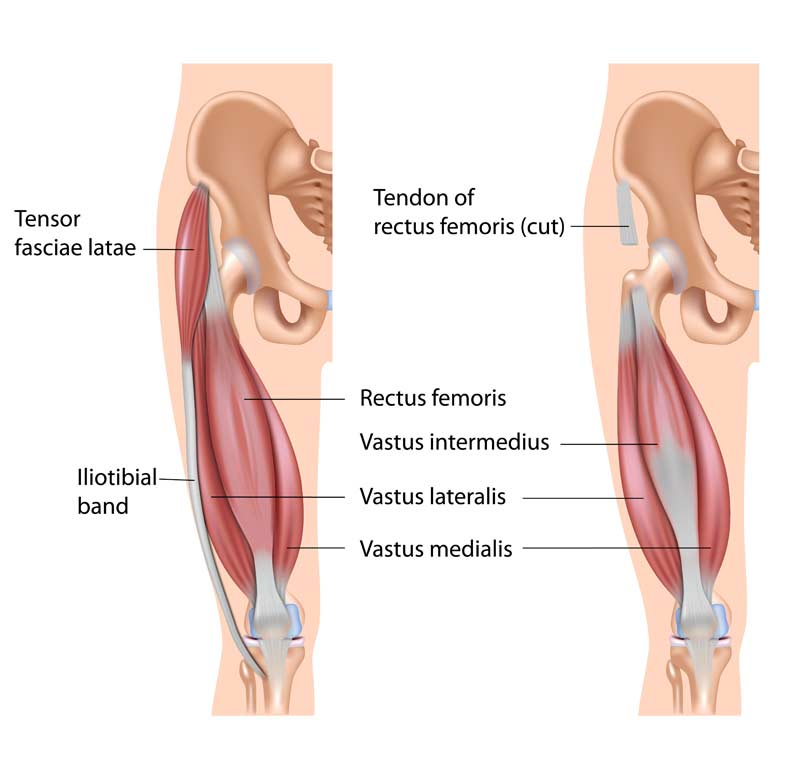
3.      Hips

Your feet are directly tied to your hips. So, the action of your hip and feet should be working together for good purposeful movement.

Here is a quick way to check this yourself:

Stand tall, with your feet planted shoulder width apart. Drive your knees out to the side. You will notice your foot arch lifts.

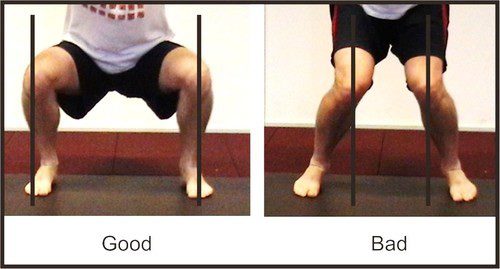
It might be a very small amount, but worth taking note. Because, this is no different when you are squatting. If your knees collapse in, it may mean that you are not recruiting the key muscles of your hips that prevent the knees collapsing.

So, driving your knees out to match the alignment of your hip-ankle not only lifts the arches but begins the process of recruitment patterns of hip muscles to engage.

The common deficit contributing to your knee pain may be weak gluteal muscles.

Gluteal muscles are powerful muscles of the lower limb. They are a group of three muscles, each with slight different function

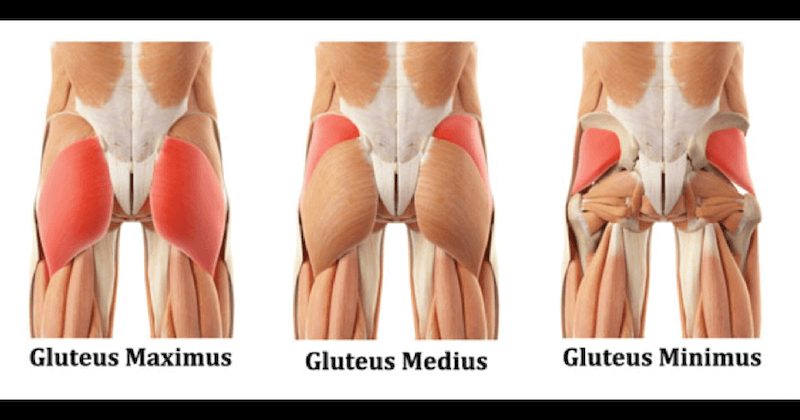
  • Gluteal maximus – hip external rotation, hip extension
  • Gluteal medius – hip abduction, internal and external rotation, extension
  • Gluteal minimus – hip abduction and internal rotation
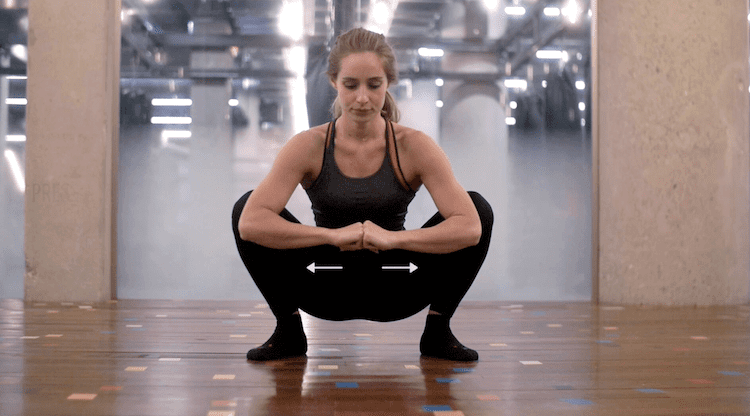
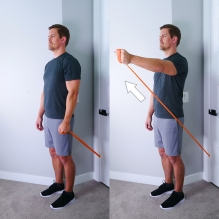
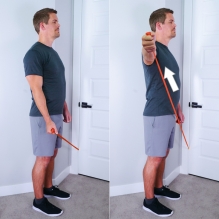
Banded squat

Banded squats are a great way to activate your gluteus. The band not only provide resistance but provides sensory information to help you learn to push into it, therefore avoid knees from collapsing in.

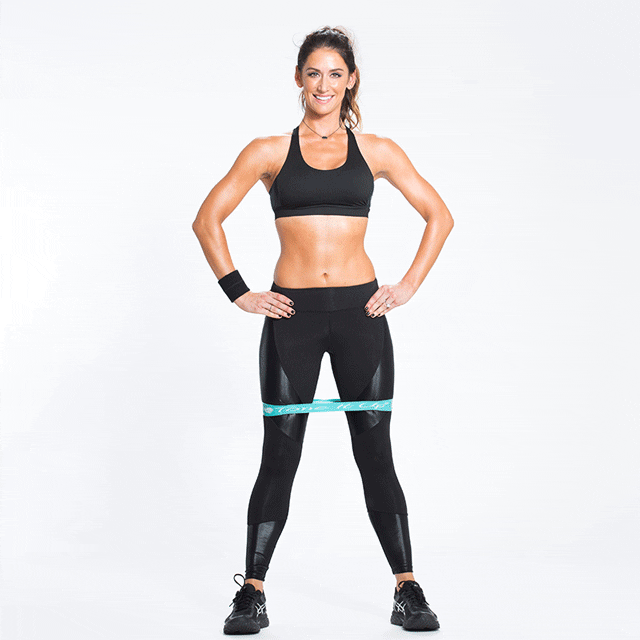
If you have a lighter level resistance band, place this at knee height.

Descend in to a squat position with emphasis on pushing you knee out into the resistance band, until you reach the hip-knee-ankle alignment.

Do this 15 times, 3 sets.

For starters, work at a level that is easy for you.

Build the reps ups as you gain confidence

  • Weak or inadequately recruited muscles could be a result of stiffness hips.

To check your flexibility, try this next test:

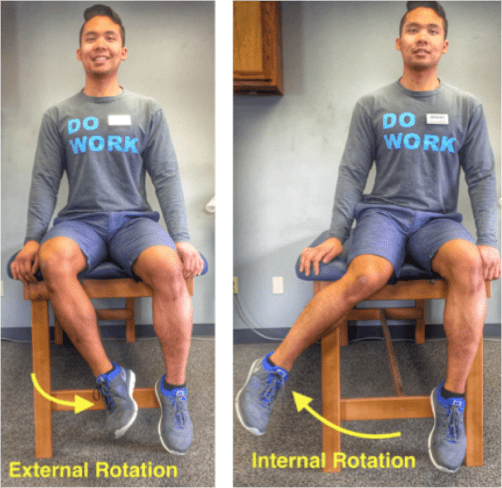
Sit on tall on a chair. Feet planted flat on ground at shoulder width apart. Test one leg at a time. Keeping your thigh in contact with the chair, drive your knee out to the side (internal rotation). Now try going inwards (external rotation).

What do you see?

  • Can internally rotate higher? External rotation is difficult? Or vice versa?

What do you feel?

  • Takes more effort going one way than the other?

Unlock the hips with this beginner hip stretch.

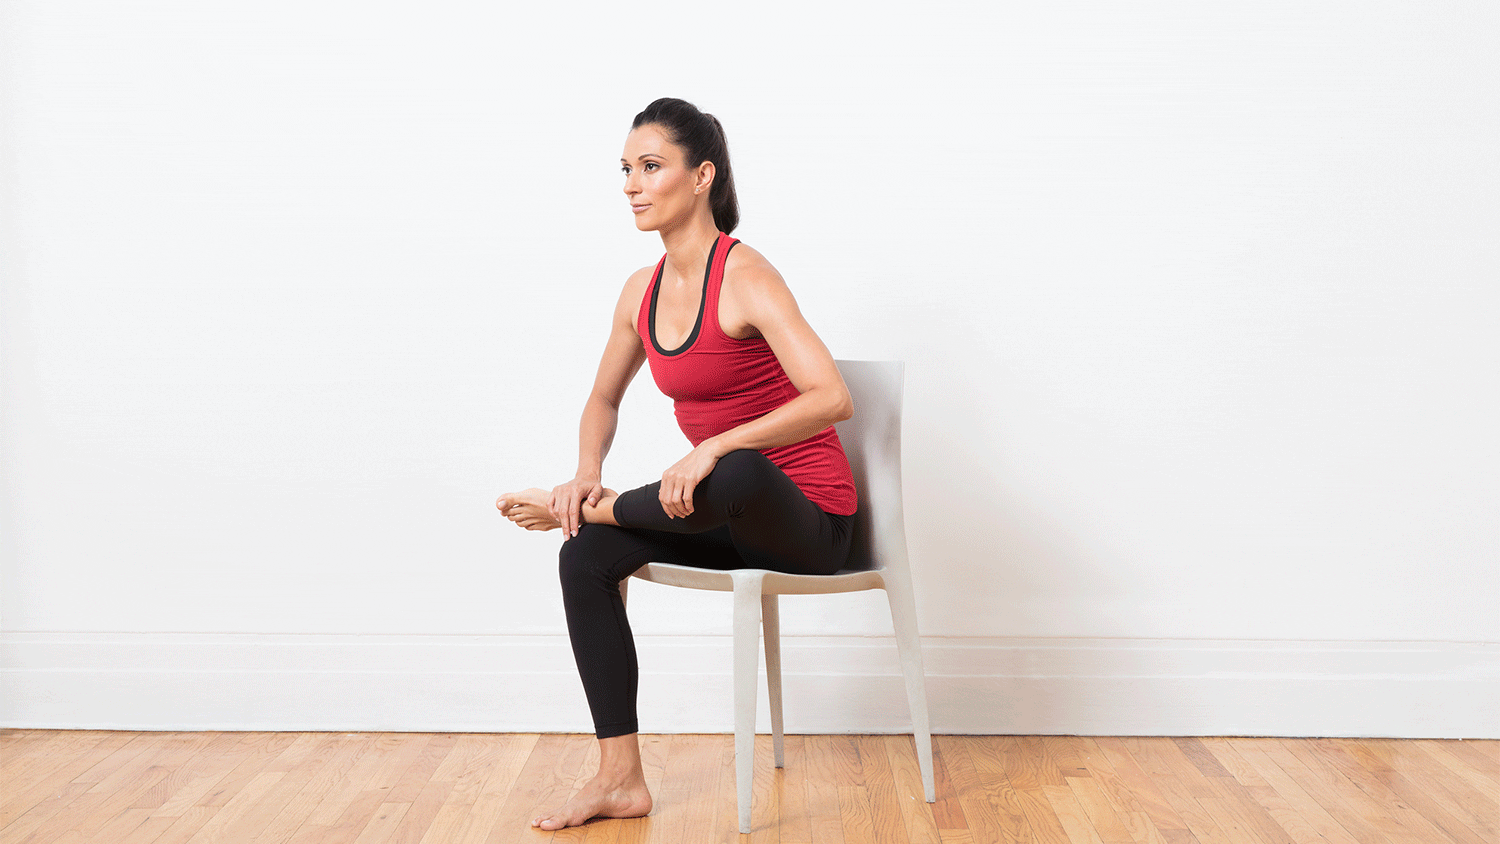
Sit upright on a chair. Cross one leg over on the other. You should feel a stretch in the buttock region. If not, progress by leaning forward with an upright posture. Hold for 15-20 seconds. Repeat 3-5 times.

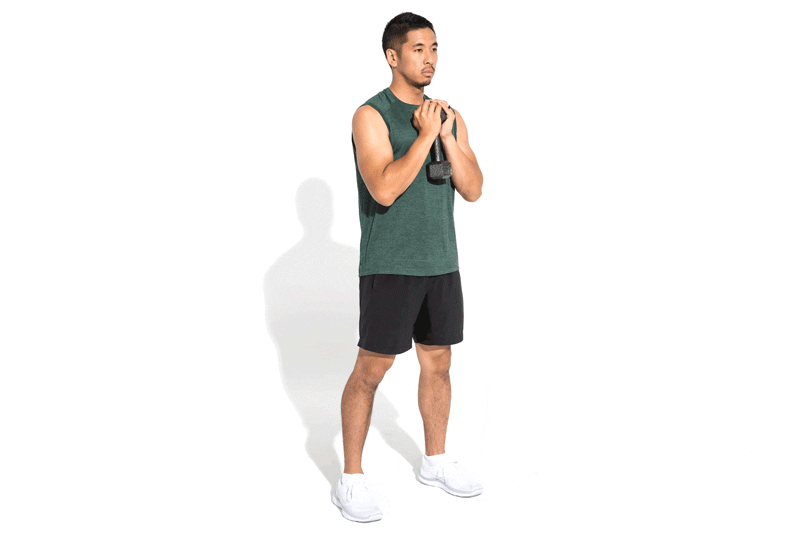
Perfecting your squat

Perfect practice makes perfect. Now bearing the rules of movement in mind, practice your squats.

Some tips to help you better practice:

  • Do not worry about the depth of your squat

It’s the quality not the quantity. So as you begin to learn and adapt these principles, only squat down to a level where you feel in control of your foot, ankle, knee and hip.

  • Use a mirror

Visual learning is a great tool! It provides for a greater ability to correct your mistakes and perfect that ‘quality over quantity’ rule.

  • Start with barefoot

This allows you to connect the sensory receptors in the soles of your feet to the ground, making it much easier to learn the tripod grip.

Still having pain?

Remember, the complexity of our body and the complexity in how we move as whole can be the result of your knee pain. So, if you are still having pain – its time you get it checked.

Book yourself in for an appointment today.

Fix the grinding in your knees when you squat

There can be multiple reasons why your knees sound like popping popcorns or grating stones when you squat.

Generally popping in the knees is attributed to stiffness of the quadriceps muscle and the fascia that surrounds the knee joint. Overtime, stiffness causes pressure to build up under knee cap, which on movement can cause a sudden release causing a ‘popping’ sound. As worrying as it may be, most of the time popping noises in the knee without pain is NORMAL. However, for others the noise can be accompanied with a grinding sensation under the knee cap which is painful. This suggests there is an underlying pathology that needs to be addressed.

This is something we would clinically consider to be Patella Femoral Pain Syndrome aka Runner’s knee – an umbrella term that encompasses the idea of dysfunctional knee cap tracking.

When you straighten and bend your knee, naturally your knee cap tracks up and down between its groove (trochlea groove) – like a train moving up and down a train track.

When the quadricep muscles on the outside (vastus lateralis) and inside (vastus medialis oblique) part of the leg are working in synchronization as they should, your knee cap is able to track up and down properly. However, if the quadriceps muscle (Vastus lateralis) is overly activated and the fascia (Iliotibial band & lateral retinaculum) on the outer part of you knee cap is excessively stiff, the knee cap gets pulled to the outside.

Essentially the train is being pulled and tilted more to the outside. Eventually overtime, repetitive or violent lateral pull of the knee cap increases friction in the knee grating the smooth underside of the knee cap called, chondromalacia. Additionally, the constant pulling and stiffness of the lateral side will cause stretching on the inside of muscles. On top of that, pain and swelling will cause the muscles in the inside of the leg to shut down.

Here are two steps to managing your symptoms.


STEP ONE

  1. Foam roller or tennis ball

Instructions:

  • Lie on your front and place the foam roller underneath your leg.
  • Bend the opposite leg and bring it out to the side to help you move back and forth.
  • Roll the entire length of the thigh muscle, staying off the knee joint.

Make sure you move through the length of the muscle close to the knee cap as you can. You should be looking for stiff spots in the muscles and any sore spots you feel concentrate on it for couple of seconds and work deeper in to the tissue. You should also move in the inside and outside of the quadriceps muscles. Do this with you knee straight and then move into knee flexed position to optimize the release.

For a more concentrated release, use a tennis ball or a lacrosse ball especially at the quadriceps tendon where much of the stiffness is likely present. The reduced surface area of the ball allows you to work on specific spots a lot better to break down deeper areas of stiffness and create more mobility.

Do this mobility routine for 1-2 minutes


  1. Quadricep stretches

  • Start in a standing position. Use support if required for balance.
  • Raise one leg behind you grabbing hold of your ankle, or your lower leg.
  • Lift and hold for 20-30 second, and then repeat for the other leg.
  • Get into a lunge position with back leg flat on floor
  • Bend your knee and slowly pull your leg into a stretch
  • Hold this stretch for 20-30 seconds
  • For comfort place a rolled face towel under the knee cap

Modified quadricep stretch

For some people if kneeling down is irritating for the knee you can modify the stretch.

  • Rest your leg on the chair with your foot against the back rest
  • Make sure your stance leg is far enough in front of the chair
  • Lunge forward until stretch is felt
  • Do this for 20-30 seconds.

NOTE: Long duration stretches of over a minute and more can decrease the potential for you to create strength and power in those muscles during your workout. So, prior to your workout focus on short duration stretches.


  1. Functional mobility stretch

Deep squat sits are great to expand the stretch. If your symptoms are not aggravated, try deep squat sits for 30 seconds up to a minute.

  • Stand with feet shoulder width apart
  • Point your feet out to about 45 degrees
  • Sit in to a deep squat keeping the pressure evenly distributed across feet

STEP TWO

Now that you’ve resolved the stiffness in the lateral portion of your knee, next step is to address the muscles imbalances caused by pain and swelling. That is, turning back the firing of the quadriceps muscles.

An effective way to address this, is by doing what we call close chain exercises – these are exercises done where your feet are on the ground, such as squats. Initially you want start slow and high. Mini squats are great because they allow you to strengthen your quadriceps without putting too much compressive forces into your knee. As you get comfortable, advance to a deeper squat and slowly begin to work towards building you strength by adding on weight.

Mini bodyweight squats

  • Stand behind a chair or table and place your hands onto the back rest.
  • Keeping your back straight, bend both knees into a semi-squatting position, allowing your hands to slide forwards.
  • Your hips should travel backwards as you counterbalance by leaning your chest forwards.
  • Push through your buttock and thigh muscles as you return to standing, and repeat.

Deep bodyweight squats

  1. Hold on to the dumbbell, keeping it close to your chest.
  2. Step your feet wide apart and turn the toes out slightly.
  3. Drop down into a deep squat position, keeping your feet on the floor.
  4. Control the movement back to the start position.

Caution: Avoid deep squats especially if you have ongoing grinding pain. Do not push in to pain, as this will only increase the forces and worsen your symptoms. At this point, it is highly recommended that you come in to see a physiotherapist to examine a potential underlying pathology.

Tennis Elbow Explained

What is Tennis Elbow?

Tennis elbow, or also known as lateral epicondylitis, is a painful disorder of the elbow triggered by overuse. This disorder is characterised by inflammation or, in some cases, micro-tearing of the extensor tendons which link the forearm muscles on the outer part of the elbow. This leads to pain and tenderness on the outside of the elbow, spreading through to the forearm and wrist.

Elbow Pain - Do I have Tennis Elbow? - Oh My Arthritis

Causes

Tennis elbow is characterized as an overuse and muscle strain injury. It is caused by repetitive and/or vigorous contractions of the forearm muscles which is used to straighten, extend, and lift the wrist and hand. The repetitive motions and stress to the tissues can result in a string of tiny, microscopic tears in the tendons which attach your forearm muscles to the bony prominence on the outside of the elbow.

Tennis elbow may result from number of activities including but not limited to:

  • Typing and repetitive computer mouse use
  • Cutting/chopping motions
  • Manual work that involves repetitive turning or lifting of the wrist, such as plumbing, or bricklaying.
  • Gardening
  • Using hand tools such as scissors, clippers, screwdrivers, plumbing and carpentry tools
  • Playing racquet sports, such as tennis, badminton, or squash
  • Throwing sports, such as the javelin or discus
  • Painting
  • Sewing/knitting

Tennis elbow may also occur after a sudden knock or bang to the elbow, if you undertake activities that you are not used to excessively and aggressively, and sometimes there is no apparent cause for it.

Risk Factors

Factors which may increase your risk of tennis elbow include:

Your age: Whilst this disorder impacts people of all ages, it is mostly prevalent in adults in the age group of 30-50 years old.

Your occupation: Those who have jobs which entail repetitive movements of the wrist and arm are more likely to develop this disorder. Examples include but are not limited to painters, computer users, plumbers, butchers, carpenters, and chefs.

Sports: Partaking in racket sports increases the risk of tennis elbow, particularly if you use poor form and technique.

Common Signs and Symptoms

Tennis Elbow - Symptoms, Causes, Treatment & Exercises

Pain noted around the bony knob on the outside of your elbow is the most common characterising symptom of tennis elbow. This knob is where the injured tendons connect to the bone. The pain is often depicted as “burning” in nature. Your elbow may be tender and sore to touch, and the pain can refer down to the forearm. The pain often increases with gripping, grasping, or rotating motions of the wrist and forearm. Bending and straightening your elbow may also be painful.

The severity of your pain may vary from a mild discomfort to severe pain that can interfere with your sleep and day to day activities. The pain typically starts gradually and then worsens over weeks or months.

Diagnosis

During your physical examination your physiotherapist will attempt to produce your pain in your elbow via specific tests and movements. They will assess your range of motion in your elbow, wrist, and shoulder joints. Referrals for X-rays and ultrasound scanning may be indicated to further support your diagnosis and to rule out other potential sources of your pain

Management

A mix of non-surgical treatment options are effective for the majority of tennis elbow cases, and self-resolves over time. You should rest your elbow and painful activities should be avoided. But it is very vital to maintain gentle movements of the forearm, elbow, and wrist through its range of motion.

Potential treatment options include:

  • Ice
  • Rest
  • Physiotherapy and acupuncture
  • Anti-inflammatory medications as recommended by your doctor or pharmacist
  • The use of a wrist and forearm brace or splint to support and rest your forearm

As your initial elbow pain lessens, your muscles around the elbow, forearm and wrist should be safely strengthened and stretched under guidance of a physiotherapist. Your physiotherapist will advise you on particular exercises, give you appropriate symptom management advice and take you through a personalised graduated rehabilitation program. If you continue to experience pain after 6-8 weeks of treatment, your physiotherapist can refer you back to your doctors, to consider administration of a cortisone injection into the elbow to help reduce pain and inflammation, and further referral onto see a specialist to seek guidance on other treatment options.

Helpful Exercises

Rotator cuff injury

Rotator cuff injuries are the most common source of shoulder problems. They can range from minor sprains causing impingement type symptoms, to massive tears resulting in severe loss of function and pain. They commonly occur as a result of acute injuries (sports, falls), chronic overuse (repetitive loading) or due to gradual aging.

Anatomy of shoulder

The shoulder joint (glenohumeral joint) is the most mobile joint in the human body. It comprises of the humeral head (top portion of upper arm bone) which fits in the glenoid cavity of the scapula (shoulder blade) to create a ball and socket configuration. This anatomical configuration results in limited bony contact between the humeral head and the glenoid fossa, which reduces the stability of the joint.

Several passive and active structures stabilize and maintain proper biomechanics of the shoulder joint.

  • Passive stabilizers include the ligaments, joint capsule, cartilage and the bony concavity of glenoid fossa. Thick cartilage known as labrum lines the glenoid fossa to further deepen the groove by about 50% which is advantageous in stabilizing the shoulder joint during the articulation.

  • Dynamic stabilizers of the glenohumeral joint is gained from the coordination of rotator cuff muscles that compress the passive structures providing stability and mobility as whole.

The rotator cuff muscles include:

  • supraspinatus

  • infraspinatus

  • subscapularis

  • teres minor

Rotator Cuff Disorders: The Facts | OrthoBethesda


Injury to any or all these four muscles, including the tendons that attach the muscles to bone can result movement dysfunction and severe pain.

Other important joints of the shoulder complex include:

  • sternoclavicular joint

  • arcomioclavicular joint

  • scapulothoracic joints

Types of rotator cuff pathology

Tendinitis and Tendinosis

More often than not the term tendinitis and tendinosis are interchangeably used to describe a similar tendon pathology. However, the factor that differentiates the two is the time of injury (acute or chronic).

Tendinitis results from acute injury to the tendon which sets off an inflammatory process characterized by pain, swelling, and redness. On the other hand, tendinosis is a chronic pathology that does not involve an inflammatory process. It is characterized by degeneration of collagen fibers in response to persistent micro-trauma, vascular compromise and aging.

Acute rotator cuff tear

  • Acute tears result from sudden forceful lifting of the arm against resistance or in an attempt to cushion a fall (for example, heavy lifting or a fall on the shoulder).

Chronic injuries

  • Most commonly resulting from occupational or sports requiring excessive repetitive overhead activity.

Signs and symptoms

Symptoms of a rotator cuff injury are due to the inflammation that accompanies the strain. Swelling that forms within the small space of the joint prevents the normal mechanics of the shoulder, resulting in the clinical picture of pain and decreased range of motion.

  • Acute rotator cuff tears
    Tearing sensation
    Immediate severe localised pain
    Reduced strength
    Symptomatic clicking
    Reduced and worsening pain with movements
    Affects daily activities (personal care, lifting, reaching etc)

  • Chronic rotator cuff tears
    Generalized deep dull ache, sharp onset of pain with movements
    Global shoulder weakness
    Reduced movements and daily activities (especially moving to the side, reaching behind back)

When to seek medical treatment

See your doctor or a physiotherapist if you experience any of the following symptoms in the shoulder:

  • Pain, especially pain that does not improve with rest

  • Swelling, redness or tenderness around the joint

  • Shoulder weakness

  • Reduced shoulder movement

For more severe rotator cuff injuries, you may require immediate medical attention.

Seek immediate medical attention if you experience the following symptoms:

  • Sudden, severe pain

  • Visible joint deformity

  • Inability to move or use your shoulder joint

  • Sudden swelling, discoloration

Diagnosis

To diagnoses an injured rotator cuff, your physiotherapist will begin with a thorough subjective and physical examination of your shoulder.

  • Subjective assessment

Your physiotherapist will begin with a thorough subjective assessment inquiring about your signs and symptoms of an acute injury as well as any symptoms that may suggest a more long-term problem.

  • Physical assessment

The physical examination often involves observation to look for muscle wasting, deformities, and/or changes in appearance of the injured shoulder to the unaffected side. Your physiotherapist will also palpate different areas of the shoulder complex to find the area of pain or tenderness. Further examination will involve assessment of movement and strength to establish injury to muscles or tendons.

  • Radiology

In addition, your physiotherapist may refer you for imaging tests to diagnosis the cause of your symptoms:

  • Ultrasound: examines soft-tissue structures (muscles, tendons, bursa)

  • X-rays: examines bone health, calcification

  • MRI: provides detailed imaging of areas injured (referred by doctors, specialists or surgeons)

Treatment

Early diagnosis and treatment of a rotator cuff tear may prevent symptoms such as loss of strength and loss of motion from setting in.

Initial treatment of rotator cuff tendinitis involves managing pain and swelling to promote healing. This can be done by:

  • avoiding activities that cause pain

  • applying cold packs to your shoulder three to four times per day

  • taking anti-inflammatory medications like ibuprofen and naproxen

Rehabilitation plays a critical role in both the nonsurgical and surgical treatment of a rotator cuff tear.

When a tear occurs, there is frequently atrophy of the muscles around the arm and loss of motion of the shoulder. An individualized physiotherapy program is necessary to regain strength and improve function in the shoulder.

Physical therapy

Physiotherapy will initially consist of passive exercises to help restore range of motion and ease pain.

Once the pain is under control, your physiotherapist will prescribe exercises to help regain strength in your arm and shoulder.

Steroid injection

If you have persisting symptoms, your physiotherapist may recommend a steroid injection. This is injected into the tendon to reduce inflammation, which reduces pain.

Surgery

Surgery is recommended if you have persistent pain or weakness in your shoulder that does not improve with nonsurgical treatment. In which case, your physiotherapist will refer you to surgeon for an opinion of surgical intervention.

Exercises

Range of movement exercise

Pendulums

  1. Lean forward with one arm hanging freely. Use your unaffected arm to brace against a chair for support.

  2. With your affected side, gently swing the hanging arm from side to side, forward and back, and in a circular motion for 15-20 seconds each direction.

  3. Slowly return to a standing position.

  4. Repeat 4-5 times a day


Shoulder pulley (Flexion)

  1. Put a chair against the door and sit so you are facing away from the door.

  2. Grasp the door pulley handles with both hands.

  3. Pull down on the pulley with your unaffected arm. This will lift your injured arm up over your head. Pull it as high as you can.

  4. DO NOT FORCE THE MOVEMENT. Your affected arm should be relaxed. The unaffected arm does the work.

Hold for 5 seconds. Relax and repeat 10-15 times, 3 sets.
Three times a day.

Shoulder pulley (Abduction)

  1. Put a chair against the door and sit so you are facing away from the door.

  2. Using door pulleys slowly pull down with your unaffected arm so that your affected arm raises up and to the side without effort.

  3. Your affected arm should be relaxed. The unaffected arm does the work.

Hold for 5 seconds. Relax and repeat 10-15 times, 3 sets.
Three times a day.

Wand flexion

  1. Stand upright and hold a stick in both hands

  2. Cup the top end of stick with affected hand

  3. Using your unaffected arm hold the stick midway and drive the affected arm forward and up.

  4. Ensure your elbow is straight throughout

  5. Hold for 5 seconds and return to the starting position.

  6. Repeat 10 times.

Wand Abduction

  1. Stand upright and hold a stick in both hands

  2. Cup the top end of stick with affected hand

  3. Using your unaffected arm hold the stick midway and drive the affected to the side as high as able.

  4. Ensure your elbow is straight throughout.

  5. Hold for 5 seconds and return to the starting position.

  6. Repeat 10 times.

Strengthening exercises with band

Flexion

  1. Stand on one end of the band while holding the other end with your affected side.

  2. Whilst keeping your elbow straight, lift the band up to 90 degrees to shoulder level.

  3. Hold at the top for 1-2 seconds then lower slowly to starting position.

  4. Repeat 10-15 repetitions, rest 20-25 seconds, complete 3 sets.

Abduction

  1. Stand on the band while holding the band with affected hand.

  2. Keep your elbow straight, lift the band up to 90 degrees to shoulder level.

  3. Hold at the top for 1-2 seconds then lower slowly to starting position.

  4. Repeat 10-15 repetitions, rest 20-25 seconds, complete 3 sets.

External Rotation

  1. Attach the resistance band to a secure anchor at belly button height.

  2. Stand with unaffected arm perpendicular to the anchor.

  3. Place a towel between your elbow and your torso to stabilize your elbow

  4. Grab the band using your affected side and then slow pull the band away from your body by squeezing your shoulder blade in towards the middle of your back.

  5. Slowly return to starting position.

  6. Repeat 10-15 repetitions, rest 20-25 seconds, complete 3 sets.

Internal Rotation

  1. Attach the resistance band to a secure anchor at belly button height.

  2. Stand with affected arm perpendicular to the anchor.

  3. Place a towel between your elbow and your torso to stabilize your elbow

  4. Grab the band using your affected side and then slow pull in to your body

  5. Slowly return to starting position.

  6. Repeat 10-15 repetitions, rest 20-25 seconds, complete 3 sets.

Ankle injuries – Your first step to recovery

Common? Oh Yes!

The ankle is the most commonly injured joint in sport. This does not exclude other people such as active hikers, beach goers and even your average Sunday stroller. Good news though – your ankle injury is highly likely to be uncomplicated.

It is still vital that your ankle is examined, evaluated and treated early. This will ensure a swift return to activity and prevent further complications.


The road to recovery

Planning for Resiliency and the Road to Recovery

Your clinician will ask you some questions related to how you injured your ankle, pain, instability and any past episodes of injury. The earlier you get your ankle checked, the sooner your recovery will begin.

Keeping a mental note of things like initial pain, swelling, ability to walk and balance will go a long way in assisting your clinician to making an accurate diagnosis.


Investigations

Ankle x-rays

In most cases, initial X – rays are done to rule out broken bones.

Ultrasounds can be used to diagnose some ligament and tendon damage.

MRI is the best form of imaging but this does come at a higher cost and higher exposure to radiation. These are usually done after failed conservative treatment or in instances where pain remains high for longer periods.

A CT scan is helpful with complicated foot and ankle fractures. It will normally be ordered by a specialist surgeon who is planning for an operation.


What to look out for

Ankle sprains:

This is normally a twisting injury that causes a stretch or tear of ligaments surrounding the ankle. Your health care professional will provide you with all the information and tools you need for recovery.

These heal relatively quickly when the outside border of the foot is affected and a little slower when the inside border of the ankle is affected.

You will normally feel pain on certain ankle movements, stiffness in the ankle and experience some swelling and bruising.

Ankle - Wikipedia


Ankle Fractures:

These normally present with swelling, bruising and pain initially – although not always. In some cases, it is too painful to put weight on the ankle.

They are usually best confirmed with X – ray and specialist referral.

Management may be surgical or non-surgical depending on the severity and site of the fracture.

Fractures generally take longer to recover compared to sprains.


What treatment to expect

Foot and Ankle Doctor | EmergeOrtho—Triangle Region

Acute phase:

Your healthcare professional will normally initiate techniques to minimise your pain and swelling with rest, ice, compression and elevation.

Analgesia and anti – inflammatory medication may also be used.

Strapping may be used for stability at this stage and can be done by your physiotherapist.

You will also be encouraged to increase movement and begin strengthening.


Rehabilitation phase:

Balance and proprioceptive exercises will be given to you by your physiotherapist.

Strengthening will continue and running will start soon.

Once running in a linear motion pain free, you will progress to sport specific exercises.

Finally, you will return to sport or previous function such as trekking with a graded program.

Strapping may continue for up to 12 months after your injury in order to prevent re–injury.


What can you do on the day of the injury?

Rest by reducing time spent walking or standing. This will help the ankle to heal.

Ice the ankle for up to 20 minutes every couple of hours.

Compress the ankle with a firm bandage during the day and remove the bandage at night.

Elevate the leg.

Attempt circulatory exercises such as ankle circles and foot pumps (About 10 – 30 repetitions every couple of hours).

Contact your health professional or physiotherapist in order to make appointment for assessment.

If you are unable to stand on your leg or have excruciating pain in the ankle, head on to the local emergency department for immediate investigation.


Remember, your injury will heal and you will recover!


To find your nearest Physio Fusion clinic and book an appointment call 09 6266186 or visit our website https://physiofusion.co.nz

We Want You To Understand Your Pain

What is pain?

Pain is the brain giving out a message to protect you . It is part of our bodies natural defense system.

When an event occurs that we need protecting from, our brains response is to increase our pain. Living things detect and respond to stimulus. | Characteristics of living  things, Natural hairstyles for kids, Characteristics

Example: Putting a hand on a hot pan. You feel pain, which is the brain giving you a warning signal to move your hand away.

Pain is all about protection, never about measuring the condition of the tissues in the body.

In this instance we experience a high level of pain to prevent a bigger injury eg. causing a burn.

This is our bodies way of protecting us

So what is happening in our brain?

  • We as human beings are amazingly adaptable. The longer we have pain, the longer our brains learn to produce pain.

  • It hurts in the tissues (back, knee, hand), but the problem is in the nervous system. There is an adaptation within our nervous system.

Long term pain or Chronic pain

Chronic pain is defined as persistent or recurrent pain lasting longer than 3 months

If you have had pain for more than 3 months, your system is now overprotective. Your nervous system and immune systems have learnt.


Movement is medicine: why exercise therapy reduces chronic pain - Hinge  Health


  • With chronic pain the buffer size is increased- therefore pain comes on quicker than before.

  • You get pain when you are not anywhere near being in danger.

Management of chronic pain:

  • Identify why your brain is protecting you – fear, anxiety, quality of movement, posture, injury

  • Reduce the size of your buffer – desensitization, reassurance, progressive load management

  • Understand your pain- know that it may not go completely, but can become more manageable

Medication:

  • Depending on the type of pain you are experiencing, painkillers/NSAID’s may be beneficial in the short term – speak to your GP/pharmacist

  • Note: the research does not show good outcomes for the long-term use of medication to treat chronic pain.

Occupational Therapy:

  • If you have been off work because of your pain – try to return to work asap. An OT can discuss and plan a gradual return to work plan for you

  • They can also assist by providing aids to helps with daily tasks such as getting out of bed, or putting on shoes.

Physiotherapy:

  • There is no quick fix for persistent pain. We can help guide you along your journey to recovery

  • With persistence and hard work you can learn to adapt and cope with your pain

  • Movement is king – it is critical for retraining the system

  • Movement gradually suppresses the pain system.

  • Finding any form of exercise or movement that you enjoy and gradually increasing the volume over time

  • Moving regularly- on your good days and your bad days

Self Help:

  • Meditation or mindfulness – Apps such as Headspace or Calm are easy to use and will guide you through the process

  • The Pain ToolKit

Exercises you can do during lockdown

I know how hard it can be when it comes to working out and its really easy to find an excuse to avoid lockdown workouts but it’s not just about staying in shape its also about keeping active to feel mentally strong. We know that exercise does wonders for mental health and at a time where its all uncertainty, anxiety, and a daily dose of doom and gloom, we all need to work out that frustration somewhere!

If you’re struggling with a lack of motivation or negative mindsets there’s only one way to turn it all around: Take :boom: ACTION :boom:


How much exercise is enough?

You’ve heard the saying something is always better than nothing and that’s the case when it comes to exercise. The current recommendation for adults according to Best Exercises for Health and Weight Loss.org is to aim for 150 minutes of moderate intensity activity every week (or 75 minutes of vigorous intensity) with two sessions of strength building activities per week. That’s about 30 minutes of movement, five times per week.

This is a quick full body routine:

Bodyweight Squats

Stand with your feet shoulder-width apart. Engage your core muscles and gently squat down. As you squat, bend from your hips. Keep your back straight as you push your hips back and counterbalance by leaning your torso forwards. Keep your knees aligned with your toes. Your weight should be evenly on your heels and the balls of your feet, not your toes. It might help to image your are trying to sit down in a chair that is too far away from you. Tense your bottom muscles at the bottom of the squat and keep them tense as you straighten back up to the start position.

Arm dips

Start in a seated position. Place your hands on the seat of the chair and use your arms to move yourself forwards towards the front of the chair. You will need to move your feet further forwards to help your stability. From this position, use the strength of your arms to slowly lower your body directly down towards the floor and then raise yourself back up. Do not actually sit on the floor and keep your hands close in beside you. Relax and repeat.


Lunges

Stand straight with your arms to the side or on your hips. Take a large step forwards on your affected leg, then drop your hips directly down between both feet, bending your hips and knees to a 90 degrees. Push back up to the starting position, and repeat. Make sure you take a large enough step that your front knee does not travel over your foot, and ensure your knee travels directly forwards. Keep your body up straight throughout the movement.


Mountain Climbers

Adopt a plank position insuring your hands are directly beneath your shoulders.
Fully flex one hip and hold.
Extend the bent leg to the rear and repeat the movement pattern on the opposite side


Disorders of the Achilles Tendon

Basic Anatomy

The Achilles tendon is the largest tendon in the human-body. It is a band of tissue that connects your calf muscles to your heel bone (calcaneus). This tendon primarily facilitates general mobility such as walking, running, climbing stairs, jumping, and standing on your tip toes, by helping to raise the heel off the ground.


Common Achilles Pathology

Achilles tendinitis and tendinosis are two common disorders and are typically classified as overuse injuries.

Achilles tendonitis involves inflammation of the Achilles tendon. Inflammation is the body’s natural response to injury or disease, and often causes swelling, pain, or irritation. This inflammation is typically short-lived. Over time, if this is left resolved, the condition may progress to degeneration of the tendon- Achilles tendinosis, in which case, the tendon loses its organized structure and is likely to develop microscopic tears.

There are two types of Achilles tendonitis and it is based on which part of the tendon is inflamed:

  • Insertional Achilles tendonitis affects the lower portion of your tendon where it attaches to your heel bone.
  • Non-insertional Achilles tendonitis involves fibres in the middle portion of the tendon and tends to affect younger people who are active.

In both non-insertional and insertional Achilles tendinitis, damaged tendon fibres may also calcify (harden) and often bone spurs (extra bone growth) develop with insertional Achilles tendinitis. Achilles tendonitis may also increase your risk of sustaining an Achilles tendon rupture (tear).

Causes

Typically referred to as “overuse” conditions, Achilles tendonitis and tendinosis are often caused by the sudden increase in repetitive activity involving the Achilles tendon. This can put too much stress on the tendon too quickly, that can then lead to micro-injury of the tendon fibres. Because of this ongoing stress on the Achilles, the body is not able to repair the injured tissue. The structure of this tendon is then modified, resulting in continued pain and other symptoms. The Achilles tendon also has poor blood supply that makes it more susceptible to injury and may make recovery from injury slow.

Common factors that may lead to the development of disorders of the Achilles tendon include:

  • Weak and/or tight calf muscles
  • Rapidly increasing the amount or intensity of exercise within a short span of time
  • Hill climbing or stair climbing exercises
  • Presence of bony spurs in the back of your heel
  • Changes in footwear – especially changing from wearing high-heeled shoes to flat shoes
  • Wearing poor fitting, inappropriate, or worn out shoes during sporting activities
  • Exercising without adequate warm-ups and stretching
  • A sudden sharp movement which causes the calf muscles to contract and the stress on the Achilles tendon to be increased. This can cause the tendon fibres to tear.
  • Excessive mobility
  • Poor feet positioning and biomechanics (excessive pronation and flattening of the arches of the foot)


Symptoms

Achilles tendon pain: Causes. when to see a doctor, and treatment


Common symptoms include:

  • Pain and stiffness along the Achilles tendon especially first thing in the morning
  • Pain along the tendon or back of the heel that worsens with activity
  • Severe pain the day after exercising
  • Visible thickening of the tendon
  • Tenderness to touch
  • Bone spur
  • Swelling that is present all the time and gets worse throughout the day with activity

If you have experienced a sudden “pop” in the back of your calf or heel, you may have torn your Achilles tendon. Please seek urgent medical attention if you think you may have torn your tendon.

Diagnosis

If Achilles tendonitis or tendinosis is suspected, please deter from any activity or exercise which causes the pain. It is advisable to see your doctor or physiotherapist as soon as possible so that an accurate diagnosis may be made and appropriate treatment recommended.

You will be asked about the nature and duration of your symptoms and the medical professional assessing you will have a look at your foot and ankle. Ultrasound scanning may be used to evaluate the damage to the tendon and/or surrounding structures.

An MRI may be recommended if symptoms persist. X-rays may also be taken to rule out other disorders which may cause symptoms like Achilles tendonitis and tendinosis.

Achilles Tendonitis - Ankle - Conditions - Musculoskeletal - What We Treat  - Physio.co.ukHow to Treat Achilles Tendinopathy with Physical Therapy -  prohealthcareproducts.com

Treatment

Treatment will depend on the nature, severity, and length of the injury. Generally speaking, the longer the symptoms are present before treatment commences, the longer the timeframe until full recovery is attained.  Full recovery may take between three and nine months.

Initial treatment options in the early stages may include:

  • Rest – to avoid further injury to the area
  • Ice – to reduce inflammation
  • Elevation – to reduce swelling
  • Non-steroidal anti-inflammatory drugs to reduce pain and inflammation.

 How physiotherapy can help:

Physiotherapy typically focuses on two main areas: treatment and rehabilitation. Treatment may entail massage, shockwave therapy, acupuncture, gait re-education, and gentle stretching, whereas, rehabilitation predominantly entails strengthening of the Achilles and surrounding musculature.

Strengthening of the muscles surrounding the Achilles tendon facilitates healing in the tendon itself. Strengthening is attained through the utilization of specific exercises, that will be taught by your physiotherapist. It is common for the rehabilitation programme to take up to three months.


Exercises


Stay safe, Stay fit

Our daily routine has been forced to change during the lockdown and it has never been more important to focus on your physical and mental health. The current situation we’re facing is strange, stressful, emotionally exhausting and there is no surprise that the motivation to keep fit has been a bit of a struggle. It is in these disquieting times that exercise can provide much-needed solace.

Research shows that being physically active helps lower cholesterol and blood pressure and can significantly reduce the risk of heart disease, stroke, and diabetes. Physical activity also maintains mass and bone density, reducing the risk of developing osteoporosis (loss of bone density), Sarcopenia (loss of muscle mass), and helps boost one’s immune system, as it flushes bacteria from the lungs and airways, increases white blood cell circulation and raises body temperature, all of which help the body fight infection.

How much Activity is Recommended?

Be active every day, in as many ways as possible. Aim for at least 2 ½ hours of moderate (or 1 ¼ hours of vigorous physical activity) spread throughout the week. The Ministry of Health outlines how much physical activity New Zealanders need to stay healthy https://www.health.govt.nz/your-health/healthy-living/food-activity-and-sleep/physical-activity/how-much-activity-recommended.

Create a Routine

Whether you are looking to maintain an exercise regime or just stay motivated from one day to the next, as your own four walls start to make you feel a bit stir crazy, many people find that it helps to have a set routine. It portions the day into bite-size chunks and allows you to feel a sense of accomplishment as you tick off the day’s tasks.

Few of us are lucky enough to have an exercise bike/treadmill at home. Fortunately, there are plenty of simple exercises that you can do around the house or with household objects that will work instead. If you do not have your own weights at home there are some surprising substitutes you can utilize instead i.e bags of rice or flour, a tin of beans and bottled water can be used, if you need something heavier you can always fill a carrier bag with a few items inside.

1. Squats

Directions:

Lie on the floor and rest on your back. Ensure that your knees are bent, and your feet are touching the floor.

Put your hands behind your head and then lift both your chest and your legs slightly but leave a gap between them.

Go back to the starting position and repeat.

2. Crunches

Crunches are another important exercise for your abs to strengthen your body core.

Directions:

Widen your feet parallel to your shoulder and extend your arms in front of you.

Bend your knees and your hips slightly and then do the traditional squat position.

Push up using your heels and repeat.

3. Stationary Lunge

Directions:

Stand up straight and put your right leg forwards and your left leg backward. It should look like you’re preparing to run.

Place your hands on your hips. Bend your right leg, leaving a little gap between the floor and the knee.

Then, switch your legs and do the same.

These bodyweight exercises are a great way to start your day and get the blood pumping in your body.


Safety during exercise outside

If you’re working from home, getting outside for physical activity will do wonders for your physical and mental health. Regular walking, running or cycling is a great way to stay active and healthy during lockdown, but it is important to keep your distance and stay more than two metres away from others. Plan your route when you’re thinking of heading out for a cycle/jog. If possible try to think of roads, neighborhoods, and parks that will be quieter and less congested. Follow the latest advice about whether you will also need to wear a mask.

Take a Bit of You Time

Fill your own cup first…Being healthy is not just about maintaining an exercise regime and eating right, it is also about staying mentally healthy too. If you are in isolation with your family, it is easy to spend the day making sure they are happy and entertained, but don’t forget to take a bit of time for you. Do a quick meditation or yoga routine while the kids are watching TV or maybe just go into the garden and take a few deep breaths to relieve some stress!

During this time of uncertainty, something we can take control of is our health and well-being. So, whatever your situation, try to keep active, eat healthily, and stay hydrated.

Ngā mihi and stay safe

KNEE PAIN

Knee pain is one of the most common musculoskeletal complaints that affects peoples of all ages.
Knee pain can result from injuries of traumatic nature or due to complications from medical conditions.

Depending on the structures involved, pain can be localized to a specific area or be felt all
around the knee.


ANATOMY OF KNEE

The knee joint is a hinge joint. Other than bearing the weight of the body, it’s primary function is to bend, straighten and rotate to a small degree. To achieve this function, the knee joint relies on a number of structures.


Image result for knee anatomyImage result for knee anatomy


Bones

Knee joint consists of four bones to provide structure and weight-bearing ability.

  •  Lower end of thigh bone (femur)
  •  Upper part of shin bone (tibia)
  • Knee cap (patella)
  • Fibula (not involved in weight-bearing, but provides attachments for ligaments and tendons)


Ligaments

Four important ligaments connect the two big bones, providing multi-directional stability.

  • Cruciate ligaments

Anterior cruciate ligament (ACL)

Posterior cruciate ligament (PCL)

  • Collateral ligaments

Medial collateral ligament (MCL)

Lateral collateral ligament (LCL)


Cartilage

  • Glossy cartilage lines the end of each bone to protect and allow smooth movements against each other with almost no friction.
  • Meniscus is another type of strong cartilage that lines the upper surface of the tibia bone to cushion and stabilize the knee.


Tendons

There are two important tendons located on the front of the knee joint.

  • Quadriceps tendon is a strong durable tissue that extends from the quadriceps muscle and connects it to the knee cap.
  • Patella tendon connects the knee cap to the tibia bone.


Bursa

Bursa are fluid filled sacs that are found in areas that require the most protection. They occur where ligaments, muscles, skins, tendons or bones rub together.


Muscles

Many muscles cross the knee joint, some of which cross from the hip or ankle joints. Due to this, some people may experience knee pain as a result of muscle imbalances such as weakness, poor flexibility and or dynamic control.


CAUSE OF PAIN

Some of the common causes of knee pain include:

  • Ligamentous sprain
  • Meniscus injuries (bulge or tears)
  • Fracture or dislocation
  • Tendinitis, Sprains
  • Bursitis
  • Calcification
  • Baker’s cyst
  • Arthritis (osteoarthritis)
  • Overuse syndromes (patella-femoral syndrome, chondromalacia)
  • Autoimmune conditions (Infection, Gout, Lupus, rheumatoid arthritis)


WHEN TO SEEK HELP

Consult your doctor or physiotherapist if your symptoms have not subsided after one-week of consistent self-management (RICE, pain medications or alternative pain-relieving modalities), or if your knee pain is stopping you from managing your hobbies or day to day activities.


Immediate medical attention: 

Knee pain from with the following signs and symptoms may require immediate attention:

  • Severe pain
  • Pain that does not resolve with rest
  • Sudden swelling or bruising
  • Clicking or locking of the knee
  • Inability to bend or straighten the knee
  • Inability to weight bear


SIGNS AND SYMPTOMS

  • Pain
  • Swelling
  • Bruising
  • Stiffness
  • Clicking, locking
  • Redness


DIAGNOSIS:

Treatment of your knee pain will depend on its underlying cause. So, it is all about the diagnosis.

A focused subjective and physical examination of your knee will be performed by your physiotherapist.


Subjective

Your physiotherapist will ask a range of questions

  • Location of pain – front or behind the knee
  • Description of pain – dull ache or sharp
  • The behavior of pain – constant or intermittent
  • Aggravating and easing factors
  • General health
  • Goals of treatment


Physical assessment

Your physiotherapist will inspect your knee joint to diagnose the source and the potential underlying cause(s) of pain.

You may be referred to have radiological Imaging to make or confirm the diagnosis.


Radiology

Image result for xray knee


TREATMENT

In most cases, individuals suffering from knee pain respond well to conservative modes of treatment (pain relief, physiotherapy, acupuncture, etc). Surgical intervention may be required where conservative management has failed to optimize function and reduce pain.


CONSERVATIVE MANAGEMENT

A self-management remedy to control inflammation (pain and swelling) in acute or chronic knee pain is using the ‘RICE’ principle (rest, ice, compress, elevate)

  • Rest – refrain from activities that impose repetitive strain or aggravation of knee pain
  • Ice – use an ice pack for 10-15 minutes, 2 to 3 times per day (with care)
  • Compress – use a compression bandage to reduce swelling (not to be worn when sleeping)
  • Elevate – using pillows elevate injured leg. This works best when the leg is higher than the level of heart, to use gravity to help facilitate the circulation of fluid.


Pain medications

Over the counter pain relievers such as non-steroidal anti-inflammatory medications (ibuprofen, celecoxib) play an important role in reducing inflammation and pain.

(Note: If you have problems with bleeding, stomach ulcers or other liver, kidney conditions, anti-inflammatory medications MUST NOT be consumed without consulting your doctor. 

Visit your general practitioner for more information on what medications are right for you.


Physiotherapy

After establishing your diagnostic findings, your physiotherapist will devise a tailored recovery programme to help you manage your pain, improve strength and flexibility.

Your physiotherapist will work with you to advance your understanding of your symptoms and provide a range of exercises, stretches and self-managing strategies that will help you be in control of your recovery.

As required, your therapist may liaise with your doctor or other health professionals (acupuncturist, podiatrist, knee specialists) to facilitate your progress.


Acupuncture/Acupressure

Acupuncture and acupressure are two different options available for individuals suffering from pain and swelling. While both aim to help control inflammation and fasten healing and recovery, acupuncture involves inserting thin needles into the body, whereas acupressure relies on hand pressure and some forms of massage.


Steroid Injection

In some instances, knee injections are recommended by your physiotherapist or doctor to reduce inflammation and relieve pain.


SURGERY

Surgical intervention may be required where conservative management has failed to optimize function and reduce pain. In this case your physiotherapist will refer you to a surgeon for the opinion of care.


EXERCISES FOR KNEE PAIN

The thought of exercise when you have knee pain can be daunting. However, your trusted physiotherapist will work with you to provide specific ‘pain-free’ exercises to get you started on effective strengthening.

Image result for knee exercise cycling

Alternatively, low-impact activities such as cycling or elliptical machines are great. Notice what feels right for you. Swimming, jogging in water, or water aerobics may be appropriate if skin integrity is maintained.

Note: muscle soreness after a hard workout is normal. 

If you experience sharp, shooting, or sudden knee pain you must consult your physiotherapist or doctor.